Pytest测试报告工具Allure用法介绍
Allure Framework是一种灵活的、轻量级、多语言测试报告工具。
不仅可以以简洁的网络报告形式非常简洁地显示已测试的内容,
而且还允许参与开发过程的每个人从日常执行中提取最大程度的有用信息和测试。
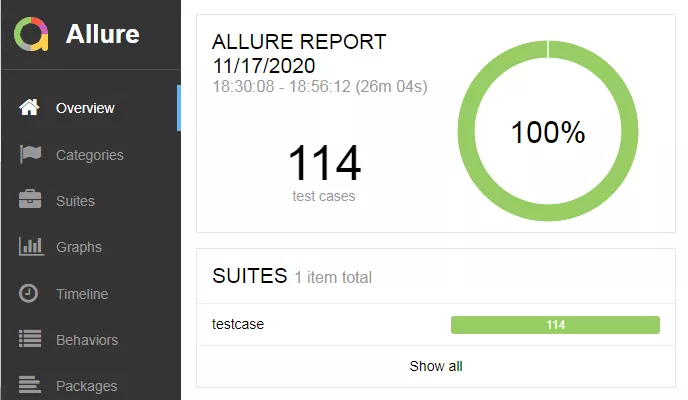
Allure报告可以快速查看到缺陷点,可以将测试未通过划分为Bug和中断的测试。
还可以配置日志,步骤,固件,附件,时间,历史记录,以及与TMS的集成和Bug跟踪系统,以便掌握所有信息。
从管理者的角度来看:Allure提供了一个清晰的全局,涵盖了所涵盖的功能,缺陷聚集的位置,执行时间表,以及许多其他方便的事情。
独特的模块化和可扩展性,确保你能够进行适当的微调,以使更适合你自己。
官方文档:https://docs.qameta.io/allure/
部署使用Pytest作为一个高扩展性、功能强大的自动化测试框架,自身的测试结果是较为简单的,如果想要一份完整测试报告需要其他插件的支持。
如果你对测试报告要求没那么高,你可以使用pytest-html插件,基本覆盖了测试报告的常规内容。
但是如果你想查看清晰的测试过程、多维度的测试报告、自定义一些输出,以及与用例和缺陷系统集成等,那allure-python将是你的"不二人选"。
注意:allure-pytest从1.7之后已弃用,从2.0版本开始迁移至allure-python项目(即使用allure2),另外要运行allure命令行也需要Java的支持。
1、安装: 1)allure-pytest插件:pip install -U allure-pytest
这将安装allure-pytest和allure-python-commons程序包,以生成与allure2兼容的报告数据。
2)allure工具:官方下载地址:https://github.com/allure-framework/allure2/releases
我的下载链接:https://pan.baidu.com/s/1aCUyGoSNB8dqBEQIlvysRg提取码: gue5
解压软件包(建议直接放到Python文件夹下),然后添加bin目录到环境变量中,最后使用allure --version验证是否安装成功。

>>> 要使allure侦听器能够在测试执行过程中收集结果,只需添加 --alluredir 选项并提供路径即可存储结果。
pytest --alluredir=<directory-with-results>
如果你运行后进行了用例更改,那么下次运行可能还是会查看到之前记录,可添加 --clean-alluredir 选项清除之前记录。
pytest --alluredir=<directory-with-results> --clean-alluredir
>>> 要在测试完成后查看实际报告,你需要使用allure命令行应用程序从结果生成报告。
1)在默认浏览器中显示生成的报告
allure serve <my-allure-results>
2)要从现有的Allure结果生成报告,可以使用以下命令:
allure generate <directory-with-results>
默认报告将生成到allure-report文件夹,你可以使用 -o 标志更改目标文件夹:
allure generate <directory-with-results> -o <directory-with-report>
3)生成报告后,可以在默认系统浏览器中将其打开,只需运行:
allure open <directory-with-report>
你也可以找到该目录,使用浏览器打开该目录下index.html。注意:有时打开会找不到数据或者乱码,如果你使用的是pycharm,请在pycharm中右击打开。

4)如果要删除生成的报告数据,只需运行:
allure report clean
默认情况下,报告命令将在allure-results文件夹中查找报告,如果要从其他位置使用报告,则可以使用-o选项。
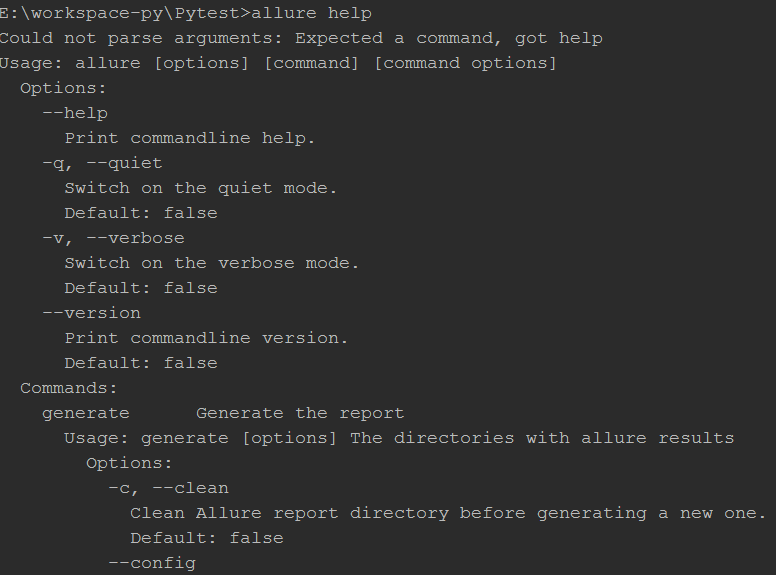
5)你也可以使用allure help命令查看更多帮助。
你可以在allure报告中看到所有默认的pytest状态:只有由于一个断言错误而未成功进行的测试将被标记为失败,其他任何异常都将导致测试的状态为坏。
示例:
# test_sample.py
import pytest
# 被测功能
def add(x, y):
    return x + y
# 测试类
class TestAdd:
    # 跳过用例
    def test_first(self):
        pytest.skip('跳过')
        assert add(3, 4) == 7
    # 异常用例
    def test_second(self):
        assert add(-3, 4) == 1
        raise Exception('异常')
    # 成功用例
    def test_three(self):
        assert add(3, -4) == -1
    # 失败用例
    def test_four(self):
        assert add(-3, -4) == 7
# conftest.py
import pytest
@pytest.fixture(scope='session', autouse=True)
def db():
    print('start')
    yield
    print('closed')
运行:
E:\workspace-py\Pytest>pytest test_sample.py --alluredir=report --clean-alluredir
========================================================================== test session starts ==========================================================================
platform win32 -- Python 3.7.3, pytest-6.0.2, py-1.9.0, pluggy-0.13.0
rootdir: E:\workspace-py\Pytest
plugins: allure-pytest-2.8.18, assume-2.3.3, cov-2.10.1, html-3.0.0, rerunfailures-9.1.1, xdist-2.1.0
collected 4 items
test_sample.py sF.F                                                                                                                                                [100%]
=============================================================================== FAILURES ================================================================================
__________________________________________________________________________ TestAdd.test_second __________________________________________________________________________
self = <test_sample.TestAdd object at 0x000000000464F278>
    def test_second(self):
        assert add(-3, 4) == 1
>       raise Exception('异常')
E       Exception: 异常
test_sample.py:21: Exception
___________________________________________________________________________ TestAdd.test_four ___________________________________________________________________________
self = <test_sample.TestAdd object at 0x000000000464FD30>
    def test_four(self):
>       assert add(-3, -4) == 7
E       assert -7 == 7
E        +  where -7 = add(-3, -4)
test_sample.py:29: AssertionError
======================================================================== short test summary info ========================================================================
FAILED test_sample.py::TestAdd::test_second - Exception: 异常
FAILED test_sample.py::TestAdd::test_four - assert -7 == 7
================================================================ 2 failed, 1 passed, 1 skipped in 0.14s =================================================================
生成报告:
E:\workspace-py\Pytest>allure generate --clean report
Report successfully generated to allure-report
查看目录:
E:\workspace-py\Pytest>tree
文件夹 PATH 列表
卷序列号为 B2C1-63D6
E:.
├─.idea
├─.pytest_cache
│  └─v
│      └─cache
├─allure-report
│  ├─data
│  │  ├─attachments
│  │  └─test-cases
│  ├─export
│  ├─history
│  ├─plugins
│  │  ├─behaviors
│  │  ├─jira
│  │  ├─junit
│  │  ├─packages
│  │  ├─screen-diff
│  │  ├─trx
│  │  ├─xctest
│  │  ├─xray
│  │  └─xunit-xml
│  └─widgets
├─report
└─__pycache__
查看报告:
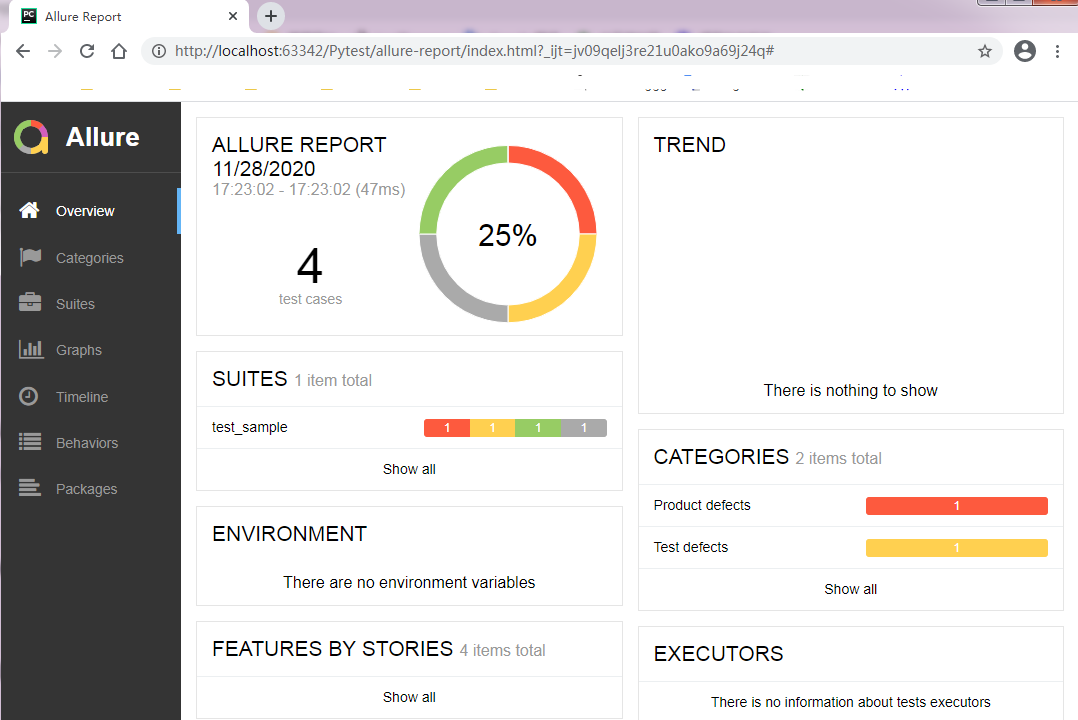
Overview:总览,显示用例执行情况、严重程度分布、环境信息等。
Categories:分类,按用例执行结果分类,异常错误和失败错误。
Suites:套件,按测试用例套件分类,目录 ->测试文件 -> 测试类 ->测试方法。
Graphs:图表,显示用例执行分布情况,状态、严重程度、持续时间、持续时间趋势、重试趋势、类别趋势、整体趋势。
Timeline:时间线,显示用例耗时情况,具体到各个时间点用例执行情况
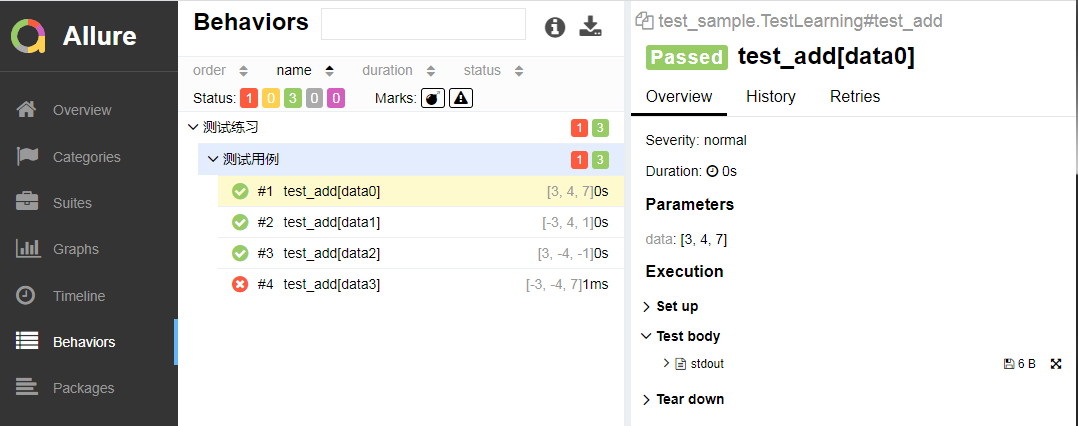
Behaviors:行为,按用例行为举止分类(以标记文字形式显示,需要用例添加allure相关装饰器)
Package:配套,按目录形式分类,显示不同的目录用例执行情况。
用例详情:
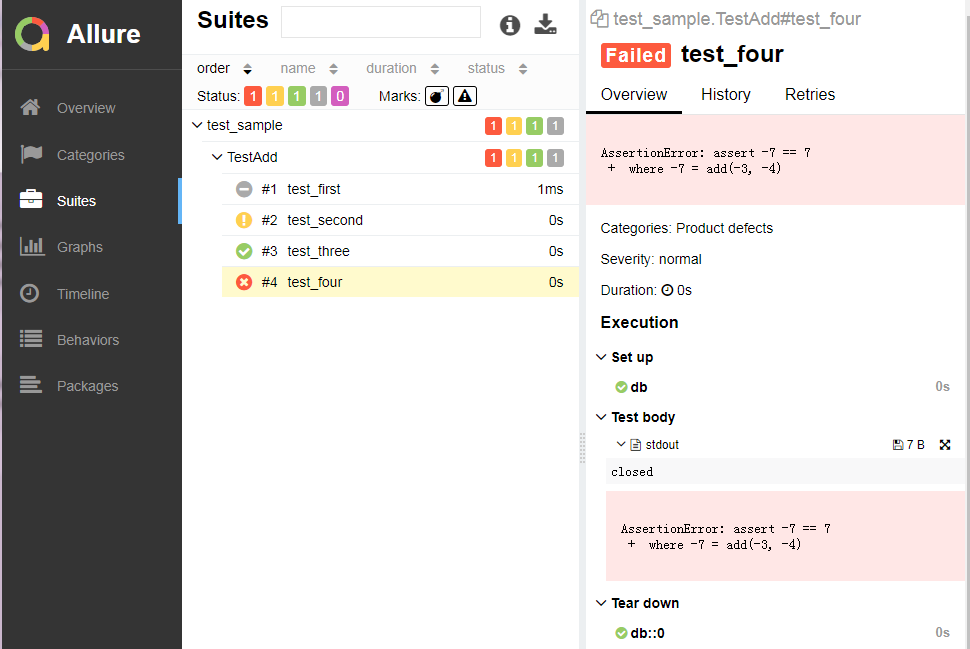
Allure报告不仅能显示pytest不同执行结果状态,错误情况,固件等,还能捕获参数化测试所有参数名称和值。
用例:
# test_sample.py
import pytest
import allure
# 被测功能
def add(x, y):
    return x + y
# 测试类
@allure.feature("测试练习")
class TestLearning:
    data = [
        [3, 4, 7],
        [-3, 4, 1],
        [3, -4, -1],
        [-3, -4, 7],
    ]
    @allure.story("测试用例")
    @allure.severity(allure.severity_level.NORMAL)
    @pytest.mark.parametrize("data", data)
    def test_add(self, data):
        assert add(data[0], data[1]) == data[2]
报告:
到此这篇关于Pytest测试报告工具Allure的文章就介绍到这了。希望对大家的学习有所帮助,也希望大家多多支持软件开发网。