WebDriver 测试开发
用过好多自动化测试工具,对于一颗拥有程序员心的测试工程师来说,选择webdriver能满足你的要求。使用Webdriver不要求你把一门语言研究的多精通,你只要知道语法,和常用的包,常用的类,常用的方法足够。
说明一下,我使用的的是java。所以,在开始前,你的电脑上正确安装了jdk,然后有个使用习惯的开发工具,如eclipse。好再装个maven,我的项目都是maven工程。下面我们开始:
到selenium的官方网站上下载几个包。一个是selenium-server-standalone.jar;还有一个是selenium-java.jar。如果你选择使用firefox(你使用firefox吧,你会慢慢发现它的好处。)再下载个selenium-firefox-driver.jar
把它引用到你创建的maven工程中:下面是我pom.xml部分内容。
<dependency> <groupId>org.seleniumhq.selenium</groupId> <artifactId>selenium-java</artifactId> <version>2.26.0</version> </dependency> <dependency> <groupId>org.seleniumhq.selenium</groupId> <artifactId>selenium-server-standalone</artifactId> <version>2.26.0</version> </dependency> <dependency> <groupId>org.seleniumhq.selenium</groupId> <artifactId>selenium-firefox-driver</artifactId> <version>2.25.0</version> </dependency>
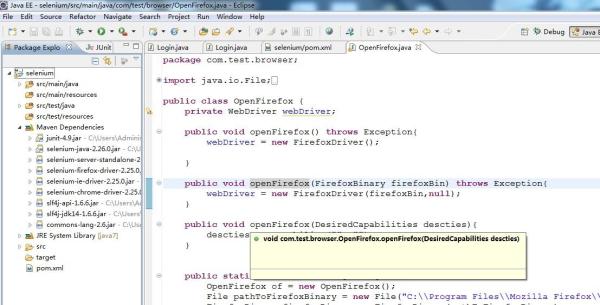
如果在 maven dependencies中存在你引的包,并且没有奇奇怪怪的符号,那么,您可以开始第一个webdriver自动化程序了。

我们当你已经成功创建了需要的project并且默认你有一些selenium的相关知识。我们用webdriver干些事吧,哈哈。
创建一个Login类。把下面代码拷到文件中,然后运行一下。能看到打开www.lovo.cn,跳转到登陆页面,然后登陆成功。
package com.test.login;
import org.openqa.selenium.By; import org.openqa.selenium.WebDriver; import org.openqa.selenium.WebElement; import org.openqa.selenium.firefox.FirefoxDriver; import org.slf4j.Logger; import org.slf4j.LoggerFactory;
public class Login { private WebDriver webDriver; private String baseUrl; private Logger logger = LoggerFactory.getLogger(this.getClass()); private WebElement element; public void openBrowser() throws Exception{ webDriver = new FirefoxDriver(); webDriver.get(baseUrl); } public void clickLoginLink(){ try { baseUrl = "http://www.lovo.cn/"; this.openBrowser(); element = webDriver.findElement(By.linkText("登录")); if(element != null){ element.click(); if(webDriver.findElement(By.id("logusername")) != null){ logger.info("正常跳转到登陆页"); }else{ logger.error("打开登陆页面失败"); } }else{ logger.error("没有找到登陆链接!!!"); } } catch (Exception e) { e.printStackTrace(); logger.error("发生未知错误!"); } } public void login(){ this.webDriver.findElement(By.id("logusername")).clear(); this.webDriver.findElement(By.id("logusername")).sendKeys("138****035"); this.webDriver.findElement(By.id("logpassword")).clear(); this.webDriver.findElement(By.id("logpassword")).sendKeys("123456"); this.webDriver.findElement(By.id("logimageCheck")).clear(); this.webDriver.findElement(By.id("logimageCheck")).sendKeys("5rkz"); this.webDriver.findElement(By.cssSelector("span.btntext")).click(); this.webDriver.findElement(By.cssSelector("div.text")).click(); if(this.webDriver.findElement(By.cssSelector("BODY")).getText().matches("^[\s\S]* 刘建东[\s\S]*$")){ this.logger.info("登陆成功!"); }else{ this.logger.error("登陆失败!"); } } public static void main(String[] args){ Login login = new Login(); login.clickLoginLink(); login.login(); } }
有时候打开firefox的时候会报错,说没有安装firefox之类的错误,这是因为你改变了firefox的默认安装路径。这种情况下,你可以根据FirefoxBinary类实现。
方法如下:
public WebDriver openFirefox() throws Exception{ File file = new File("你的firefox的安装路径+firefox.exe"); //这里注意对进行转义 FirefoxBinary firefoxBin = new FirefoxBinary(file); WebDriver webDriver = new FirefoxDriver(firefoxBin,null); return webDriver; }
或者使用setCapabilit来设置
方法如下:
public WebDriver openFirefox() throws Exception{ DesiredCapabilities des = DesiredCapabilities.firefox(); des.setCapability("firefox_binary", "你的firefox的安装路径+firefox.exe"); WebDirver webDriver = new FirefoxDriver(des); return webDriver; }
总结;
FirefoxDriver类有7个构造方法,意味着可以用7中方法打开firefox浏览器(其实比7种多),
FirefoxDriver() FirefoxDriver(Capabilities desiredCapabilities) FirefoxDriver(Capabilities desiredCapabilities, Capabilities requiredCapabilities) FirefoxDriver(FirefoxBinary binary, FirefoxProfile profile) FirefoxDriver(FirefoxBinary binary, FirefoxProfile profile, Capabilities capabilities) FirefoxDriver(FirefoxBinary binary, FirefoxProfile profile, Capabilities desiredCapabilities, Capabilities requiredCapabilities) FirefoxDriver(FirefoxProfile profile)