新书众筹
以最低的价格获取我的新书已众筹资金:{{ total }} ETH
众筹已完成
众筹截止时间:{{ endDate }}
参与价格
{{ joinPrice }} ETH
当前众筹价格
{{ price }} ETH
Vue 是一套在前端开发中广泛采用的用于构建用户界面的渐进式 JavaScript 框架。Vue 通过响应的数据绑定和组合的视图组件让界面开发变得非常的简单。这边文章来看看如何使用 Vue 开发以太坊 DApp。
Vue 简介Vue 除了是 JavaScript 框架,还提供了一个配套的命令行工具 Vue CLI,通常称之为脚手架工具,用来进行项目管理,比如快速开始零配置原型开发,安装插件库等。
Vue CLI 可以通过以下命令安装:
1
|
> npm install -g @vue/cli
|
运行以下命令来创建一个名为 crowdfunding 的新项目:
1
|
> vue create crowdfunding
|
命令会生成一个项目目录,并安装好相应的依赖库,生成的主要文件有:
1
2
3
4
5
6
7
8
9
10
11
|
├── package.json
├── public
│   ├── index.html
└── src
    ├── App.vue
    ├── assets
    │   └── logo.png
    ├── components
    │   ├── CrowdFund.vue
    │   └── HelloWorld.vue
    └── main.js
|
简单介绍一下 Vue 生成的文件,更多的使用介绍,可参考 vue.js 文档 [6]。
index.html 是入口文件,里面定义了一个 div 标签:
1
|
|
在 main.js 中,会把 APP.vue 的组件的内容渲染到 id 为 app 的 div 标签内:
1
2
3
|
new Vue({
  render: h => h(App),
}).$mount('#app')
|
APP.vue 组件又引用了 Hello.vue 组件,创建完成后进入目录,就可以运行项目,命令如下:
1
2
|
> cd crowdfunding
> npm run serve (或 yarn serve)
|
此时会在 8080 端口下,启动一个 Web 服务,浏览器输入 URL: http://localhost:8080,会打开前端页面。
在刚刚创建的工程下来完成众筹 DApp,先分析下需求,假设我准备出版一本区块练技术书籍,但是不确定有多少人愿意购买这本书,于是我发起了一个众筹, 如果在一个月内,能筹集到 10 个 ETH,我就进行写作,并给参与的读者每人赠送一本书,如果未能筹到足够的资金,参与的读者赎回之前投入的资金。
同时,为了让读者积极参与,初始时,参与众筹的价格非常低(0.02 ETH),每筹集满 1 个 ETH 时,价格上涨 0.002ETH。
归纳出合约三个对外动作(函数):
汇款进合约,可通过实现合约的回退函数来实现。 读者赎回汇款,这个函数仅仅在众筹未达标之后,由读者本人调用生效。 创作者提取资金,这个函数需要在众筹达标之后,由创作者调用。除此之外,还需要一个状态变量来保存以下状态:
用户众筹的金额,使用一个 mapping 来保存。 当前众筹的价格,以及一个相应的内部函数逐步上涨价格。价格可以使用一个 uint 来保存。 合约众筹的截止时间,用 uint 来保存, 在合约创建时往后追加 30 天,在构造函数中完成。 记录合约众筹的收益者,即创作者,在合约创建时在构造函数中进行赋值,合约创建者就是创作者。 再加入众筹状态,如果众筹停止阻止用户在参与。创作者提取资金时及时关闭众筹。 实现众筹合约DApp 的开发,我们依然可以使用 Truffle 框架,先进入 crowdfunding 目录,使用 truffle init 进行一下 truffle 项目初始化:
1
|
> truffle init
|
初始化完成后, 会在当前目录下生成 truffle-config.js 配置文件及 contracts migrations 文件夹等内容,之后,就可以在项目下使用 truffle compile 来编译合约及 truffle migrate 来部署合约。
在 contracts 下创建一个合约文件 Crowdfunding.sol:
1
2
3
4
5
6
7
8
9
10
11
12
13
14
15
16
17
18
19
20
21
22
23
24
25
26
27
28
29
30
31
32
33
34
35
36
37
38
39
40
41
42
43
44
45
46
47
48
49
50
51
52
53
54
55
56
57
58
59
60
61
62
63
|
pragma solidity >=0.4.21  uint) public joined;
    // 众筹目标
    uint constant Target = 10 ether;
    // 众筹截止时间
    uint public endTime;
    // 记录当前众筹价格
    uint public price  = 0.02 ether ;
    // 作者提取资金之后,关闭众筹
    bool public closed = false;
    // 部署合约时调用,初始化作者以及众筹结束时间
    constructor() public {
        author = msg.sender;
        endTime = now + 30 days;
    }
    // 更新价格,这是一个内部函数
    function updatePrice() internal {
        uint rise = address(this).balance / 1 ether * 0.002 ether;
        price = 0.02 ether + rise;
    }
    // 用户向合约转账时 触发的回调函数
    function () external payable {
        require(now = price, "出价太低了");
        joined[msg.sender] = msg.value;
        updatePrice();
    }
    // 作者提取资金
    function withdrawFund() external {
        require(msg.sender == author, "你不是作者");
        require(address(this).balance >= Target, "未达到众筹目标");
        closed = true;
        msg.sender.transfer(address(this).balance);
    }
    // 读者赎回资金
    function withdraw() external {
        require(now > endTime, "还未到众筹结束时间");
        require(!closed, "众筹达标,众筹资金已提取");
        require(Target > address(this).balance, "众筹达标,你没法提取资金");
        msg.sender.transfer(joined[msg.sender]);
    }
}
|
代码的介绍,我以注释的形式加入在代码中,除此之外,在合约代码中,使用到了 Solidity 语言中的一些知识点:
ether : 这是货币单位。
days : 这是时间单位,1 days 对应 1 天的秒数。
now : 这是一个 Solidity 的内置属性,用于获取当前的时间戳,单位是秒。
require : 如果条件不满足回退交易。
address.transfer(value) : 对某一个地址进行转账。
有关 Solidity 语言特性,大家可参考深入浅出区块链社区翻译的 Solidity 中文文档
合约部署在 migrations 下创建一个部署脚本 2_crowfunding.js , 和宠物商店 DApp 类似,内容如下:
1
2
3
4
5
|
const crowd = artifacts.require("Crowdfunding");
module.exports = function(deployer) {
  deployer.deploy(crowd);
};
|
在 truffe-config.js 配置要部署的网络,同时确保对应的网络节点程序是开启状态,方法参考宠物商店 DApp 或链上笔记本投票合约案例中一样,然后就可以 truffle migrate 进行部署。
默认会有一个 HelloWorld.vue, 新写一个组件 CrowdFund.vue ,把 App.vue 中对 HelloWorld.vue 的引用替换掉。
App.vue 修改为:
1
2
3
4
5
6
7
8
9
10
11
12
13
14
15
16
|
|
利用 CrowdFund.vue 来众筹界面,众筹界面需要显示以下几个部分:
当前众筹到金额。 众筹的截止时间。 当前众筹的价格,参与众筹按钮。 如果是已经参与,显示其参与的价格以及赎回按钮。 如果是创作者,显示一个提取资金按钮。因为 Vue 具有很好的数据绑定及条件渲染特性,因此前端写起来会更简单,只需要把相应的数据用变量替代,代码如下:
1
2
3
4
5
6
7
8
9
10
11
12
13
14
15
16
17
18
19
20
21
22
23
24
25
26
27
28
29
30
31
32
33
34
35
36
37
38
39
|
|
代码中使用 Vue 的特性包含:
使用v-if 进行条件渲染,例如 v-if="joined" 表示当 joined 变量为 true 时,才渲染标签。
使用 进行数据绑定, 例如: ETH , price 会用其真实的值进行渲染,并且当 price 变量的值更新时,标签会自动更新。
使用 @click 指令来监听事件,@click 实际上是 v-on:click 的缩写,例如:@click="join" 表示当标签点击时,会调用 join 函数。
使用 :disabled 绑定一个属性,这实际是 v-bind:disabled, 属性的值来源于一个变量。
与众筹合约交互
现在来编写 JavaScript 逻辑部分,前端界面与合约进行交互时,需要使用到 truffle-contract 及 web3 ,因为 Vue 工程本身也是通过 NPM 进行包管理,因此可以直接通过 npm 进行安装,命令如下:
1
|
npm install --save truffle-contract web3
|
先把 JavaScript 逻辑的主体框架代码编写出来:
1
2
3
4
5
6
7
8
9
10
11
12
13
14
15
16
17
18
19
20
21
22
23
24
25
26
27
28
29
30
31
32
33
34
35
36
|
export default {
  name: 'CrowdFund',
  // 定义上面HTML模板中使用的变量
  data() {
    return {
      price: null,
      total: 0,
      closed: true,
      joinPrice: null,
      joined: false,
      endDate: "null",
      isAuthor: true,
    }
  },
  // 当前Vue组件被创建时回调的hook 函数
  async created() {
    //  初始化 web3及账号
    await this.initWeb3Account()
     //  初始化合约实例
    await this.initContract()
     //  获取合约的状态信息
    await this.getCrowdInfo()
  },
  methods: {
    async initWeb3Account() {}
    async initContract() {}
    async getCrowdInfo() {}
  }
}
|
以上代码通过 data () 定义好了上面 HTML 模板中使用的变量, 当 Vue 组件被创建时通过回调的 created () 函数,来进行初始化工作(这里使用了 async/await 来简化异步调用), 在 created () 函数中调用了三个函数:
initWeb3Account() initContract() getCrowdInfo()依次来进行实现:
initWeb3Account () 用来完成 web3 及账号初始化,代码和投票案例基本类似,代码如下:
1
2
3
4
5
6
7
8
9
10
11
12
13
14
15
16
17
18
19
20
|
import Web3 from "web3";
 async initWeb3Account() {
   if (window.ethereum) {
     this.provider = window.ethereum;
     try {
       await window.ethereum.enable();
     } catch (error) {
       //   console.log("User denied account access");
     }
   } else if (window.web3) {
     this.provider = window.web3.currentProvider;
   } else {
     this.provider = new Web3.providers.HttpProvider("http://127.0.0.1:7545");
   }
   this.web3 = new Web3(this.provider);
   this.web3.eth.getAccounts().then(accs  => {
     this.account = accs[0]
   })
 },
|
通过这段代码完成了 this.provider this.web3 this.account 三个变量的赋值,在后面的代码中会使用到。
initContract () 初始化合约实例:
1
2
3
4
5
6
7
8
|
import contract from "truffle-contract";
import crowd from '../../build/contracts/Crowdfunding.json';
    async initContract() {
      const crowdContract = contract(crowd)
      crowdContract.setProvider(this.provider)
      this.crowdFund = await crowdContract.deployed()
    },
|
this.crowdFund 变量就是部署的众筹合约对应得 JavaScript 中的实例, 下面就可以通过 this.crowdFund 来调用合约的函数,获取相关变量的值,也就是实现 getCrowdInfo 函数:
1
2
3
4
5
6
7
8
9
10
11
12
13
14
15
16
17
18
19
20
21
22
23
24
25
26
27
28
29
30
31
32
33
34
35
36
37
38
39
40
41
42
43
44
45
46
|
async getCrowdInfo() {
  // 获取合约的余额
  this.web3.eth.getBalance(this.crowdFund.address).then(
    r => {
      this.total = this.web3.utils.fromWei(r)
    }
  )
  // 获取读者的参与金额
  this.crowdFund.joined(this.account).then(
    r => {
      if (r > 0) {
        this.joined = true
        this.joinPrice = this.web3.utils.fromWei(r)
      }
    }
  )
 // 获取合约的关闭状态
  this.crowdFund.closed().then(
    r => this.closed = r
  )
  // 获取当前的众筹价格
  this.crowdFund.price().then(
    r => this.price = this.web3.utils.fromWei(r)
  )
  // 获取众筹截止时间
  this.crowdFund.endTime().then(r => {
    var endTime = new Date(r * 1000)
    // 把时间戳转化为本地时间
    this.endDate = endTime.toLocaleDateString().replace(/\//g, "-") + " " + endTime.toTimeString().substr(0, 8);
  })
  // 获取众筹创作者地址
  this.crowdFund.author().then(r => {
    if (this.account == r) {
      this.isAuthor = true
    } else {
      this.isAuthor = false
    }
  })
}
|
对代码中使用到的几个技术点,进行下解释:
合约实例 this.crowdFund 调用的函数joined() closed() price() 是由合约中是 public 的状态变量,自动生成相应的访问器函数。可以回顾第 6 章。
代码中使用的 this.web3.eth.getBalance() 和 this.web3.utils.fromWei() 是 Web3.js 中定义的函数,分别用来获取余额及把单位 wei 转化为 ether。
至此,完成 DApp 的状态数据的获取,接下来开始处理 3 个点击动作(即 html 模板中 @click 触发的函数):
读者参与众筹的 join () 函数; 读者赎回的 withdraw () 函数; 创作者提取资金的 withdrawFund () 函数。join () 需要完成的实际上是由读者账号向众筹合约账号发起一笔转账,通过 web3.eth.sendTransaction 完成,代码如下:
1
2
3
4
5
6
7
8
9
|
join() {
  this.web3.eth.sendTransaction({
    from: this.account,
    to: this.crowdFund.address,
    value: this.web3.utils.toWei(this.price)
  }).then(() =>
    this.getCrowdInfo()
  )
}
|
读者进行转账时,就会触发合约的回退函数。
如果众筹未达标,读者可以点击赎回,对应 withdraw () 函数实现如下:
1
2
3
4
5
6
7
|
withdraw() {
  this.crowdFund.withdraw({
    from: this.account
  }).then(() => {
    this.getCrowdInfo()
  })
},
|
如果众筹达标,创作者提取资金 withdrawFund () 函数实现如下:
1
2
3
4
5
6
7
|
withdrawFund() {
  this.crowdFund.withdrawFund({
    from: this.account
  }).then(() => {
    this.getCrowdInfo()
  })
}
|
到这里众筹案例就全部完成了,完整的代码请大家订阅小专栏。
DApp 运行在项目的目录下,输入以下命令:
1
|
> npm run serve(或 yarn serve )
|
浏览器输入 http://localhost:8080, 效果如下图:
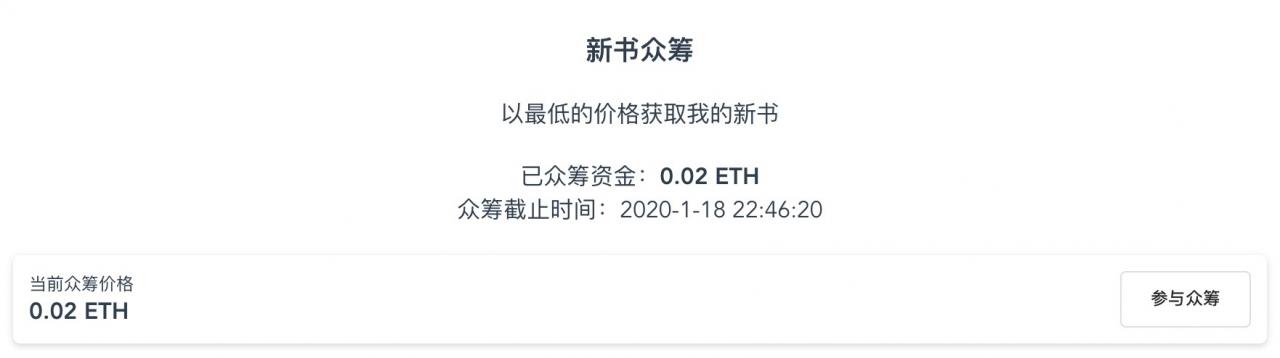
如果是参与过众筹(创作者账号还会显示一个” 提取资金 “),界面如下图: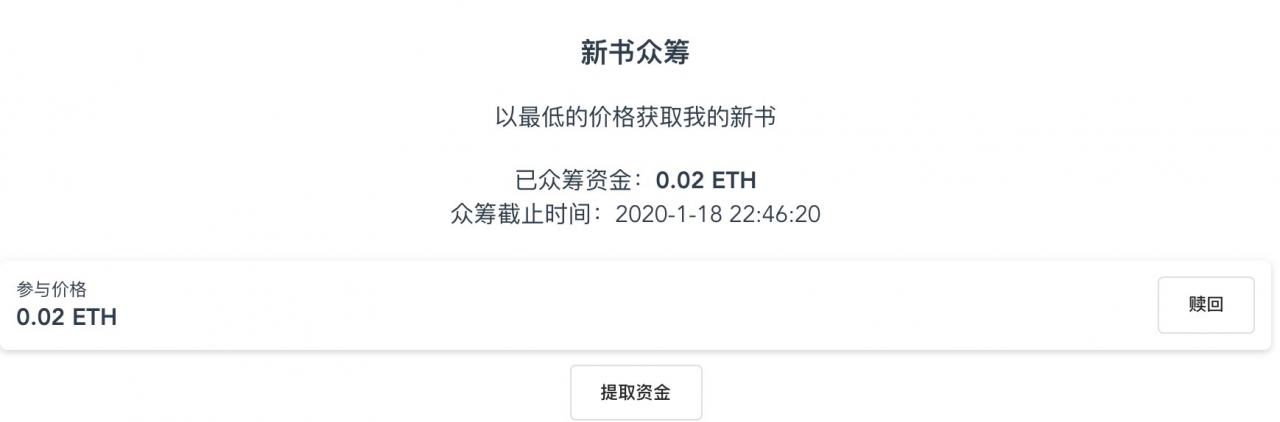
在运行 DApp 时,要确保 MetaMask 链接的网络和合约部署的网络一致,这样 DApp 才能正确的通过 web3 获取到合约的数据。
DApp 发布通过以下命令:
1
|
> npm run build(或 yarn build )
|
会再 dist 目录下,构建出用户发布的完整的前端代码,其文件如下:
1
2
3
4
5
6
7
8
9
10
|
dist
├── css
│   └── app.40b6ecb0.css
├── favicon.ico
├── index.html
└── js
    ├── app.5b2f814c.js
    ├── app.5b2f814c.js.map
    ├── chunk-vendors.787aba35.js
    └── chunk-vendors.787aba35.js.map
|
index.html 就是 DApp 前端入口文件,把 dist 目录下的所有文件拷贝到公网的服务器即可。