跟着官网学spring—快速入门指南
Spring快速入门开始一个新的Spring Boot项目开始编写属于自己的代码验证效果
这是跟着官网学习Spring的第一篇博客,后续会继续更新。喜欢的话就多多点赞评论关注! 开始一个新的Spring Boot项目 冢狐
冢狐
 原创文章 79获赞 155访问量 1万+
关注
私信
展开阅读全文
原创文章 79获赞 155访问量 1万+
关注
私信
展开阅读全文
作者:冢狐
这是跟着官网学习Spring的第一篇博客,后续会继续更新。喜欢的话就多多点赞评论关注! 开始一个新的Spring Boot项目
使用 快速开始创建一个”web“项目,如下图所示:
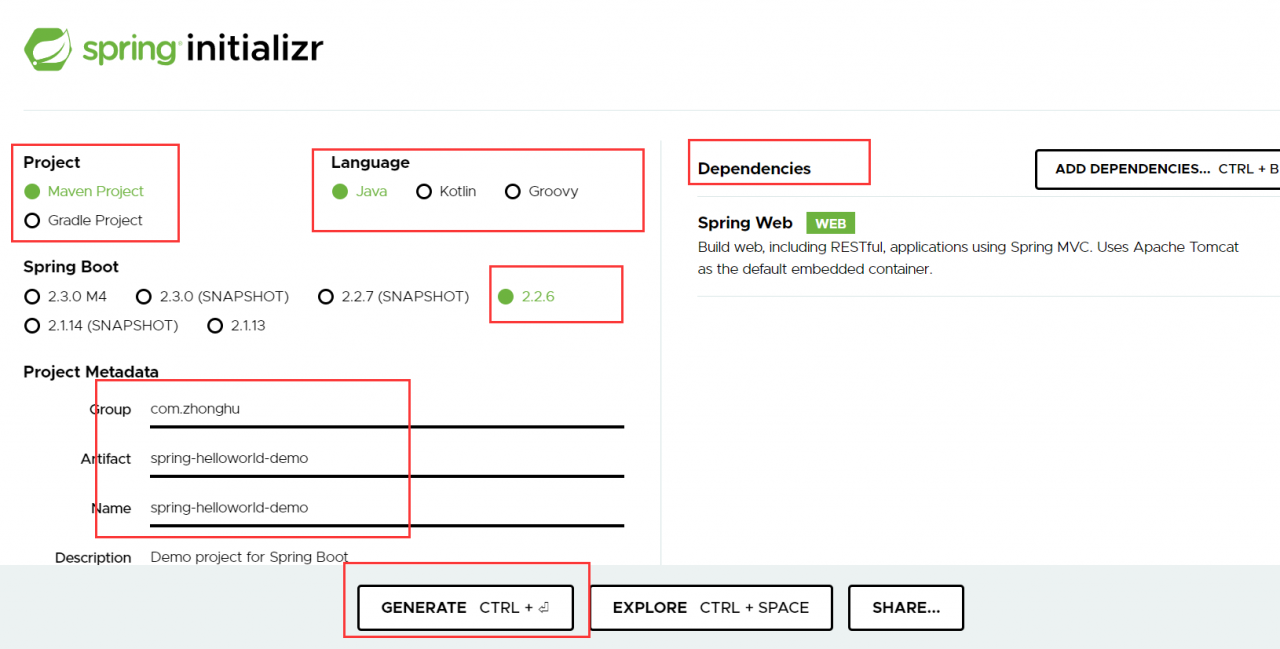
需要注意的是需要在依赖关系中添加web依赖关系
完成属于自己的个性化配置后,点击生成
解压后,用idea打开,就完成了Spring boot的创建。
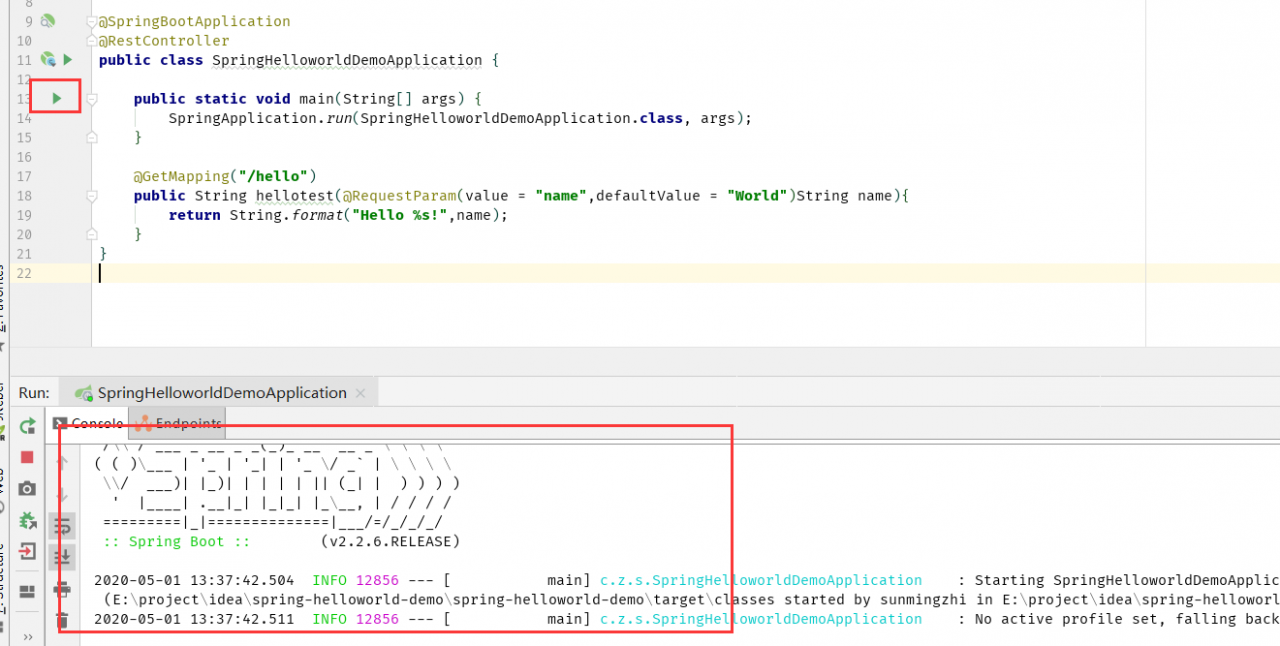
idea打开后效果图如下图所示:

在Application.java文件中添加如下代码:
package com.zhonghu.springhelloworlddemo;
import org.springframework.boot.SpringApplication;
import org.springframework.boot.autoconfigure.SpringBootApplication;
import org.springframework.web.bind.annotation.GetMapping;
import org.springframework.web.bind.annotation.RequestParam;
import org.springframework.web.bind.annotation.RestController;
@SpringBootApplication
@RestController
public class SpringHelloworldDemoApplication {
	public static void main(String[] args) {
		SpringApplication.run(SpringHelloworldDemoApplication.class, args);
	}
	@GetMapping("/hello")
	public String hellotest(@RequestParam(value = "name",defaultValue = "World")String name){
		return String.format("Hello %s!",name);
	}
}
@RequestParam:告诉Spring在请求中期望的一个值,如果不存在,使用后面的默认值。
@RestController:此注解告诉Spring,这个代码描述应该可在网上的端点。
@GetMapping("/hello"):告诉Spring我们用hellotest方法来响应/hello
验证效果
启动刚才写的代码:
因为Spring Boot中集成了诸如tomcat的工具,所以直接启动,访问刚才的页面:http://localhost:8080/hello,将会看到下面的界面:

显示Hello World!是因为我们没有给后端代码返回一个参数,导致其使用默认值World,然后打印在界面中。
相应的我们要是想从前端将名称传入到后端并且显示出来,只需要在刚才的链接后面拼接诸如:?name=zhonghu
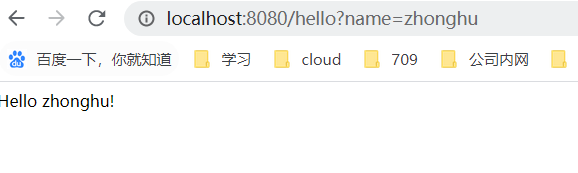
相应的zhonghu可以换成自己的名字甚至是汉字都可以将其显示出来
冢狐
原创文章 79获赞 155访问量 1万+
关注
私信
展开阅读全文
作者:冢狐