IDEA中如何引入spring的命名空间
IDEA引入spring的命名空间
idea项目添加spring
配置步骤
问题与解决
总结
IDEA引入spring的命名空间我们在写spring的配置文件的时候,有的时候可能会用到 P 标签,然后我们发现自己并没有p标签啊,那么我们一起来看我是怎么解决的。
首先在我们的xml文件的首部添上这句话:
xmlns:context="http://www.springframework.org/schema/context"
然后我们打出
xmlns:p=
然后就会相应的提示:
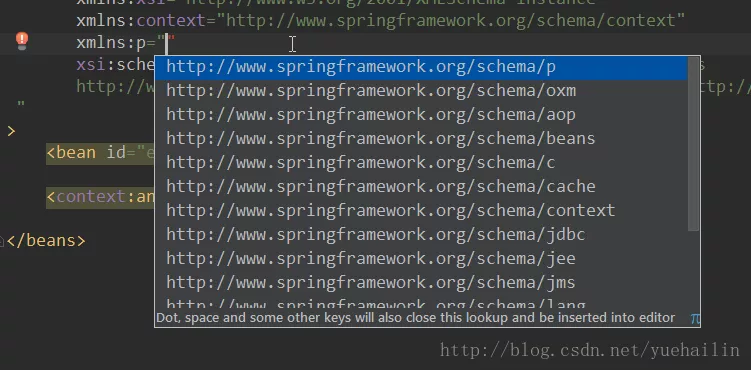
还有一点需要注意的就是:
需要注意的是必须在xmlns:context="”这一行的下面打,否则也不会提示,如图所示位置即可提示,否则可能不提示
最终的代码:
xmlns="http://www.springframework.org/schema/beans"
       xmlns:xsi="http://www.w3.org/2001/XMLSchema-instance" xmlns:util="http://www.springframework.org/schema/util"
       xmlns:context="http://www.springframework.org/schema/context"
       xmlns:p="http://www.springframework.org/schema/p"
       xsi:schemaLocation="http://www.springframework.org/schema/beans http://www.springframework.org/schema/beans/spring-beans.xsd http://www.springframework.org/schema/util http://www.springframework.org/schema/util/spring-util.xsd">
idea项目添加spring
配置步骤
1.添加spring的依赖包
idea可以直接右击项目 选择add frame support,勾选spring即可
2.创建applicationContext.xml
在src的直接子目录下创建 applicationContext.xml
这里给出一个applicationContext.xml 的实例,以及注释解释
<?xml version="1.0" encoding="UTF-8"?>
<beans xmlns:xsi="http://www.w3.org/2001/XMLSchema-instance"
xmlns="http://www.springframework.org/schema/beans" xmlns:aop="http://www.springframework.org/schema/aop"
xmlns:context="http://www.springframework.org/schema/context" xmlns:tx="http://www.springframework.org/schema/tx"
xsi:schemaLocation="http://www.springframework.org/schema/beans
http://www.springframework.org/schema/beans/spring-beans.xsd
http://www.springframework.org/schema/aop
http://www.springframework.org/schema/aop/spring-aop.xsd
http://www.springframework.org/schema/context
http://www.springframework.org/schema/context/spring-context.xsd
http://www.springframework.org/schema/tx
http://www.springframework.org/schema/tx/spring-tx.xsd">
<!-- 扫描有注解的文件 base-package 包路径 -->
<context:component-scan base-package="service.imp, action, dao.imp"/>
<!-- 定义 Autowired 自动注入 bean -->
<bean class="org.springframework.beans.factory.annotation.AutowiredAnnotationBeanPostProcessor"/>
<!-- 声明式容器事务管理 ,transaction-manager指定事务管理器为transactionManager -->
<bean id="transactionManager" class="org.springframework.orm.hibernate5.HibernateTransactionManager">
<property name="sessionFactory" ref="sessionFactory"/>
</bean>
<tx:advice id="txAdvice" transaction-manager="transactionManager">
<tx:attributes>
<tx:method name="*User"/>
<tx:method name="*" propagation="NOT_SUPPORTED" read-only="true"/>
</tx:attributes>
</tx:advice>
<!-- 定义切面,在service包及子包中所有方法中,执行有关的hibernate session的事务操作 -->
<aop:config>
<!-- 只对业务逻辑层实施事务 -->
<aop:pointcut id="serviceOperation" expression="execution( * service..*.*(..))"/>
<aop:advisor advice-ref="txAdvice" pointcut-ref="serviceOperation"/>
</aop:config>
<!-- 配置dataSource -->
<bean id="dataSource" class="com.mchange.v2.c3p0.ComboPooledDataSource">
<property name="driverClass" value="com.mysql.jdbc.Driver"/>
<property name="jdbcUrl"
value="jdbc:mysql://localhost:3306/j2ee?useUnicode=true&characterEncoding=utf-8&autoReconnect=true"/>
<property name="user" value="root"/>
<property name="password" value="wyy"/>
<property name="initialPoolSize" value="5"/>
<property name="maxPoolSize" value="10"/>
</bean>
<!-- 配置sessionFactory -->
<bean id="sessionFactory" class="org.springframework.orm.hibernate5.LocalSessionFactoryBean">
<property name="dataSource" ref="dataSource"/>
<property name="packagesToScan" value="model"/>
<property name="hibernateProperties">
<props>
<prop key="hibernate.dialect"> org.hibernate.dialect.MySQL57Dialect</prop>
<prop key="hibernate.show_sql">false</prop>
<prop key="hibernate.format_sql">true</prop>
<prop key="hibernate.hbm2ddl.auto">update</prop>
<prop key="hibernate.connection.autocommit">true</prop>
</props>
</property>
</bean>
<!-- 配置hibernateTemplate -->
<bean id="hibernateTemplate" class="org.springframework.orm.hibernate5.HibernateTemplate">
<property name="sessionFactory" ref="sessionFactory"/>
</bean>
</beans>
3.给service的实现类添加@Service注解 给dao的实现类添加@Repository注解 将生命周期管理交给spring
注意所有交给spring管理的类,不能new出实例,只能用spring注入。
4.所有使用到service和dao的地方,均使用@Autowired注解注入。
@Autowired注解可以在构造函数、类成员属性、getset方法添加注解注入bean,但是类成员属性的注入方法是不推荐的
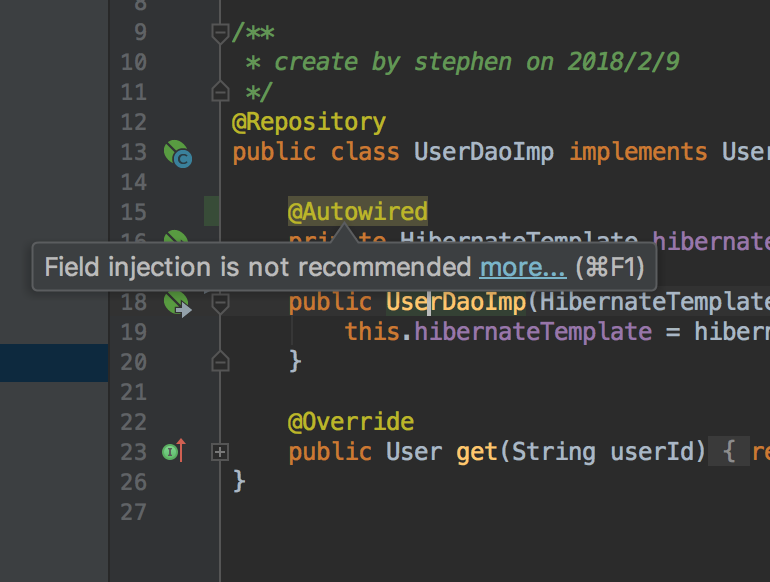
在stackoverflow上有人做了详细的解释 https://stackoverflow.com/questions/39890849/what-exactly-is-field-injection-and-how-to-avoid-it
总结下来,使用属性注入会产生如下问题
对象和注入的容器有着很紧的耦合
对象间的耦合被隐藏了,外部无法看到,不利于复杂度控制
如果没有注入容器,对象无法创建
当一个类有多个属性注入,你感知不到他的复杂度。而当你使用构造函数注入时,就会发现,要穿入的参数过多。也是不利于复杂度控制
5.dao的实现技术
sessionFactory
@Repository
public class UserDaoImp implements UserDao {
    private SessionFactory sessionFactory;
    @Autowired
    public UserDaoImp(SessionFactory sessionFactory) {
        this.sessionFactory = sessionFactory;
    }
    @Override
    public User get(String userId) {
        return sessionFactory.openSession().load(User.class, userId);
    }
}
hibernateTemplate
@Repository
public class UserDaoImp implements UserDao {
    @Autowired
    private HibernateTemplate hibernateTemplate;
    public UserDaoImp(HibernateTemplate hibernateTemplate) {
        this.hibernateTemplate = hibernateTemplate;
    }
    @Override
    public User get(String userId) {
        return hibernateTemplate.get(User.class, userId);
    }
}
hibernateTemplate封装了SessionFactory,数据库操作变得更简单。
如下给出实现hibernateTemplate分页的代码。
@Override
public List<Order> getListByHql(String hql, int page, int pageSize) {
    return hibernateTemplate.execute(new HibernateCallback<List<Order>>() {
        @Override
        public List<Order> doInHibernate(Session session) throws HibernateException {
            Query<Order> query = session.createQuery(hql);
            query.setFirstResult((page - 1) * pageSize).setMaxResults(pageSize);
            //把结果返回
            return query.list();
        }
    });
}
问题与解决
nested exception is java.lang.NoClassDefFoundError: org/aspectj/weaver/reflect/ReflectionWorld$ReflectionWorldException
这个错误显然是没有找到某个jar包。如果要定义aop,除了spring核心包之外,还需要自行下载这两个jar。
aopalliance.jar
aspectjweaver.jar
检查一下jar包,发现没有aspectjweaver.jar,下载并加入到项目路径即可。
总结以上为个人经验,希望能给大家一个参考,也希望大家多多支持软件开发网。