如何在vue3.0+中使用tinymce及实现多图上传文件上传公式编辑功能
本文部分内容借鉴: https://www.cnblogs.com/zhongchao666/p/11142537.html
tinymce中文文档: http://tinymce.ax-z.cn/
安装tinymce1、安装相关依赖
yarn add tinymce  ||  npm install tinymce -S
yarn add @tinymce/tinymce-vue  ||  npm install @tinymce/tinymce-vue -S
2、汉化编辑器前往此地址下载中文汉化包: https://www.tiny.cloud/get-tiny/language-packages/
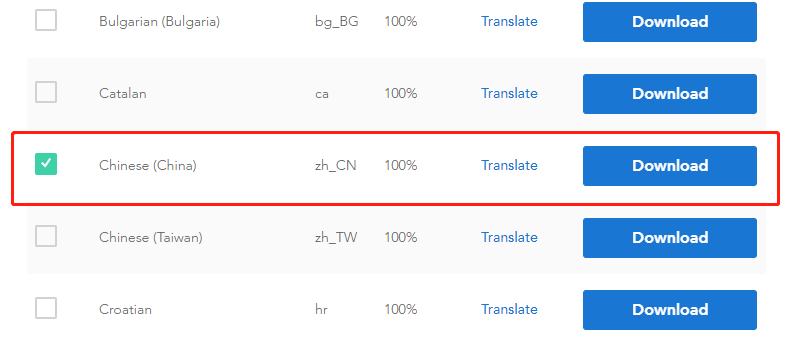
在项目public文件夹下新建tinymce文件夹,将下载后的压缩包解压至此文件夹另将node_modules/tinymce/skins文件夹也复制到public/tinymce里

3、封装组件:在src/components下新建TEditor.vue,并写入以下代码
<template>
    <div class="tinymce-box">
<Editor v-model="contentValue" :init="init" :disabled="disabled" @onClick="onClick" />
</div>
</template>
<script>
import api from '../api/api.js'
//引入tinymce编辑器
import Editor from '@tinymce/tinymce-vue'
//引入node_modules里的tinymce相关文件文件
import tinymce from 'tinymce/tinymce' //tinymce默认hidden,不引入则不显示编辑器
import 'tinymce/themes/silver'  //编辑器主题,不引入则报错
import 'tinymce/icons/default'  //引入编辑器图标icon,不引入则不显示对应图标
// 引入编辑器插件(基本免费插件都在这儿了)
import 'tinymce/plugins/advlist'  //高级列表
import 'tinymce/plugins/anchor'  //锚点
import 'tinymce/plugins/autolink'  //自动链接
import 'tinymce/plugins/autoresize'  //编辑器高度自适应,注:plugins里引入此插件时,Init里设置的height将失效
import 'tinymce/plugins/autosave'  //自动存稿
import 'tinymce/plugins/charmap'  //特殊字符
import 'tinymce/plugins/code'  //编辑源码
import 'tinymce/plugins/codesample'  //代码示例
import 'tinymce/plugins/directionality'  //文字方向
import 'tinymce/plugins/emoticons'  //表情
import 'tinymce/plugins/fullpage'  //文档属性
import 'tinymce/plugins/fullscreen'  //全屏
import 'tinymce/plugins/help'  //帮助
import 'tinymce/plugins/hr'  //水平分割线
import 'tinymce/plugins/image'  //插入编辑图片
import 'tinymce/plugins/importcss'  //引入css
import 'tinymce/plugins/insertdatetime'  //插入日期时间
import 'tinymce/plugins/link'  //超链接
import 'tinymce/plugins/lists' //列表插件
import 'tinymce/plugins/media' //插入编辑媒体
import 'tinymce/plugins/nonbreaking' //插入不间断空格
import 'tinymce/plugins/pagebreak' //插入分页符
import 'tinymce/plugins/paste' //粘贴插件
import 'tinymce/plugins/preview'//预览
import 'tinymce/plugins/print'//打印
import 'tinymce/plugins/quickbars'  //快速工具栏
import 'tinymce/plugins/save'  //保存
import 'tinymce/plugins/searchreplace'  //查找替换
// import 'tinymce/plugins/spellchecker'  //拼写检查,暂未加入汉化,不建议使用
import 'tinymce/plugins/tabfocus'  //切入切出,按tab键切出编辑器,切入页面其他输入框中
import 'tinymce/plugins/table'  //表格
import 'tinymce/plugins/template'  //内容模板
import 'tinymce/plugins/textcolor'  //文字颜色
import 'tinymce/plugins/textpattern'  //快速排版
import 'tinymce/plugins/toc'  //目录生成器
import 'tinymce/plugins/visualblocks'  //显示元素范围
import 'tinymce/plugins/visualchars'  //显示不可见字符
import 'tinymce/plugins/wordcount'  //字数统计
export default {
      name: 'TEditor',
      components: {
            Editor
      },
      props: {
            value: {
                  type: String,
                  default: ''
            },
            disabled: {
                  type: Boolean,
                  default: false
            },
            plugins: {
                  type: [String, Array],
                  default: 'print preview searchreplace autolink directionality visualblocks visualchars fullscreen image link media template code codesample table charmap hr pagebreak nonbreaking anchor insertdatetime advlist lists wordcount textpattern autosave '
            },
            toolbar: {
                  type: [String, Array],
                  default: 'fullscreen undo redo restoredraft | cut copy paste pastetext | forecolor backcolor bold italic underline strikethrough link anchor | alignleft aligncenter alignright alignjustify outdent indent | \
                styleselect formatselect fontselect fontsizeselect | bullist numlist | blockquote subscript superscript removeformat | \
                table image media charmap hr pagebreak insertdatetime print preview | code selectall searchreplace visualblocks | indent2em lineheight formatpainter axupimgs'
            },
      },
      data(){
             return {
                  init: {
                        language_url: '/tinymce/langs/zh_CN.js',  //引入语言包文件
                        language: 'zh_CN',  //语言类型
                        skin_url: '/tinymce/skins/ui/oxide',  //皮肤:浅色
                        // skin_url: '/tinymce/skins/ui/oxide-dark',//皮肤:暗色
                        plugins: this.plugins,  //插件配置
                        toolbar: this.toolbar,  //工具栏配置,设为false则隐藏
                        // menubar: 'file edit',  //菜单栏配置,设为false则隐藏,不配置则默认显示全部菜单,也可自定义配置--查看 http://tinymce.ax-z.cn/configure/editor-appearance.php --搜索“自定义菜单”
                        fontsize_formats: '12px 14px 16px 18px 20px 22px 24px 28px 32px 36px 48px 56px 72px',  //字体大小
                        font_formats: '微软雅黑=Microsoft YaHei,Helvetica Neue,PingFang SC,sans-serif;苹果苹方=PingFang SC,Microsoft YaHei,sans-serif;宋体=simsun,serif;仿宋体=FangSong,serif;黑体=SimHei,sans-serif;Arial=arial,helvetica,sans-serif;Arial Black=arial black,avant garde;Book Antiqua=book antiqua,palatino;',  //字体样式
                        lineheight_formats: "0.5 0.8 1 1.2 1.5 1.75 2 2.5 3 4 5",  //行高配置,也可配置成"12px 14px 16px 20px"这种形式
                        height: 400,  //注:引入autoresize插件时,此属性失效
                        placeholder: '在这里输入文字',
                        branding: false,  //tiny技术支持信息是否显示
                        resize: false,  //编辑器宽高是否可变,false-否,true-高可变,'both'-宽高均可,注意引号
                        // statusbar: false,  //最下方的元素路径和字数统计那一栏是否显示
                        elementpath: false,  //元素路径是否显示
                        content_style: "img {max-width:100%;}",  //直接自定义可编辑区域的css样式
                        // content_css: '/tinycontent.css',  //以css文件方式自定义可编辑区域的css样式,css文件需自己创建并引入
                        // images_upload_url: '/apib/api-upload/uploadimg',  //后端处理程序的url,建议直接自定义上传函数image_upload_handler,这个就可以不用了
                        // images_upload_base_path: '/demo',  //相对基本路径--关于图片上传建议查看--http://tinymce.ax-z.cn/general/upload-images.php
                        paste_data_images: true,  //图片是否可粘贴
                        images_upload_handler: (blobInfo, success, failure) => {
                              if(blobInfo.blob().size/1024/1024>2){
                                    failure("上传失败,图片大小请控制在 2M 以内")
                              }else{
                                    let params=new FormData()
                                    params.append('file',blobInfo.blob())
                                    let config={
                                          headers:{
                                                "Content-Type":"multipart/form-data"
                                          }
                                    }
                                    this.$axios.post(`${api.baseUrl}/api-upload/uploadimg`,params,config).then(res=>{
                                          if(res.data.code==200){
                                                success(res.data.msg)  //上传成功,在成功函数里填入图片路径
                                          }else{
                                                failure("上传失败")
                                          }
                                    }).catch(()=>{
                                          failure("上传出错,服务器开小差了呢")
                                    })
                              }
                        }
                  },
                  contentValue: this.value
            }
      },
      watch: {
            value (newValue) {
                  this.contentValue = newValue
            },
            contentValue (newValue) {
                  this.$emit('input', newValue)
            },
      },
      created(){
      },
      mounted(){
            tinymce.init({})
      },
      methods: {
            // 添加相关的事件,可用的事件参照文档=> https://github.com/tinymce/tinymce-vue => All available events
            onClick(e){
                  this.$emit('onClick', e, tinymce)
            },
            //清空内容
            clear(){
                  this.contentValue = ''
            },
      },
}
</script>
<style lang="less">
</style>
注册及使用组件
在main.js中全局注册
import TEditor from '@/components/TEditor.vue'
Vue.component('TEditor',TEditor)
在相关页面使用
<TEditor ref="editor" v-model="value" />
注:单图上传插件调用接口不同,上传图片和上传文件的两个函数都有调用,所以上传文件函数里也要添加对图片上传的判断和处理
出现如下报错,是因为引入路径出问题,引入不到文件包导致的,需要自己配置路径
Uncaught SyntaxError: Unexpected token '<'
Failed to load emoticons: Script at URL
 "http://xxxx/static/js/plugins/emoticons/js/emojis.js" did not call
 `tinymce.Resource.add('tinymce.plugins.emoticons', data)` within 1 second
解决方法
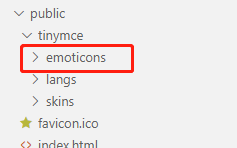
1、将node_modules/tinymce/plugins/emoticons文件夹复制到public/tinymce里
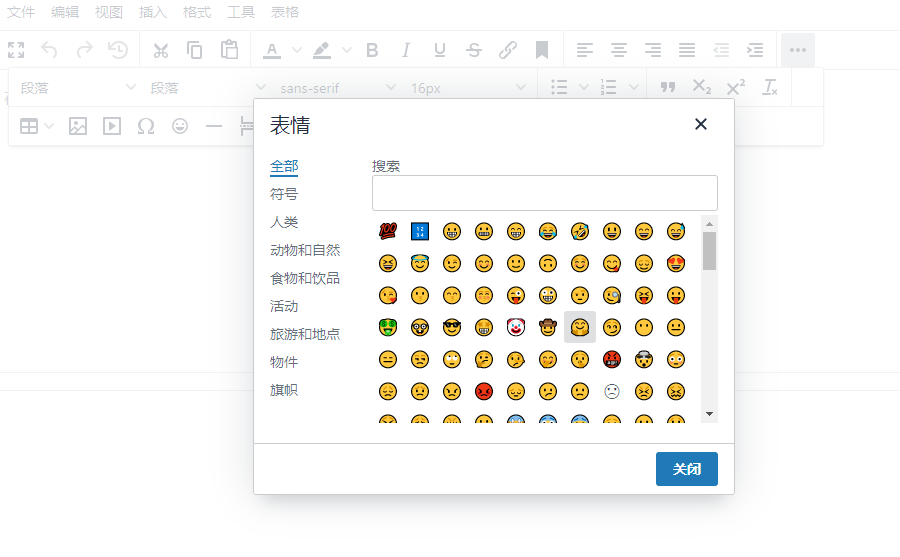
2、在如上代码里的init里添加一行代码emoticons_database_url:'/tinymce/emoticons/js/emojis.js',见图
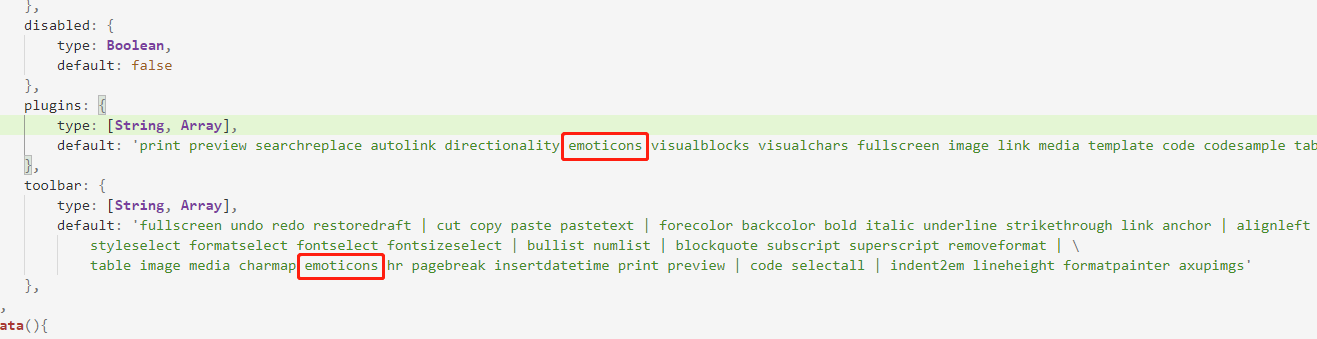
3、在如上代码里的plugins和toolbars里分别添加emoticons来引入表情插件,见图
4、刷新或重启项目即可

参考文档: http://tinymce.ax-z.cn/more-plugins/indent2em.php
1、前往上方文档里下载intent2em插件
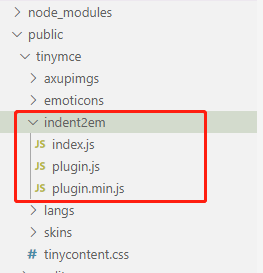
2、将解压后的首行缩进插件intent2em复制到public/tinymce文件夹下,见图
3、在indent2em里新建index.js并写入以下代码
// Exports the "indent2em" plugin for usage with module loaders
// Usage:
// CommonJS:
// require('tinymce/plugins/indent2em')
// ES2015:
// import 'tinymce/plugins/indent2em'
require('./plugin.js');
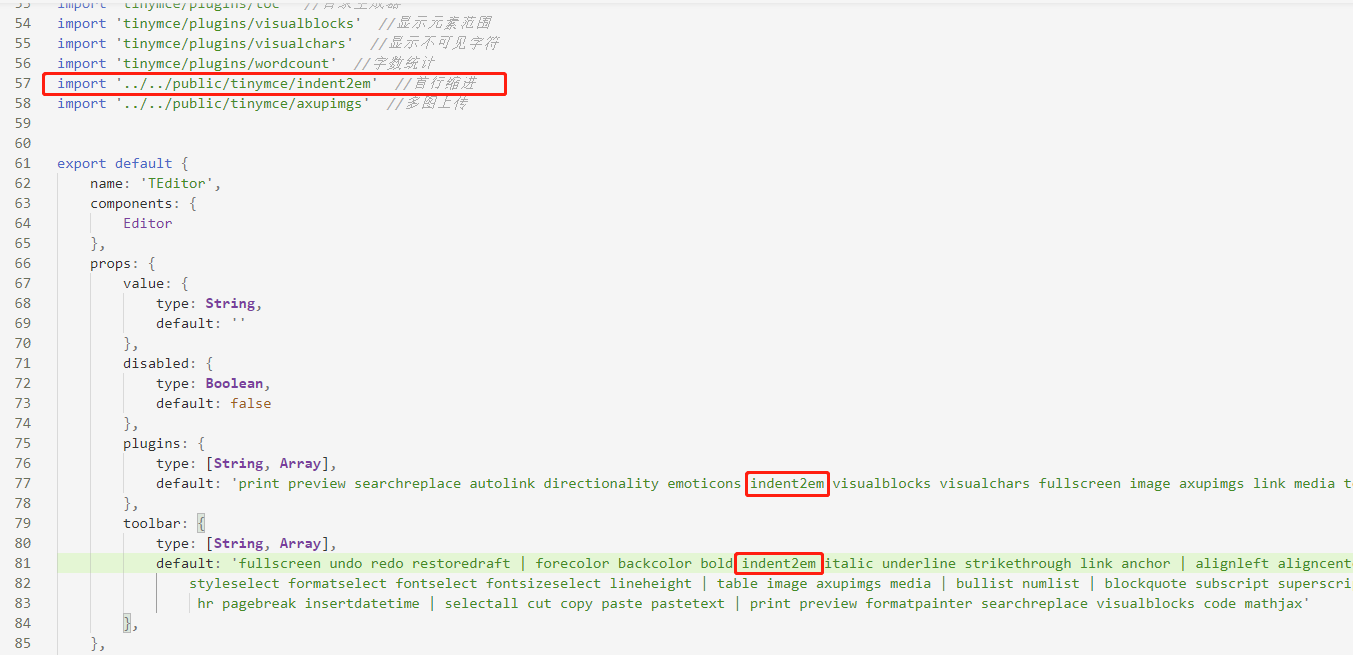
4、在components/TEditor.vue里引入首行缩进插件,并在plugins和toolbar里注册该插件,见图
import '../../public/tinymce/indent2em' //首行缩进
5、刷新或重启项目即可使用
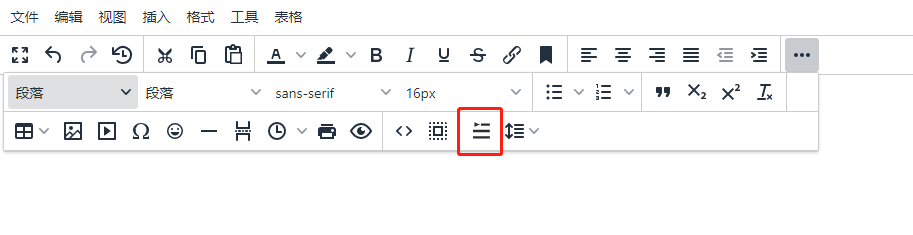
格式刷
方法和首行缩进功能一样
解决css引入报警告的问题

解决
由于项目路径的部署,之前的默认css引入可能会出现问题并报警告,所以建议自己引入一份css以替代之前的
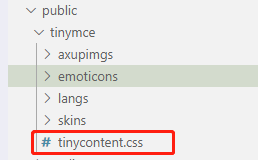
1、在public/tinymce文件夹下新建tinycontent.css
2、在src/components/TEditor.vue的init里引入tinycontent.css,并将content_style注释掉(因为引入css文件,content_style字段就不需要了)
content_css: `${api.editorUrl}tinymce/tinycontent.css`, //以css文件方式自定义可编辑区域的css样式,css文件需自己创建并引入
3、刷新或重启项目即可,警告消失


参考文档: http://tinymce.ax-z.cn/more-plugins/axupimgs.php
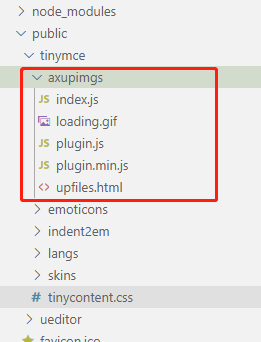
1、前往上方文档里下载多图上传插件axupimgs
2、将解压后的多图上传插件axupimgs复制到public/tinymce文件夹下
3、在axupimgs文件夹下新建index.js并写入以下代码
// Exports the "axupimgs" plugin for usage with module loaders
// Usage:
//   CommonJS:
//     require('tinymce/plugins/axupimgs')
//   ES2015:
//     import 'tinymce/plugins/axupimgs'
require('./plugin.js');
4、打开axupimgs/plugin.js,配置以下几行代码(为什么配置:因为这几行代码的作用是引入多图上传弹框upfiles.html文件,
若多图上传功能有弹框,但是弹框内无内容,则可能是此路径未引入正确,此时则需要再配置一下)
配置前:
tinymce.PluginManager.add('axupimgs', function(editor, url) {
var pluginName='多图上传';
window.axupimgs={}; //扔外部公共变量,也可以扔一个自定义的位置
var baseURL=tinymce.baseURL;
var iframe1 = baseURL+'/plugins/axupimgs/upfiles.html';
配置后:
+ import api from '@/api/api.js'
tinymce.PluginManager.add('axupimgs', function(editor, url) {
var pluginName='多图上传';
window.axupimgs={}; //扔外部公共变量,也可以扔一个自定义的位置
+var baseURL=api.editorUrl;
+var iframe1 = baseURL+'tinymce/axupimgs/upfiles.html';
注:每个人的项目不同,则路径配置也不同,根据自己项目配置即可。
5、在components/TEditor.vue里引入多图上传插件,并在plugins和toolbar里注册该插件(见图)
import '../../public/tinymce/axupimgs'  //多图上传
6、刷新或重启项目即可
注:此多图上传功能是基于单图上传功能的,多图上传就是多次调用单图上传的接口函数(见最上方 images_upload_handler)。
所以必须先完成单图上传功能才行,单图上传在最上面代码里已经实现了,这里不做赘述。


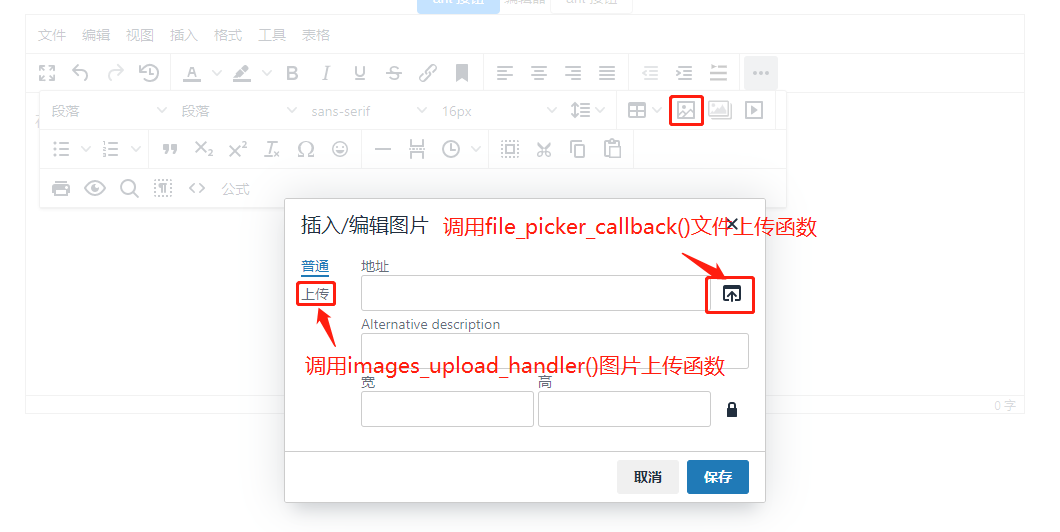
添加文件上传以及媒体上传功能(上传功能包括图片上传,文件上传以及媒体上传三类。其中图片上传使用图片上传函数,文件和媒体上传均使用文件上传函数)
参考文档: http://tinymce.ax-z.cn/general/upload-images.php
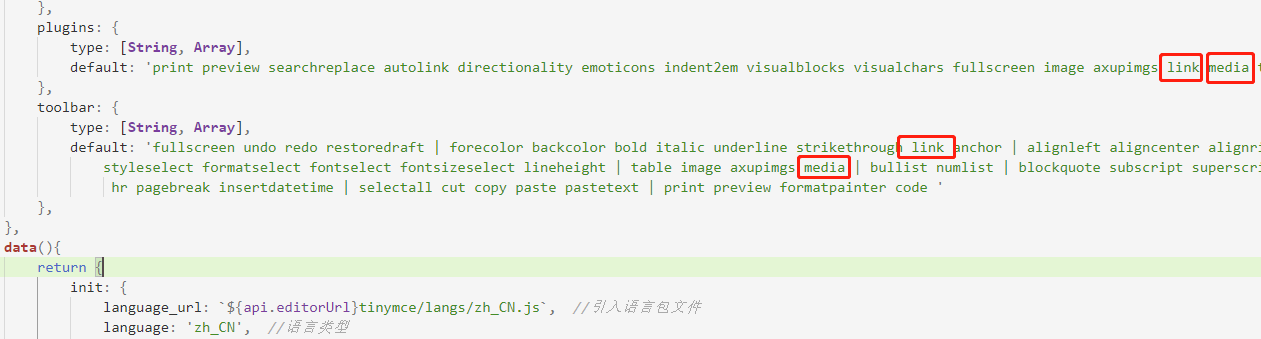
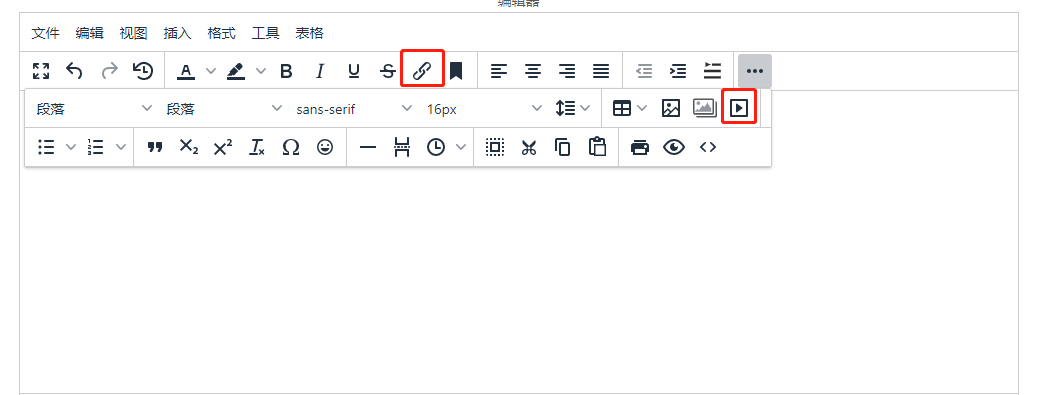
1、在plugins和toolbar里注册link插件以及media插件(见图)
2、在init里添加以下代码(以下代码对于link插件和media插件是通用的,配置好后这两个插件就都可以使用了)(见图)
file_picker_types: 'file image media', //分别对应三个类型文件的上传:link插件,image和axupimgs插件,media插件。想屏蔽某个插件的上传就去掉对应的参数
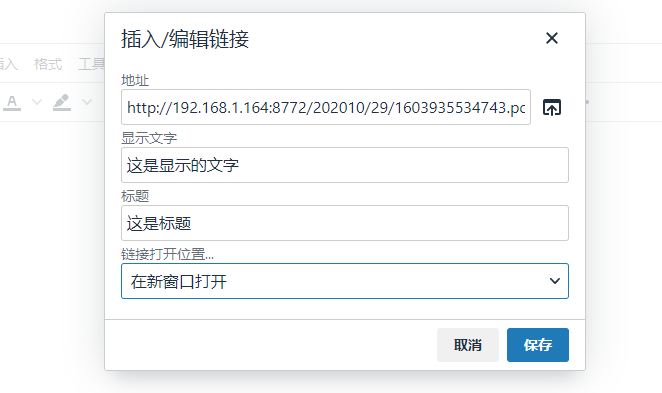
file_picker_callback: (callback, value, meta)=>{
let filetype='.pdf, .txt, .zip, .rar, .7z, .doc, .docx, .xls, .xlsx, .ppt, .pptx, .mp3, .mp4, .jpg'; //限制文件的上传类型
let inputElem = document.createElement('input'); //创建文件选择
inputElem.setAttribute('type', 'file');
inputElem.setAttribute('accept', filetype);
inputElem.click();
inputElem.onchange=()=>{
let upurl=''
let file=inputElem.files[0] //获取文件信息
if(file.type.slice(0,5)=='video'){ //判断文件类型
upurl=`${api.baseUrl}/api-upload/uploadTxVideo`
}else{
upurl=`${api.baseUrl}/api-upload/upload`
}
if(file.type.slice(0,5)=='image'&&file.size/1024/1024>2){
alert("上传失败,图片大小请控制在2M以内")
}else if(file.type.slice(0,5)=='video'&&file.size/1024/1024>500){
alert("上传失败,视频大小请控制在 500M 以内")
}else if(file.size/1024/1024>10){
alert("上传失败,文件大小请控制在 10M 以内")
}else{
let params=new FormData()
params.append('file',file)
let config={
headers:{
"Content-Type":"multipart/form-data"
}
}
this.$axios.post(upurl,params,config).then(res=>{
if(res.data.code==200){
callback(res.data.data) //上传成功,在回调函数里填入文件路径
}else{
alert("上传失败")
}
}).catch(()=>{
alert("上传出错,服务器开小差了呢")
})
}
}
}
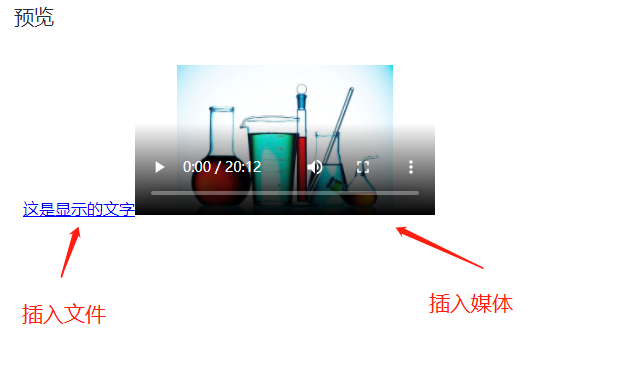
3、具体效果见图


假如你的项目需要公式编辑功能
1、MathJax插件+LaTeX语法
说到公式编辑功能,首先想到的是引入MathJax插件,使用LaTeX语法。这样做出来的有几个缺点,
一个是用户是不会LaTeX语法的,另一个是在vue的v-html里,LateX语法渲染的富文本是不生效的,
因为latex的语法里的斜杠\在v-html里会被转义,导致无法识别。所以考虑了一下还是放弃了这个实现方式,
当然,如果你的项目使用mathjax没有影响,则可以使用其方式,实现方式这里不做赘述,请参考以下文档
实现步骤:  https://www.cnblogs.com/already/p/12876452.html
mathjax使用文档1: https://www.cnblogs.com/mqingqing123/p/12711372.html
mathjax使用文档2:  https://www.cnblogs.com/mqingqing123/p/12026817.html
LaTeX语法:  https://www.jianshu.com/p/27b163b1c6ef
2、使用百度编辑器的kityformula
之前一直使用百度编辑器,对百度编辑器的公式编辑插件kityformula还是比较赞的。
但是kityformula是依附于百度编辑器的,不能单独拎出来集成到tinymce里(如果有大神有办法单独集成还请告知)
所以考虑在项目中引入百度编辑器,并只使用其公式编辑功能,然后将百度编辑器整个集成到tinymce里。

1、前往此地址下载ueditor包: https://files.cnblogs.com/files/huihuihero/UEditor.zip
2、将解压后的包复制到public文件夹下,与tinymce文件夹同级

3、创建公式编辑的插件
参考文档:http://tinymce.ax-z.cn/advanced/creating-a-plugin.php
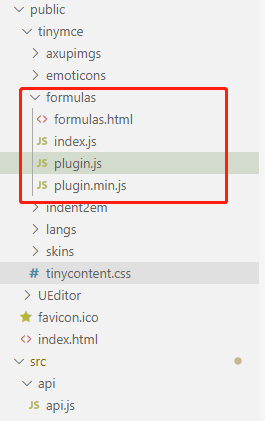
1、在public/tinymce文件夹下新建formulas文件夹
2、在formulas文件夹下新建index.js,写入以下代码
// Exports the "formulas" plugin for usage with module loaders
// Usage:
// CommonJS:
// require('tinymce/plugins/formulas')
// ES2015:
// import 'tinymce/plugins/formulas'
require('./plugin.js');
3、在formulas文件夹下新建plugin.js和plugin.min.js,写入以下代码,两个文件代码一样即可
import api from '@/api/api.js'
tinymce.PluginManager.add('formulas', function(editor, url) {
var pluginName='公式';
//配置文件引入路径,根据自己项目来,我这里引入的api.editorUrl=http://192.168.1.171/apib
//需要说明的是iframe1所代表的页面地址在线下跑的时候需能够访问,否则访问不了会默认展示至项目首页
var iframe1 = api.editorUrl+'tinymce/formulas/formulas.html';
var openDialog = function () {
return editor.windowManager.openUrl({
title: pluginName,
size: 'large',
url:iframe1,
buttons: [
{
type: 'cancel',
text: 'Close'
},
// {
// type: 'custom',
// text: 'Save',
// name: 'save',
// primary: true
// },
],
});
};
// 注册一个工具栏按钮名称
editor.ui.registry.addButton('formulas', {
text: pluginName,
onAction: function () {
openDialog();
}
});
// 注册一个菜单项名称 menu/menubar
editor.ui.registry.addMenuItem('formulas', {
text: pluginName,
onAction: function() {
openDialog();
}
});
return {
getMetadata: function () {
return {
//插件名和链接会显示在“帮助”→“插件”→“已安装的插件”中
name: "Example plugin",//插件名称
url: "http://exampleplugindocsurl.com", //作者网址
};
}
};
});
4、在formulas文件夹下新建formulas.html,并写入以下代码
<!doctype html>
<html>
<head>
<meta charset="utf-8" />
<title>formulas</title>
<meta name="viewport" content="user-scalable=no, width=device-width, initial-scale=1.0, maximum-scale=1.0"/>
<meta name="apple-mobile-web-app-capable" content="yes" />
<meta name="apple-mobile-web-app-status-bar-style" content="black" />
<meta name="format-detection" content="telephone=no">
<meta http-equiv="X-UA-Compatible" content="IE=edge,chrome=1" />
<style>
html,body{margin:0;padding:0;background:#fff;}
#wrap{
width: 80%;
margin-left: 10%;
}
#editor{
width: 100%;
height: 300px;
margin-top: 40px;
}
.remind-a{
font-size: 14px;
color: #6f6f6f;
margin-top: 60px;
}
.remind-a span{
font-size: 16px;
font-weight: 700;
color: #333;
}
.remind-b{
font-size: 14px;
color: #6f6f6f;
margin-top: 10px;
}
</style>
</head>
<body>
<div id="wrap">
<div id="editor"></div>
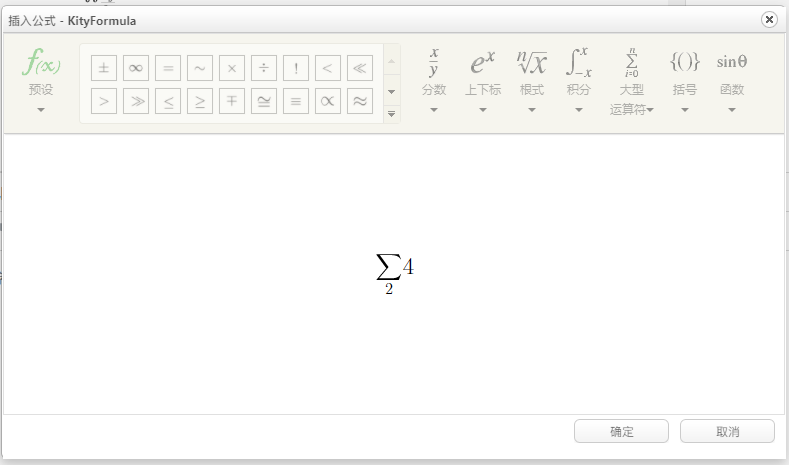
<div class="remind-a">点击左上角 <span>∑</span> 符号即可编辑公式</div>
<div class="remind-b">编辑完成后 Ctrl+C 复制,之后在编辑器里 Ctrl+V 粘贴即可</div>
</div>
</body>
<script type="text/javascript" src="../../UEditor/ueditor.config.js"></script>
<script type="text/javascript" src="../../UEditor/ueditor.all.js"></script>
<script type="text/javascript" src="../../UEditor/lang/zh-cn/zh-cn.js"></script>
<script type="text/javascript" charset="utf-8" src="../../UEditor/kityformula-plugin/addKityFormulaDialog.js"></script>
<script type="text/javascript" charset="utf-8" src="../../UEditor/kityformula-plugin/getKfContent.js"></script>
<script type="text/javascript" charset="utf-8" src="../../UEditor/kityformula-plugin/defaultFilterFix.js"></script>
<script id="editor" type="text/plain" name="gdesc" style="width:100%;height:350px;"></script>
<script type="text/javascript">
//实例化编辑器
var ue = UE.getEditor('editor', {toolbars: ["kityformula"]});
</script>
</html>
4、引入自制的公式编辑插件formulas
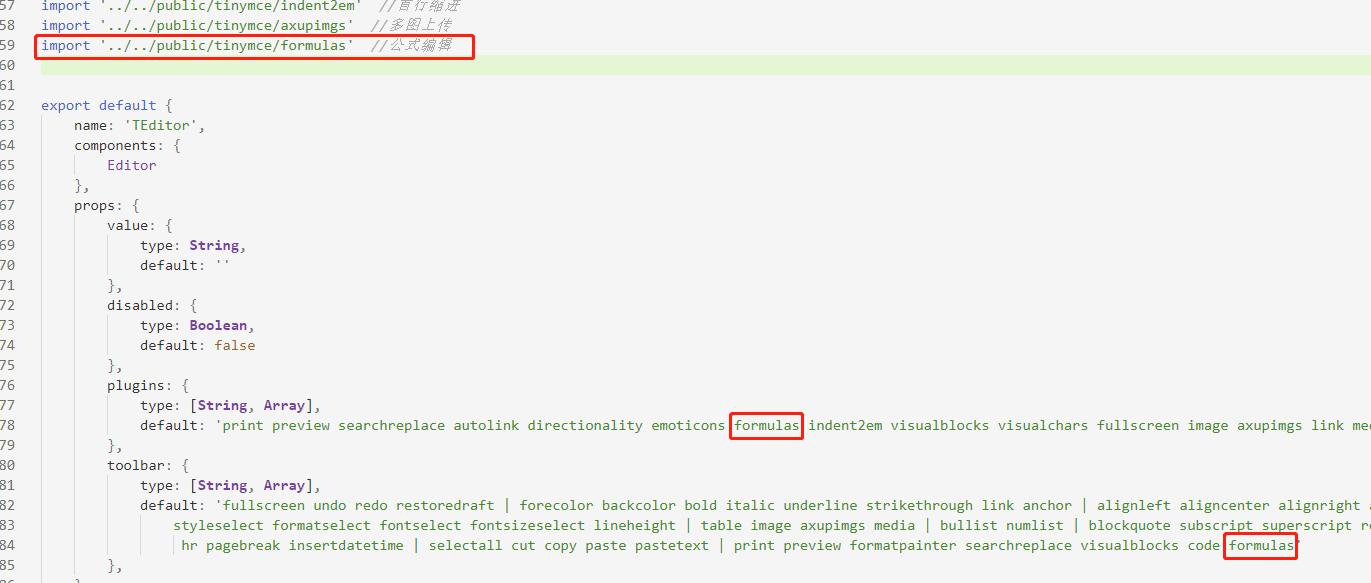
在src/components/TEditor.vue里的引入公式编辑插件,并在plugins和toolbar里注册该插件
import '../../public/tinymce/formulas'  //公式编辑
5、重启项目,公式编辑功能开发完成


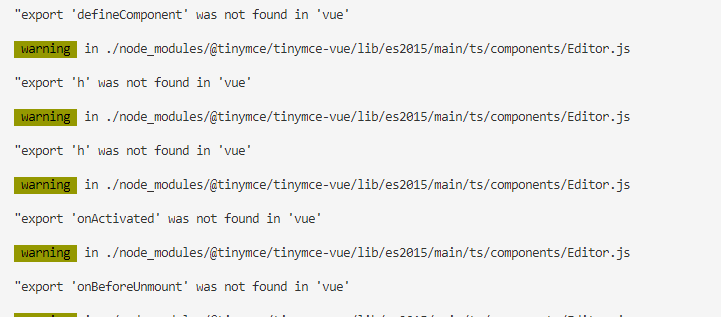
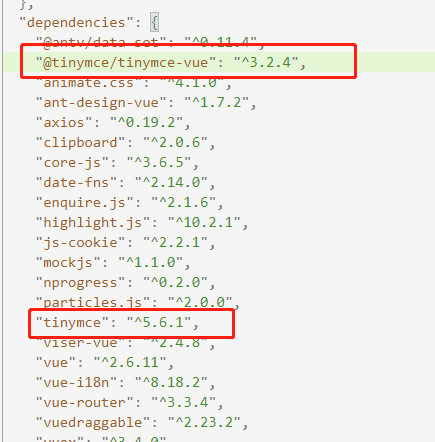
最近新建一个项目,在@tinymce/tinymce-vue版本为4.0.0+的时候,会出现以下报错。因此出现报错的同学,建议使用4.0.0之前的版本号,如下(成功解决报错)
以上就是在vue3.0+中使用tinymce及实现多图上传,文件上传,公式编辑等功能的详细内容,更多关于vue实现多图上传文件上传公式编辑的资料请关注软件开发网其它相关文章!