教你在vue 中使用 svg symbols
安装svg-sprite-loader插件
在vue.config.js中配置 svg-sprite-loader
封装IconSvg.vue通用组件
加载所有的svg静态资源,并且把IconSvg注册到全局组件当中
使用
安装svg-sprite-loader插件在vue.config.js中配置 svg-sprite-loadernpm install svg-sprite-loader -D
或者
yarn add svg-sprite-loader -D
const path = require('path');
module.exports = {
  chainWebpack:config =>{
    const dir = path.resolve(__dirname,'src/assets/icons')
    config.module
      .rule('svg-sprite')
      .test(/\.svg$/)
      .include.add(dir).end() //设置 icons 目录走 svg-sprite 规则
      .use('svg-sprite-loader').loader('svg-sprite-loader').options({extract : false}).end()
      .use('svgo-loader').loader('svgo-loader')
      .tap(options => ({...options,plugins:[{removeAttrs:{attrs:'fill'}}]})).end()//安装插件去除svg中的fill属性
    config.plugin('svg-sprite').use(require('svg-sprite-loader/plugin'),[{plainSprite: true}])
    config.module.rule('svg').exclude.add(dir)//其他svg loader 排除 icons 目录
  }
}
也可以这么配置
const { defineConfig } = require('@vue/cli-service')
// 加在头部
const path = require('path')
function resolve (dir) {
  return path.join(__dirname, dir)
}
module.exports = defineConfig({
  transpileDependencies: true,
  chainWebpack (config) {
    config.plugins.delete('prefetch')
    // set svg-sprite-loader
    config.module
      .rule('svg')
      .exclude.add(resolve('src/assets/icons'))
      .end()
    config.module
      .rule('icons')
      .test(/\.svg$/)
      .include.add(resolve('src/assets/icons'))
      .end()
      .use('svg-sprite-loader')
      .loader('svg-sprite-loader')
      .options({
        // symbolId: 'icon-[name]'
        symbolId: '[name]'
      })
      .end()
    }
})
注意:src/assets/icons这个文件夹放着你的svg文件
封装IconSvg.vue通用组件<template>
<div class="icon-wrapper">
<svg class="icon" aria-hidden="true">
<use :href="iconName" rel="external nofollow" ></use>
</svg>
</div>
</template>
<script>
export default {
name: 'IconSvg',
props: {
name: String,
prefix: {
type: String,
default: 'icon-'
}
},
computed: {
iconName() {
// return `#${this.prefix}${this.name}`
return `#${this.name}`
}
}
}
</script>
<style scoped>
.icon-wrapper {
display: inline-block;
}
.icon {
width: 100%;
height: 100%;
vertical-align: -0.15em;
fill: currentColor;
overflow: hidden;
}
</style>
加载所有的svg静态资源,并且把IconSvg注册到全局组件当中
import Vue from 'vue'
import App from './App.vue'
import router from './router'
// 引入本地的svg文件
// 定义一个加载目录的函数
const requireAll = requireContext => requireContext.keys().map(requireContext)
const req = require.context('./assets/icons', false, /\.svg$/)
// 加载目录下的所有的 svg 文件
requireAll(req)
// 全局注册IconSvg组件
const IconSvg = () => import('./components/svg/IconSvg');
const components = {
  IconSvg
}
Object.keys(components).forEach(item => {
  Vue.component(item, components[item])
})
Vue.config.productionTip = false
new Vue({
  router,
  render: h => h(App)
}).$mount('#app')
使用
使用的话有多种形式,我们一个一个来看。
1、使用自己编写的svg文件
在src/assets/icons文件夹下面创建circle.svg(一定是这个文件夹,因为这个文件夹下的svg文件会被你的svg插件解析)
<?xml version="1.0"?>
<svg viewBox="0 0 120 120" version="1.1"
  xmlns="http://www.w3.org/2000/svg">
  <circle cx="60" cy="60" r="50"/>
</svg>
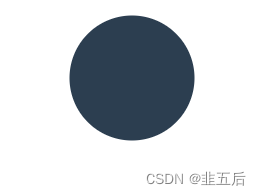
经过svg-sprite-loader插件的解析,你在html里面可以看到有个id为circle(和svg名称一样)的一个symbol标签挂载在svg标签下面

这个时候直接使用就可以了
<template>
  <div class="home">
    <IconSvg name="circle"/>
  </div>
</template>
<script>
export default {
  name: 'HomeView',
  components: {
  }
}
</script>
<style scoped>
</style>

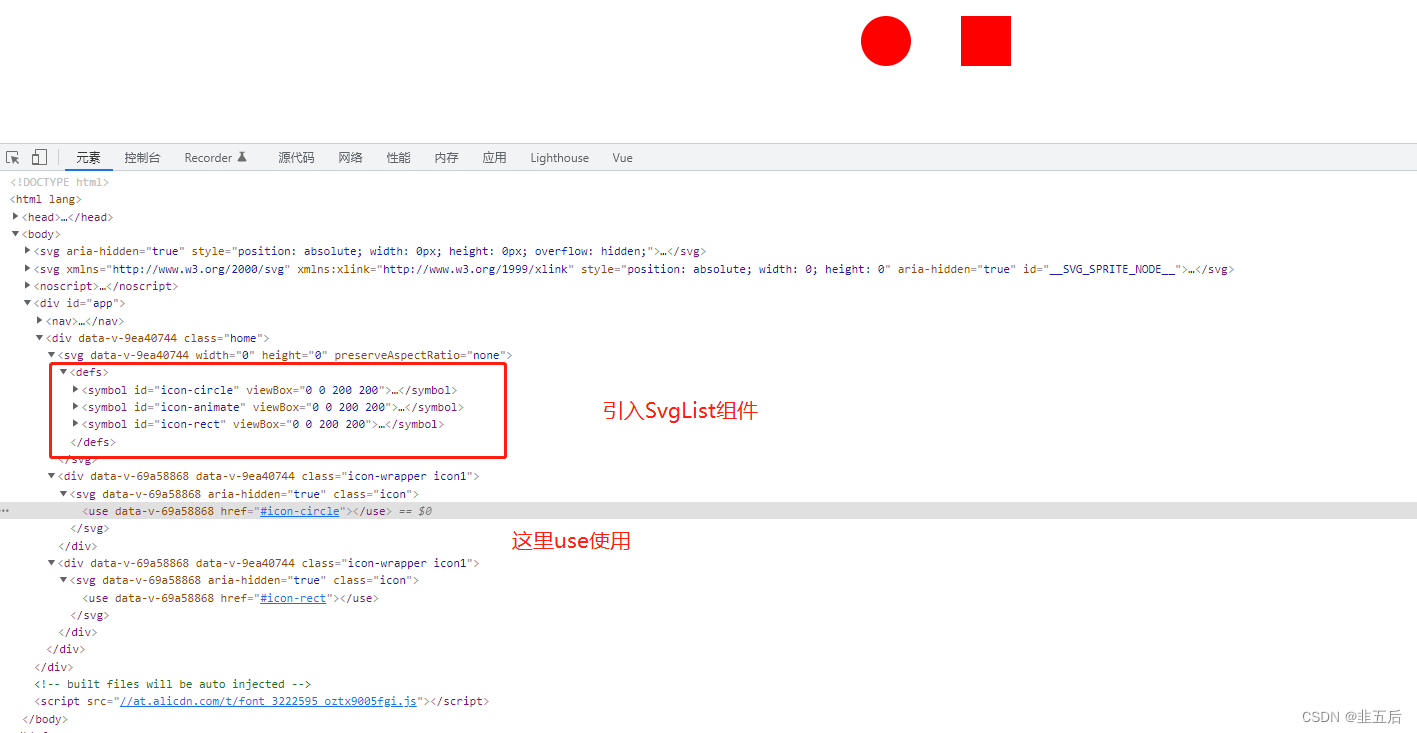
2、将svg标签封装到一个vue文件中
创建SvgList.vue组件
<template>
  <svg width="0" height="0" preserveAspectRatio="none">
    <defs>
      <!-- 这是个圆 -->
      <symbol id="icon-circle" viewBox="0 0 200 200">
        <circle cx="60" cy="60" r="50" />
      </symbol>
      <!-- 这是个动画 -->
      <symbol id="icon-circle" viewBox="0 0 200 200">
        <rect width="10" height="10">
          <animate attributeName="rx" values="0;5;0" dur="10s" repeatCount="indefinite" />
        </rect>
      </symbol>
      <!-- 这是个正方形 -->
      <symbol id="icon-circle" viewBox="0 0 200 200">
        <rect x="10" y="10" width="100" height="100"/>
      </symbol>
    </defs>
  </svg>
</template>
<script>
export default {
};
使用如下
<template>
  <div class="home">
    <!-- 这里要使用这个组件,否则svg标签引入不进来 -->
    <svg-list />
    <IconSvg name="icon-circle" class="icon1"/>
    <IconSvg name="icon-rect" class="icon1"/>
  </div>
</template>
<script>
import SvgList from '../components/SvgList.vue'
export default {
  name: 'HomeView',
  components: {
    SvgList
  }
}
</script>
<style scoped>
.icon1 {
  width: 100px;
  height:100px;
  color: red;
}
</style>

3、使用iconfont的svg代码

在src/assets/icons这个文件夹下面去创建heart.svg(一定是这个文件夹,因为这个文件夹下的svg文件会被你的svg插件解析)
<svg t="1660895988570" class="icon" viewBox="0 0 1171 1024" version="1.1" xmlns="http://www.w3.org/2000/svg" p-id="1570" width="200" height="200">
  <path d="M1001.6 153.6s0-3.2 0 0c-118.4-118.4-304-121.6-425.6-12.8-121.6-108.8-307.2-105.6-422.4 9.6-118.4 118.4-121.6 310.4-3.2 428.8l3.2 3.2 355.2 352c38.4 38.4 99.2 38.4 137.6 0l355.2-352c118.4-118.4 118.4-310.4 0-428.8z m-115.2 249.6c-9.6 0-16-6.4-16-16 0-57.6-48-105.6-105.6-105.6-9.6 0-16-6.4-16-16s6.4-16 16-16c76.8 0 137.6 60.8 137.6 137.6 0 9.6-6.4 16-16 16z" fill="#343231" p-id="1571">
  </path>
</svg>
使用
<template>
  <div class="home">
    <IconSvg name="heart" class="icon1"/>
  </div>
</template>
<script>
export default {
  name: 'HomeView',
  components: {
  }
}
</script>
<style scoped>
.icon1 {
  width: 100px;
  height:100px;
  color: chocolate;
}
</style>
效果

在这里你会遇到一个问题,那就是给这个svg改颜色改不掉,你只要把svg标签里的fill属性去掉就可以了,或者把fill属性设置成none。还有一个stroke轮廓颜色也是可以设置的。
4、直接引入整个iconfont的svg图片
生成symbol代码

在index.html中引入上面的symbol代码
<!DOCTYPE html>
<html lang="">
  <head>
    <meta charset="utf-8">
    <meta http-equiv="X-UA-Compatible" content="IE=edge">
    <meta name="viewport" content="width=device-width,initial-scale=1.0">
    <link rel="icon" href="<%= BASE_URL %>favicon.ico" rel="external nofollow" >
    <title><%= htmlWebpackPlugin.options.title %></title>
  </head>
  <body>
    <noscript>
      <strong>We're sorry but <%= htmlWebpackPlugin.options.title %> doesn't work properly without JavaScript enabled. Please enable it to continue.</strong>
    </noscript>
    <div id="app"></div>
    <!-- built files will be auto injected -->
    <!-- 引入svg代码 -->
    <script src="//at.alicdn.com/t/c/font_1803779_bgkm96l1xgp.js"></script>
  </body>
</html>
看控制台已经全部引入进来了

使用
<template>
  <div class="home">
    <IconSvg name="iconjiahao" class="icon1"/>
    <IconSvg name="iconqicheqianlian-1" class="icon2"/>
    <IconSvg name="iconxinaixin" class="icon2"/>
    <IconSvg name="iconjinzhi" class="icon1"/>
    <IconSvg name="iconcart" class="icon1"/>
  </div>
</template>
<script>
export default {
  name: 'HomeView',
  components: {
  }
}
</script>
<style scoped>
.icon1 {
  width: 100px;
  height:100px;
  color: chocolate;
}
.icon2 {
  width: 100px;
  height:100px;
  color: darkorange;
}
</style>
效果

提示:当然你也可以上传svg图片到iconfont平台,然后再下载下来使用,但是在下载下来的时候一定要去去除颜色并提交,这样你的svg图片就可以随心所欲的改颜色了
到此这篇关于如何在vue中使用svgsymbols的文章就介绍到这了,更多相关vue使用svgsymbols内容请搜索软件开发网以前的文章或继续浏览下面的相关文章希望大家以后多多支持软件开发网!