Python+OpenCV实现图像识别替换功能详解
OpenCV-Python是一个Python库,旨在解决计算机视觉问题。
OpenCV是一个开源的计算机视觉库,1999年由英特尔的Gary Bradski启动。Bradski在访学过程中注意到,在很多优秀大学的实验室中,都有非常完备的内部公开的计算机视觉接口。这些接口从一届学生传到另一届学生,对于刚入门的新人来说,使用这些接口比重复造轮子方便多了。这些接口可以让他们在之前的基础上更有效地开展工作。OpenCV正是基于为计算机视觉提供通用接口这一目标而被策划的。
安装opencv
pip3 install -i https://pypi.doubanio.com/simple/ opencv-python
思路:
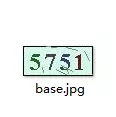
1、首先区分三张图片:
base图片代表初始化图片;
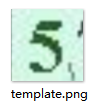
template图片代表需要在大图中匹配的图片;
white图片为需要替换的图片。
2、然后template图片逐像素缩小匹配,设定阈值,匹配度到达阈值的图片,判定为在初始图片中;否则忽略掉。
3、匹配到最大阈值的地方,返回该区域的位置(x,y)
4、然后用white图片resize到相应的大小,填补到目标区域。
match函数:
"""检查模板图片中是否包含目标图片"""
def make_cv2(photo1, photo2):
global x, y, w, h, num_1,flag
starttime = datetime.datetime.now()
#读取base图片
img_rgb = cv2.imread(f'{photo1}')
#读取template图片
template = cv2.imread(f'{photo2}')
h, w = template.shape[:-1]
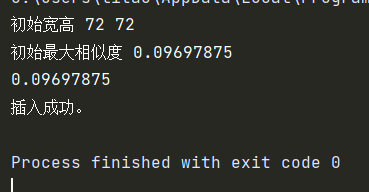
print('初始宽高', h, w)
res = cv2.matchTemplate(img_rgb, template, cv2.TM_CCOEFF_NORMED)
print('初始最大相似度', res.max())
threshold = res.max()
""",相似度小于0.2的,不予考虑;相似度在[0.2-0.75]之间的,逐渐缩小图片"""
print(threshold)
while threshold >= 0.1 and threshold <= 0.83:
if w >= 20 and h >= 20:
w = w - 1
h = h - 1
template = cv2.resize(
template, (w, h), interpolation=cv2.INTER_CUBIC)
res = cv2.matchTemplate(img_rgb, template, cv2.TM_CCOEFF_NORMED)
threshold = res.max()
print('宽度:', w, '高度:', h, '相似度:', threshold)
else:
break
"""达到0.75覆盖之前的图片"""
if threshold > 0.8:
loc = np.where(res >= threshold)
x = int(loc[1])
y = int(loc[0])
print('覆盖图片左上角坐标:', x, y)
for pt in zip(*loc[::-1]):
cv2.rectangle(
img_rgb, pt, (pt[0] + w, pt[1] + h), (255, 144, 51), 1)
num_1 += 1
endtime = datetime.datetime.now()
print("耗时:", endtime - starttime)
overlay_transparent(x, y, photo1, photo3)
else:
flag = False
replace函数:
"""将目标图片镶嵌到指定坐标位置"""
def overlay_transparent(x, y, photo1, photo3):
    #覆盖图片的时候上下移动的像素空间
    y += 4
    global w, h, num_2
    background = cv2.imread(f'{photo1}')
    overlay = cv2.imread(f'{photo3}')
    """缩放图片大小"""
    overlay = cv2.resize(overlay, (w, h), interpolation=cv2.INTER_CUBIC)
    background_width = background.shape[1]
    background_height = background.shape[0]
    if x >= background_width or y >= background_height:
        return background
    h, w = overlay.shape[0], overlay.shape[1]
    if x + w > background_width:
        w = background_width - x
        overlay = overlay[:, :w]
    if y + h > background_height:
        h = background_height - y
        overlay = overlay[:h]
    if overlay.shape[2] < 4:
        overlay = np.concatenate([overlay, np.ones((overlay.shape[0], overlay.shape[1], 1), dtype=overlay.dtype) * 255],axis=2,)
    overlay_image = overlay[..., :3]
    mask = overlay[..., 3:] / 255.0
    background[y:y + h,x:x + w] = (1.0 - mask) * background[y:y + h,x:x + w] + mask * overlay_image
    # path = 'result'
    path = ''
    cv2.imwrite(os.path.join(path, f'1.png'), background)
    num_2 += 1
    print('插入成功。')
    init()
每次执行需要初始化x,y(图片匹配初始位置参数),w,h(图片缩放初始宽高)
x = 0
y = 0
w = 0
h = 0
flag = True
threshold = 0
template = ''
num_1 = 0
num_2 = 0
photo3 = ''
"""参数初始化"""
def init():
    global x, y, w, h, threshold, template,flag
    x = 0
    y = 0
    w = 0
    h = 0
    threshold = 0
    template = ''
完整代码
import cv2
import datetime
import os
import numpy as np
x = 0
y = 0
w = 0
h = 0
flag = True
threshold = 0
template = ''
num_1 = 0
num_2 = 0
photo3 = ''
"""参数初始化"""
def init():
    global x, y, w, h, threshold, template,flag
    x = 0
    y = 0
    w = 0
    h = 0
    threshold = 0
    template = ''
"""检查模板图片中是否包含目标图片"""
def make_cv2(photo1, photo2):
    global x, y, w, h, num_1,flag
    starttime = datetime.datetime.now()
    img_rgb = cv2.imread(f'{photo1}')
    template = cv2.imread(f'{photo2}')
    h, w = template.shape[:-1]
    print('初始宽高', h, w)
    res = cv2.matchTemplate(img_rgb, template, cv2.TM_CCOEFF_NORMED)
    print('初始最大相似度', res.max())
    threshold = res.max()
    """,相似度小于0.2的,不予考虑;相似度在[0.2-0.75]之间的,逐渐缩小图片"""
    print(threshold)
    while threshold >= 0.1 and threshold <= 0.83:
        if w >= 20 and h >= 20:
            w = w - 1
            h = h - 1
            template = cv2.resize(
                template, (w, h), interpolation=cv2.INTER_CUBIC)
            res = cv2.matchTemplate(img_rgb, template, cv2.TM_CCOEFF_NORMED)
            threshold = res.max()
            print('宽度:', w, '高度:', h, '相似度:', threshold)
        else:
            break
    """达到0.75覆盖之前的图片"""
    if threshold > 0.8:
        loc = np.where(res >= threshold)
        x = int(loc[1])
        y = int(loc[0])
        print('覆盖图片左上角坐标:', x, y)
        for pt in zip(*loc[::-1]):
            cv2.rectangle(
                img_rgb, pt, (pt[0] + w, pt[1] + h), (255, 144, 51), 1)
        num_1 += 1
        endtime = datetime.datetime.now()
        print("耗时:", endtime - starttime)
        overlay_transparent(x, y, photo1, photo3)
    else:
        flag = False
"""将目标图片镶嵌到指定坐标位置"""
def overlay_transparent(x, y, photo1, photo3):
    y += 0
    global w, h, num_2
    background = cv2.imread(f'{photo1}')
    overlay = cv2.imread(f'{photo3}')
    """缩放图片大小"""
    overlay = cv2.resize(overlay, (w, h), interpolation=cv2.INTER_CUBIC)
    background_width = background.shape[1]
    background_height = background.shape[0]
    if x >= background_width or y >= background_height:
        return background
    h, w = overlay.shape[0], overlay.shape[1]
    if x + w > background_width:
        w = background_width - x
        overlay = overlay[:, :w]
    if y + h > background_height:
        h = background_height - y
        overlay = overlay[:h]
    if overlay.shape[2] < 4:
        overlay = np.concatenate([overlay, np.ones((overlay.shape[0], overlay.shape[1], 1), dtype=overlay.dtype) * 255],axis=2,)
    overlay_image = overlay[..., :3]
    mask = overlay[..., 3:] / 255.0
    background[y:y + h,x:x + w] = (1.0 - mask) * background[y:y + h,x:x + w] + mask * overlay_image
    # path = 'result'
    path = ''
    cv2.imwrite(os.path.join(path, f'1.png'), background)
    num_2 += 1
    print('插入成功。')
    init()
if __name__ == "__main__":
    photo1 = "1.png"
    photo2 = "3.png"
    photo3 = "white.png"
    while flag == True:
        make_cv2(photo1, photo2)
        overlay_transparent(x, y, photo1, photo3)
执行结果:
到此这篇关于Python+OpenCV实现图像识别替换功能详解的文章就介绍到这了,更多相关Python OpenCV图像识别替换内容请搜索软件开发网以前的文章或继续浏览下面的相关文章希望大家以后多多支持软件开发网!