Android Phone蓝牙通信方式总结(Socket与Gatt)
Android手机间通过蓝牙方式进行通信,有两种常见的方式,一种是socket方式,另一种是通过Gatt Server(Android 5.0以后)通信,socket方式最为简单,但是很多低功耗的蓝牙设备,如单片机上的蓝牙模块可能不支持。而Gatt方式说起来就比较复杂,我研究了好会儿,搜索了不少资料,走了不少弯路才总结出来。
首先来看比较简单的socket方式其实无论是socket方式还是Gatt,Android设备间蓝牙通信都是一种CS(client-server)模式。
1)socket服务端:
使用listenUsingInsecureRfcommWithServiceRecord接口开启监听,其他同一般的socket网络通信没区别:
    init{
        mSocket = mBleAdapter.listenUsingInsecureRfcommWithServiceRecord("GomeServer", Constants.BLE_SERVICE_UUID)
    }
    override fun run() {
        var socket: BluetoothSocket?
        try{
            while(running) {
                socket = mSocket.accept()
                if(socket != null) {
                    val inputStream = socket.inputStream
                    val os = socket.outputStream
                    var read:Int
                    val byteArray = ByteArray(1024) { 0}
                    while(socket.isConnected) {
                        read = inputStream.read(byteArray)
                        if(read == -1) break
                        val byte = ByteArray(read){ byteArray[it] }
                        val message = Message.obtain()
                        message.obj = String(byte)
                        mHandler.sendMessage(message)
                        //Thread.sleep(2000)
                        break
                    }
                    os.close()
                    socket.close()
                }
            }
        } catch(e:IOException) {
            e.printStackTrace()
        }
    }
2)socket客户端
客户端对应的接口是createRfcommSocketToServiceRecord:
    private void connectBleDeviceSocket(final BluetoothDevice device, final String content) {
        if(sSocket != null) {
            try {
                sSocket.close();
            } catch (IOException e) {
                e.printStackTrace();
            }
            sSocket = null;
        }
        OutputStream out = null;
        try {
            sSocket = device.createRfcommSocketToServiceRecord(Constants.MY_SERVICE_UUID);
            if(sSocket != null) {
                sSocket.connect();
                out = sSocket.getOutputStream();
                out.write(content.getBytes());
                Thread.sleep(100);
            }
        } catch (IOException | InterruptedException e) {
            Log.e(TAG,"stack:", e);
        } finally {
            if(out != null) {
                try {
                    out.close();
                } catch (IOException e) {
                    e.printStackTrace();
                }
            }
            if(sSocket != null) {
                try {
                    sSocket.close();
                } catch (IOException e) {
                    e.printStackTrace();
                }
            }
        }
    }
至于device可以直接通过mac获取:
BluetoothDevice device = mBleAdapter.getRemoteDevice(mac);
Android手机蓝牙通信socket方式最需要注意的是,SERVICE_UUID是固定的,必须是如下的定义:
public static final UUID MY_SERVICE_UUID = UUID.fromString("00001101-0000-1000-8000-00805F9B34FB");
至于socket方式的读写,跟一般网络通信没啥区别,这里就不描叙了。
2. Gatt方式
蓝牙Gatt方式相对来说比较复杂,稍微不按着它的流程来可能就行不通,这里慢慢看来。
1)Gatt服务端
首先我们需要启动一个Gattserver,同时我们还需要把用BluetoothLeAdvertiser它广播出去,这样客户端才能搜到。
Gattserver的定义:
private fun setupServer() {
        val gattService = BluetoothGattService(Constants.BLE_SERVICE_UUID, BluetoothGattService.SERVICE_TYPE_PRIMARY)
        val characteristicRead = BluetoothGattCharacteristic(Constants.BLE_READ_UUID, BluetoothGattCharacteristic.PROPERTY_READ, BluetoothGattCharacteristic.PERMISSION_READ)
        val descriptor = BluetoothGattDescriptor(Constants.BLE_DESC_UUID, BluetoothGattCharacteristic.PERMISSION_WRITE)
        characteristicRead.addDescriptor(descriptor)
        gattService.addCharacteristic(characteristicRead)
        val characteristicWrite = BluetoothGattCharacteristic(Constants.BLE_WRITE_UUID, BluetoothGattCharacteristic.PROPERTY_WRITE or
                BluetoothGattCharacteristic.PROPERTY_READ or BluetoothGattCharacteristic.PROPERTY_NOTIFY,
                BluetoothGattCharacteristic.PERMISSION_WRITE)
        gattService.addCharacteristic(characteristicWrite)
        Log.d("wenpd", "startGattServer:stagattServicetus=$gattService")
        mGattServer.addService(gattService)
    }
然后是广播的定义:
private fun startAdvertising() {
        val settings = AdvertiseSettings.Builder()
            .setAdvertiseMode(AdvertiseSettings.ADVERTISE_MODE_BALANCED)
            .setTimeout(0)
            .setConnectable(true)
            .setTxPowerLevel(AdvertiseSettings.ADVERTISE_TX_POWER_LOW)
            .build()
        val advertiseData = AdvertiseData.Builder()
            .setIncludeDeviceName(true)
            .addServiceUuid(ParcelUuid(Constants.BLE_SERVICE_UUID))
            .build()
        /*val scanResponseData = AdvertiseData.Builder()
            .addServiceUuid(ParcelUuid(Constants.BLE_SERVICE_UUID))
            .setIncludeTxPowerLevel(true)
            .build()*/
        mAdvertiseCallback = object : AdvertiseCallback() {
            override fun onStartSuccess(settingsInEffect: AdvertiseSettings) {
                Log.d("wenpd", "BLE advertisement added successfully")
            }
            override fun onStartFailure(errorCode: Int) {
                Log.e("wenpd", "Failed to add BLE advertisement, reason: $errorCode")
            }
        }
        mBluetoothLeAdvertiser.startAdvertising(settings, advertiseData, mAdvertiseCallback)
    }
我们在OnResume中启动server与广播:
    override fun onResume() {
        super.onResume()
        if (mBleAdapter == null || !(mBleAdapter as BluetoothAdapter).isEnabled) {
            val enableBtIntent = Intent(BluetoothAdapter.ACTION_REQUEST_ENABLE)
            startActivity(enableBtIntent)
            finish()
            return
        }
        if (!packageManager.hasSystemFeature(PackageManager.FEATURE_BLUETOOTH_LE)) {
            finish()
            return
        }
        if(Constants.BLE_CONNECT_MODE == 1) {
            if (!(mBleAdapter as BluetoothAdapter).isMultipleAdvertisementSupported) {
                finish()
                return
            }
            mBluetoothLeAdvertiser = (mBleAdapter as BluetoothAdapter).bluetoothLeAdvertiser
            mGattServer = mBleManager?.openGattServer(this, gattServerCallback) as BluetoothGattServer
            setupServer()
            startAdvertising()
        }
    }
我们再看这里openGattServer(this, gattServerCallback) as BluetoothGattServer,gattServerCallback的定义:
    private val gattServerCallback = object:BluetoothGattServerCallback() {
        override fun onConnectionStateChange(device: BluetoothDevice?, status: Int, newState: Int) {
            super.onConnectionStateChange(device, status, newState)
            Log.d("wenpd", "onConnection:status=$status,newState=$newState")
            if (newState == BluetoothProfile.STATE_CONNECTED) {
                mDevices.add(device!!)
            } else if (newState == BluetoothProfile.STATE_DISCONNECTED) {
                mDevices.remove(device)
            }
        }
        override fun onCharacteristicWriteRequest(device: BluetoothDevice?, requestId: Int, characteristic: BluetoothGattCharacteristic?, preparedWrite: Boolean, responseNeeded: Boolean, offset: Int, value: ByteArray?) {
            super.onCharacteristicWriteRequest(device, requestId, characteristic, preparedWrite, responseNeeded, offset, value)
            Log.d("wenpd", "onCharacteristicWrite:characteristic=${characteristic?.uuid},value=$value")
            if (characteristic!!.uuid == Constants.BLE_WRITE_UUID) {
                setReceivedData(String(value!!, StandardCharsets.UTF_8));
                mGattServer.sendResponse(device, requestId, BluetoothGatt.GATT_SUCCESS, 0, null)
                val length = value!!.size
                val reversed = ByteArray(length)
                for (i in 0 until length) {
                    reversed[i] = value[length - (i + 1)]
                }
                characteristic.value = reversed
                for (dev in mDevices) {
                    mGattServer.notifyCharacteristicChanged(dev, characteristic, false)
                }
            }
        }
客户端写数据会调用onCharacteristicWriteRequest,而onCharacteristicWriteRequest中,通过 mGattServer.notifyCharacteristicChanged(dev, characteristic, false)将信息反馈给客户端。
到此服务端就设置好了,注意:
 val BLE_SERVICE_UUID = UUID.fromString("00001802-0000-1000-8000-00805f9b34fb")
 val BLE_WRITE_UUID = UUID.fromString("00002a02-0000-1000-8000-00805f9b34fb")
这两个ID客户端是需要知道的。
2)Gatt客户端
Gatt客户端不能直接通过mac来获取device然后通信,我开始这样做,然后就出现如下困惑:
https://stackoverflow.com/questions/60859756/how-to-communicate-with-each-other-in-two-android-phones-through-bluetoothgatt
郁闷了好久。
Gatt客户端需要通过server UUID来搜索设备。
看搜索代码:
    private void startScan() {
        if (!hasPermissions() || mScanning) {
            return;
        }
        Log.d(TAG, "startScan");
        List filters = new ArrayList();
        ScanFilter scanFilter = new ScanFilter.Builder()
                .setServiceUuid(new ParcelUuid(Constants.SERVICE_UUID))
                .build();
        filters.add(scanFilter);
        ScanSettings settings = new ScanSettings.Builder()
                .setScanMode(ScanSettings.SCAN_MODE_LOW_POWER)
                .build();
        /*mScanResults = new HashMap();
        mScanCallback = new BtleScanCallback(mScanResults);*/
        mScanCallback = new BtleScanCallback();
        mBluetoothLeScanner = mBluetoothAdapter.getBluetoothLeScanner();
        mBluetoothLeScanner.startScan(filters, settings, mScanCallback);
        mScanning = true;
        mHandler = new Handler();
        mHandler.postDelayed(new Runnable() {
            @Override
            public void run() {
                stopScan();
            }
        }, SCAN_PERIOD);
    }
注意,这里的Constants.SERVICE_UUID,与服务端是一致的。
搜到设备后就可以直接连接了:
private class BtleScanCallback extends ScanCallback {
        /*private HashMap mScanResults;
        private BtleScanCallback(HashMap scanResults) {
            mScanResults = scanResults;
            mScanResults.clear();
        }*/
        @Override
        public void onScanResult(int callbackType, ScanResult result) {
            addScanResult(result);
        }
        @Override
        public void onBatchScanResults(List results) {
            for (ScanResult result : results) {
                addScanResult(result);
            }
        }
        @Override
        public void onScanFailed(int errorCode) {
            Log.e(TAG, "BLE Scan Failed with code " + errorCode);
        }
        private void addScanResult(ScanResult result) {
            Log.d(TAG, "addScanResult:" + result);
            /*BluetoothDevice device = result.getDevice();
            String deviceAddress = device.getAddress();
            mScanResults.put(deviceAddress, device);*/
            stopScan();
            BluetoothDevice bluetoothDevice = result.getDevice();
            connectDevice(bluetoothDevice);
        }
    }
    private void connectDevice(BluetoothDevice device) {
        GattClientCallback gattClientCallback = new GattClientCallback();
        mGatt = device.connectGatt(this, false, gattClientCallback);
    }
这里最重要就是BluetoothGattCallback了:
    private class GattClientCallback extends BluetoothGattCallback {
        @Override
        public void onConnectionStateChange(BluetoothGatt gatt, int status, int newState) {
            super.onConnectionStateChange(gatt, status, newState);
            if (status == BluetoothGatt.GATT_FAILURE) {
                disconnectGattServer();
                return;
            } else if (status != BluetoothGatt.GATT_SUCCESS) {
                disconnectGattServer();
                return;
            }
            if (newState == BluetoothProfile.STATE_CONNECTED) {
                mConnected = true;
                gatt.discoverServices();
            } else if (newState == BluetoothProfile.STATE_DISCONNECTED) {
                disconnectGattServer();
            }
        }
        @Override
        public void onServicesDiscovered(BluetoothGatt gatt, int status) {
            super.onServicesDiscovered(gatt, status);
            Log.d(TAG, "onServicesDiscovered status:" + status);
            if (status != BluetoothGatt.GATT_SUCCESS) {
                return;
            }
            BluetoothGattService service = gatt.getService(Constants.SERVICE_UUID);
            BluetoothGattCharacteristic characteristic = service.getCharacteristic(Constants.CHARACTERISTIC_UUID);
            characteristic.setWriteType(BluetoothGattCharacteristic.WRITE_TYPE_DEFAULT);
            mInitialized = gatt.setCharacteristicNotification(characteristic, true);
        }
        @Override
        public void onCharacteristicChanged(BluetoothGatt gatt, BluetoothGattCharacteristic characteristic) {
            super.onCharacteristicChanged(gatt, characteristic);
            byte[] messageBytes = characteristic.getValue();
            /*for(int i = 0, j = messageBytes.length -1; i < j; ++i, --j) {
                byte temp = messageBytes[i];
                messageBytes[i] = messageBytes[j];
                messageBytes[j] = temp;
            }*/
            String messageString = new String(messageBytes, StandardCharsets.UTF_8);
            Log.d(TAG,"Received message: " + messageString);
            setReceivedData(messageString);
        }
    }
重点需要注意onServicesDiscovered中对service和character的设置代码:
BluetoothGattService service = gatt.getService(Constants.SERVICE_UUID);
            BluetoothGattCharacteristic characteristic = service.getCharacteristic(Constants.CHARACTERISTIC_UUID);
            characteristic.setWriteType(BluetoothGattCharacteristic.WRITE_TYPE_DEFAULT);
            mInitialized = gatt.setCharacteristicNotification(characteristic, true);
只有这里设置好了,客户端才能向服务器发送数据。onCharacteristicChanged是收到来自服务端的反馈数据。
这一切配置好后,发送数据就简单了:
private void sendMessage() {
        if (!mConnected || !mInitialized) {
            return;
        }
        EditText messageEditText = findViewById(R.id.data);
        BluetoothGattService service = mGatt.getService(Constants.SERVICE_UUID);
        BluetoothGattCharacteristic characteristic = service.getCharacteristic(Constants.CHARACTERISTIC_UUID);
        String message = messageEditText.getText().toString();
        if(message.isEmpty()) {
            return;
        }
        messageEditText.setText("");
        byte[] messageBytes = message.getBytes(StandardCharsets.UTF_8);
        characteristic.setValue(messageBytes);
        boolean success = mGatt.writeCharacteristic(characteristic);
        Log.d(TAG, "send message success:" + success);
    }
注意蓝牙每次发送最大字节数为20,超过20,网上去搜别人怎么做的。
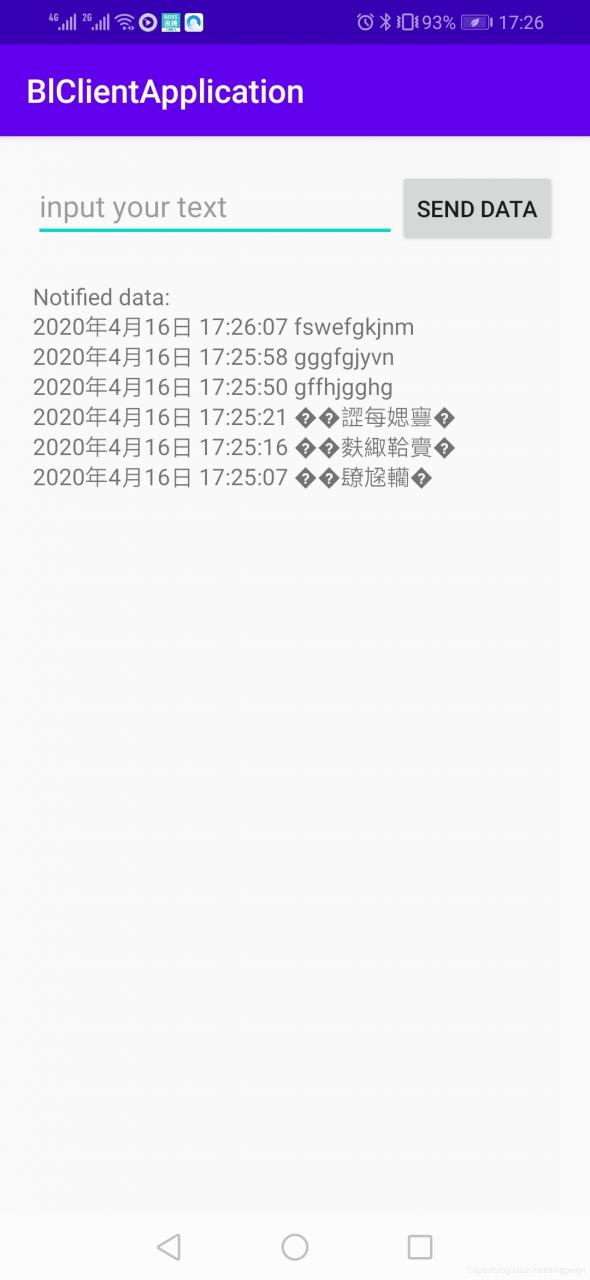
看结果:

其他部分代码,可参考:
https://github.com/dingpwen/bl_communication
GATT 使用的详细流程可参考网址:
https://nerdranchighq.wpengine.com/blog/bluetooth-low-energy-on-android-part-1/
https://nerdranchighq.wpengine.com/blog/bluetooth-low-energy-on-android-part-2/
作者:dingpwen