舵机跟着太阳转
接线:
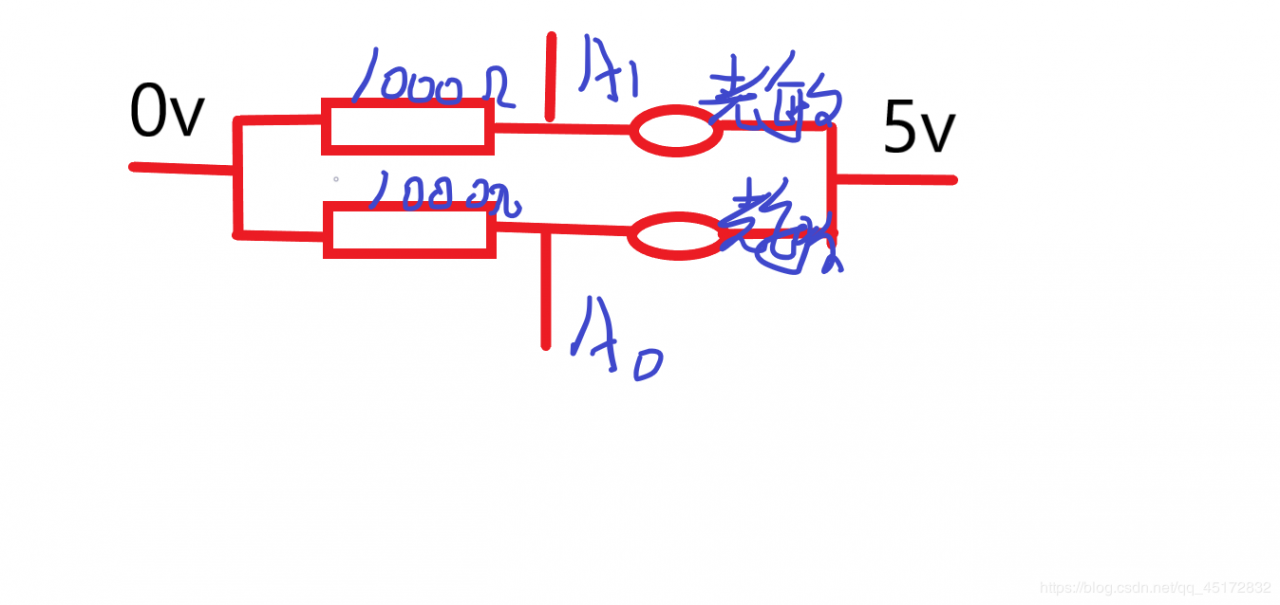
首先两个光敏电阻与电阻串联后并联
给并联电路供5v直流电
arduino A0\A1分别连接两个光敏电阻两端电压(其实是一端)
舵机红线——3.3v
舵机黑线——GND
舵机黄线——信号输入(9号引脚)
代码:
#include
//ADC测电压引脚定义
int L_ADC = A0;
int R_ADC = A1;
//舵机变量
Servo myservo;  // 定义Servo对象来控制
int pos = 0;    // 角度存储变量
void setup() {
  // put your setup code here, to run once:
  Serial.begin(9600);
  //analogReference(INTERNAL); //调用板载1.1V基准源
  analogReference(DEFAULT); //调用当前工作电压基准源
  myservo.attach(9);  // 舵机控制线连接数字9
  pos=90;
  myservo.write(pos); // 舵机角度写入
}
void loop() {
   while(1)
  {
  // put your main code here, to run repeatedly:
  int V_L = analogRead(L_ADC);    //读取A0口的电压值
  int V_R = analogRead(R_ADC);    //读取A0口的电压值
  //float temp = (1.1 * n * 100.0) / 1024;//初始化时,必须指明电压基准源:analogReference(INTERNAL); //调用板载1.1V基准源
  float L_temp = (5.0 * V_L * 100.0) / 1024;
  float R_temp = (5.0 * V_R * 100.0) / 1024;
  /*
  Serial.print("L_temp=");
  Serial.print(L_temp);
  Serial.print("      R_temp=");
  Serial.println(R_temp);
*/
  if(L_temp-R_temp>10)
  {
    /*Serial.println("电机右转");
    Serial.print("L_temp=");
    Serial.print(L_temp);
    Serial.print("      R_temp=");
    Serial.println(R_temp);
  */
    if( pos>10)
    {
    pos=pos-1;
    // in steps of 1 degree
    myservo.write(pos); // 舵机角度写入
    }
  }
  if(R_temp-L_temp>10)
  {
    /*Serial.println("电机左转");
    Serial.print("L_temp=");
    Serial.print(L_temp);
    Serial.print("      R_temp=");
    Serial.println(R_temp);
    */
    if( pos<180)
    {
    pos=pos+1;
    // in steps of 1 degree
    myservo.write(pos); // 舵机角度写入
    }
  }
  delay(10);
  }
}
作者:James Bin