Springboot接收 Form 表单数据的示例详解
一、接收 Form 表单数据
1,基本的接收方法
2,参数没有传递的情况
3,使用 map 来接收参数
4,接收一个数组
5,使用对象来接收参数
6,使用对象接收时指定参数前缀
二、接收字符串文本数据
三、接收 JSON 数据
1,使用 Map 来接收数据
2,使用 Bean 对象来接收数据
一、接收 Form 表单数据 1,基本的接收方法(1)下面样例Controller接收form-data格式的POST数据:
import org.springframework.web.bind.annotation.PostMapping;
import org.springframework.web.bind.annotation.RequestParam;
import org.springframework.web.bind.annotation.RestController;
@RestController
public class HelloController {
    @PostMapping("/postHello1")
    public String postHello1(@RequestParam("name") String name,
                        @RequestParam("age") Integer age) {
        return "name:" + name + "\nage:" + age;
    }
}
(2)下面是一个简单的测试样例:

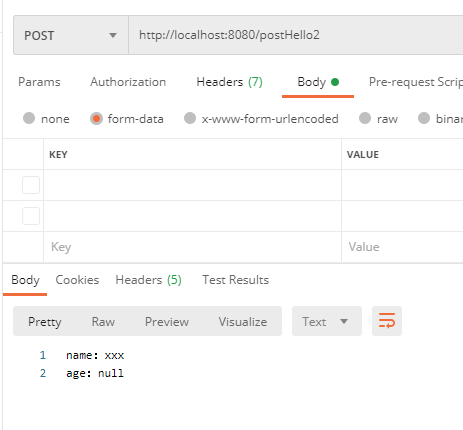
(1)如果没有传递参数Controller将会报错,这个同样有如下两种解决办法:
使用required = false标注参数是非必须的。
使用defaultValue给参数指定个默认值。
import org.springframework.web.bind.annotation.PostMapping;
import org.springframework.web.bind.annotation.RequestParam;
import org.springframework.web.bind.annotation.RestController;
@RestController
public class HelloController {
    @PostMapping("/postHello2")
    public String postHello2(@RequestParam(name = "name", defaultValue = "xxx") String name,
                        @RequestParam(name = "age", required = false) Integer age) {
        return "name:" + name + "\nage:" + age;
    }
}
(1)Controller还可以直接使用map来接收所有的请求参数:
import org.springframework.web.bind.annotation.PostMapping;
import org.springframework.web.bind.annotation.RequestParam;
import org.springframework.web.bind.annotation.RestController;
@RestController
public class HelloController {
    @PostMapping("/postHello2")
    public String postHello2(@RequestParam(name = "name", defaultValue = "xxx") String name,
                        @RequestParam(name = "age", required = false) Integer age) {
        return "name:" + name + "\nage:" + age;
    }
}
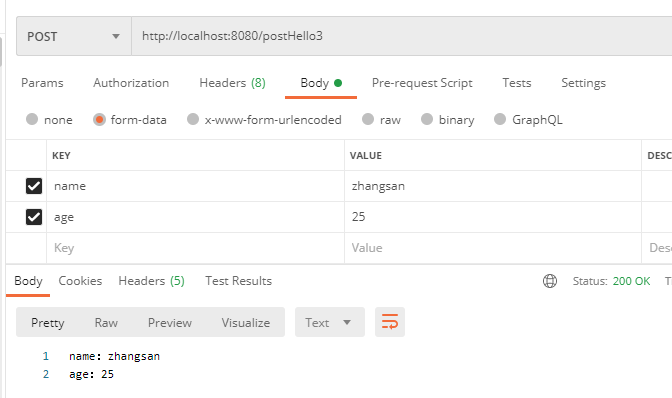
(2)下面是一个简单的测试样例:
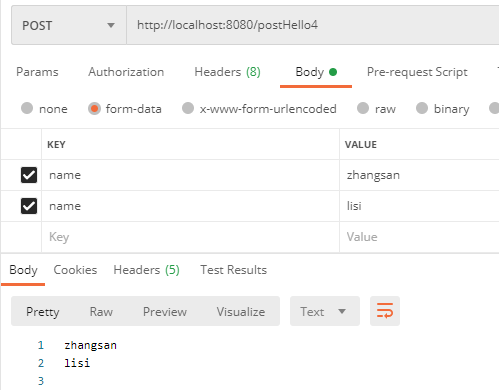
(1)表单中有多个同名参数,Controller这边可以定义一个数据进行接收:
import org.springframework.web.bind.annotation.PostMapping;
import org.springframework.web.bind.annotation.RequestParam;
import org.springframework.web.bind.annotation.RestController;
import java.util.Map;
@RestController
public class HelloController {
    @PostMapping("/postHello4")
    public String postHello4(@RequestParam("name") String[] names) {
        String result = "";
        for(String name:names){
            result += name + "\n";
        }
        return result;
    }
}
(2)下面是一个简单的测试样例:
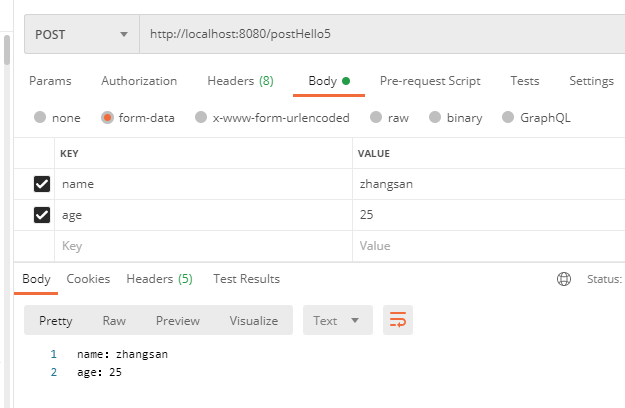
1)如果一个post请求的参数太多,我们构造一个对象来简化参数的接收方式:
import org.springframework.web.bind.annotation.PostMapping;
import org.springframework.web.bind.annotation.RestController;
@RestController
public class HelloController {
    @PostMapping("/postHello5")
    public String postHello5(User user) {
        return "name:" + user.getName() + "\nage:" + user.getAge();
    }
}
(2)User类的定义如下,到时可以直接将多个参数通过getter、setter方法注入到对象中去:
public class User {
    private String name;
    private Integer age;
    public String getName() {
        return name;
    }
    public void setName(String name) {
        this.name = name;
    }
    public Integer getAge() {
        return age;
    }
    public void setAge(Integer age) {
        this.age = age;
    }
}
(3)下面是一个简单的测试样例:
(4)如果传递的参数有前缀,且前缀与接收实体类的名称相同,那么参数也是可以正常传递的:

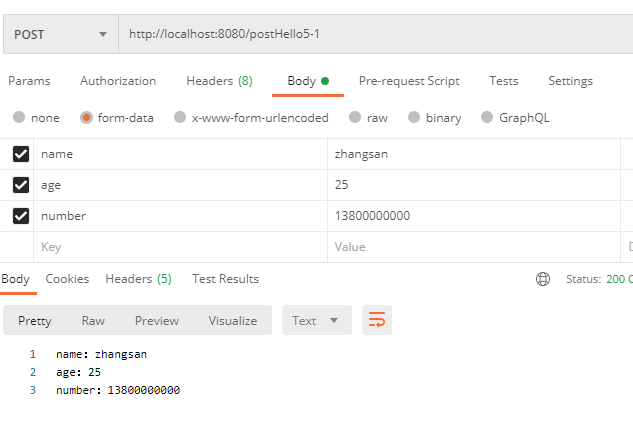
(5)如果一个 post 请求的参数分属不同的对象,也可以使用多个对象来接收参数:
import org.springframework.web.bind.annotation.PostMapping;
import org.springframework.web.bind.annotation.RestController;
@RestController
public class HelloController {
    @PostMapping("/postHello5-1")
    public String hello(User user, Phone phone) {
        return "name:" + user.getName() + "\nage:" + user.getAge()
                + "\nnumber:" + phone.getNumber();
    }
}
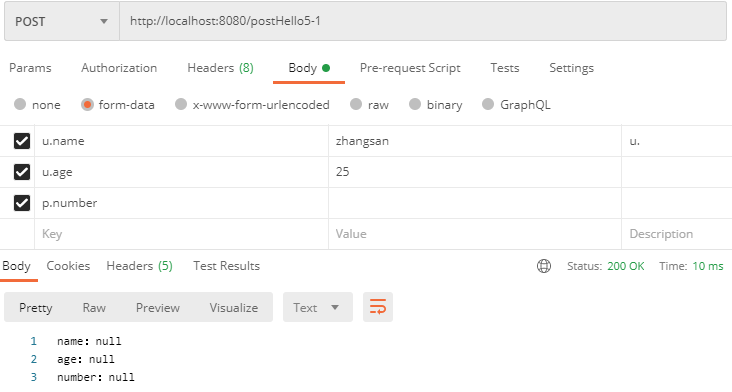
(1)如果传递的参数有前缀,且前缀与接收实体类的名称不同相,那么参数无法正常传递:
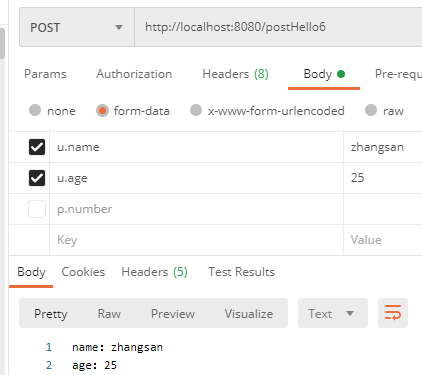
(2)我们可以结合@InitBinder解决这个问题,通过参数预处理来指定使用的前缀为 u.
除了在 Controller 里单独定义预处理方法外,我们还可以通过@ControllerAdvice结合@InitBinder来定义全局的参数预处理方法,方便各个Controller使用。具体做法参考我之前的文章:
SpringBoot - @ControllerAdvice的使用详解3(请求参数预处理 @InitBinder)
import org.springframework.web.bind.WebDataBinder;
import org.springframework.web.bind.annotation.*;
@RestController
public class HelloController {
    @PostMapping("/postHello6")
    public String postHello6(@ModelAttribute("u") User user) {
        return "name:" + user.getName() + "\nage:" + user.getAge();
    }
    @InitBinder("u")
    private void initBinder(WebDataBinder binder) {
        binder.setFieldDefaultPrefix("u.");
    }
}
(3)重启程序再次发送请求,可以看到参数已经成功接收了:
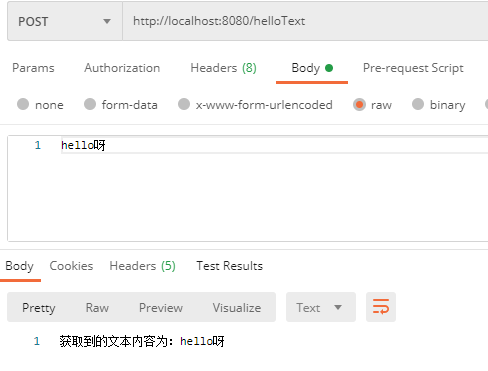
(1)如果传递过来的是Text文本,我们可以通过HttpServletRequest获取输入流从而读取文本内容。
import org.springframework.web.bind.annotation.PostMapping;
import org.springframework.web.bind.annotation.RestController;
import javax.servlet.ServletInputStream;
import javax.servlet.http.HttpServletRequest;
import java.io.IOException;
@RestController
public class HelloController {
    @PostMapping("/helloText")
    public String hello(HttpServletRequest request) {
        ServletInputStream is = null;
        try {
            is = request.getInputStream();
            StringBuilder sb = new StringBuilder();
            byte[] buf = new byte[1024];
            int len = 0;
            while ((len = is.read(buf)) != -1) {
                sb.append(new String(buf, 0, len));
            }
            System.out.println(sb.toString());
            return "获取到的文本内容为:" + sb.toString();
        } catch (IOException e) {
            e.printStackTrace();
        } finally {
            try {
                if (is != null) {
                    is.close();
                }
            } catch (IOException e) {
                e.printStackTrace();
            }
        }
        return null;
    }
}
(1)如果把json作为参数传递,我们可以使用@requestbody接收参数,将数据转换Map:
import org.springframework.web.bind.annotation.PostMapping;
import org.springframework.web.bind.annotation.RequestBody;
import org.springframework.web.bind.annotation.RestController;
@RestController
public class HelloController {
    @PostMapping("/helloBean")
    public String hello(@RequestBody User user){
        return user.getName() + " " + user.getAge();
    }
}
(2)下面是一个简单的测试样例:

(1)如果把json作为参数传递,我们可以使用@requestbody接收参数,将数据直接转换成对象:
import org.springframework.web.bind.annotation.PostMapping;
import org.springframework.web.bind.annotation.RequestBody;
import org.springframework.web.bind.annotation.RestController;
@RestController
public class HelloController {
    @PostMapping("/helloBean")
    public String hello(@RequestBody User user){
        return user.getName() + " " + user.getAge();
    }
}
(2)下面是一个简单的测试样例:

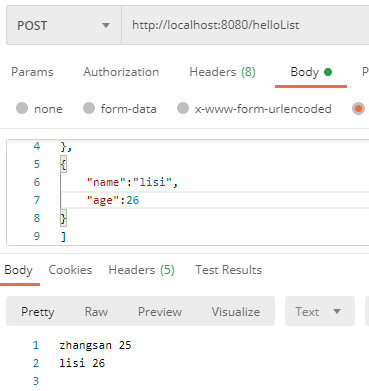
(4)如果传递的JOSN数据是一个数组也是可以的,Controller做如下修改:
import org.springframework.web.bind.annotation.PostMapping;
import org.springframework.web.bind.annotation.RequestBody;
import org.springframework.web.bind.annotation.RestController;
import java.util.List;
@RestController
public class HelloController {
    @PostMapping("/helloList")
    public String helloList(@RequestBody List<User> users){
        String result = "";
        for(User user:users){
            result += user.getName() + " " + user.getAge() + "\n";
        }
        return result;
    }
}
到此这篇关于Springboot接收 Form 表单数据的文章就介绍到这了,更多相关Springboot接收表单数据内容请搜索软件开发网以前的文章或继续浏览下面的相关文章希望大家以后多多支持软件开发网!