spring IOC容器的Bean管理XML自动装配过程
目录
什么是自动装配?
自动装配过程
1. 创建 2 个类
2. 配置文件
3. 测试方法
什么是自动装配?在之前的内容中,每给属性注入值都要一个个的用 property 标签来完成,比如:
<bean id="book" class="com.pingguo.spring5.collectiontype.Book" scope="prototype">
        <property name="list" ref="bookList"></property>
    </bean>
这就是手动装配。
而自动装配中,spring 会根据指定装配规则(属性名称或者属性类型) 来自动的将匹配的属性值进行注入。
自动装配过程 1. 创建 2 个类分别是部门类 Department 和员工类 Employee 。
package com.pingguo.spring5.autowire;
public class Department {
    @Override
    public String toString() {
        return "Department{}";
    }
}
员工类有个 部门的属性,表示员工所属的一个部门。其他方法是为了后续方便演示输出。
package com.pingguo.spring5.autowire;
public class Employee {
    private Department department;
    public void setDepartment(Department department) {
        this.department = department;
    }
    @Override
    public String toString() {
        return "Employee{" +
                "department=" + department +
                '}';
    }
    public void test() {
        System.out.println(department);
    }
}
2. 配置文件
<?xml version="1.0" encoding="UTF-8"?>
<beans xmlns="http://www.springframework.org/schema/beans"
       xmlns:xsi="http://www.w3.org/2001/XMLSchema-instance"
       xsi:schemaLocation="http://www.springframework.org/schema/beans http://www.springframework.org/schema/beans/spring-beans.xsd">
    <bean id="employee" class="com.pingguo.spring5.autowire.Employee">
        <property name="department" ref="department"></property>
    </bean>
    <bean id="department" class="com.pingguo.spring5.autowire.Department"></bean>
</beans>
3. 测试方法
@Test
    public void test5() {
        ApplicationContext context =
                new ClassPathXmlApplicationContext("bean5.xml");
        Employee employee = context.getBean("employee", Employee.class);
        System.out.println(employee);
    }
运行结果:
Employee{department=Department{}}
Process finished with exit code 0
ok,到这里,其实就是手动装配的过程。
实现自动装配,在配置文件里,通过 bean 标签里的属性 autowire 来配置:
autowire="byName":根据属性名称自动注入。
autowire="byType":根据属性类型自动注入。
1)byName 演示
注入值的bean的 id 值和类属性名称一致,比如:
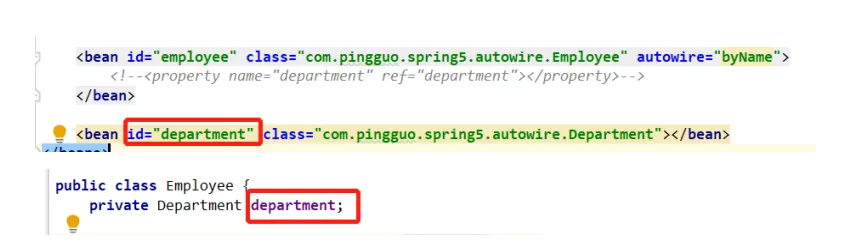
修改配置文件,加上 autowire="byName",然后注释掉 property。
<bean id="employee" class="com.pingguo.spring5.autowire.Employee" autowire="byName">
        <!--<property name="department" ref="department"></property>-->
    </bean>
    <bean id="department" class="com.pingguo.spring5.autowire.Department"></bean>
执行测试函数:
Employee{department=Department{}}
Process finished with exit code 0
跟使用 property 手动装配结果一致。
2)byType 演示
要注入值的 bean 的类型与 属性里的一致,比如:
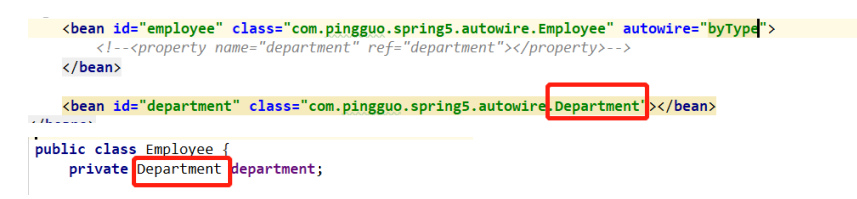
现在继续修改配置文件,加上 autowire="byType",然后注释掉 property。
<bean id="employee" class="com.pingguo.spring5.autowire.Employee" autowire="byType">
        <!--<property name="department" ref="department"></property>-->
    </bean>
    <bean id="department" class="com.pingguo.spring5.autowire.Department"></bean>
再次执行测试:
Employee{department=Department{}}
Process finished with exit code 0
跟使用 property 手动装配结果一致。
不过,用 xml 方式使用自动装配实际中是很少的,一般是以注解的方式,后续会学习到。
以上就是spring IOC容器的Bean管理XML自动装配过程的详细内容,更多关于spring IOC Bean管理XML装配的资料请关注软件开发网其它相关文章!