使用Gitee自动化部署python脚本的详细过程
目录
一、前期准备
1.1 安装环境
二、python代码
2.1 源码
2.2 注意事项
一、前期准备 1.1 安装环境1、安装python3
2、打开命令行安装selenium
pip install selenium
二、python代码
2.1 源码
#!/usr/bin/python
# -*- coding: utf-8 -*-
import time
from selenium import webdriver
from selenium.webdriver.common.alert import Alert
# 模拟浏览器打开到gitee登录界面
driver = webdriver.Chrome()
driver.get('https://gitee.com/login')
# 将窗口最大化
driver.maximize_window()
time.sleep(2)
# 输入账号--通过html的id属性定位输入位置--改为你的账号
user_login = driver.find_element_by_id('user_login')
user_login.send_keys("此处改为你的账号")
# 输入密码--通过html的id属性定位输入位置--改为你的密码
driver.find_element_by_id('user_password').send_keys("此处改为你的密码")
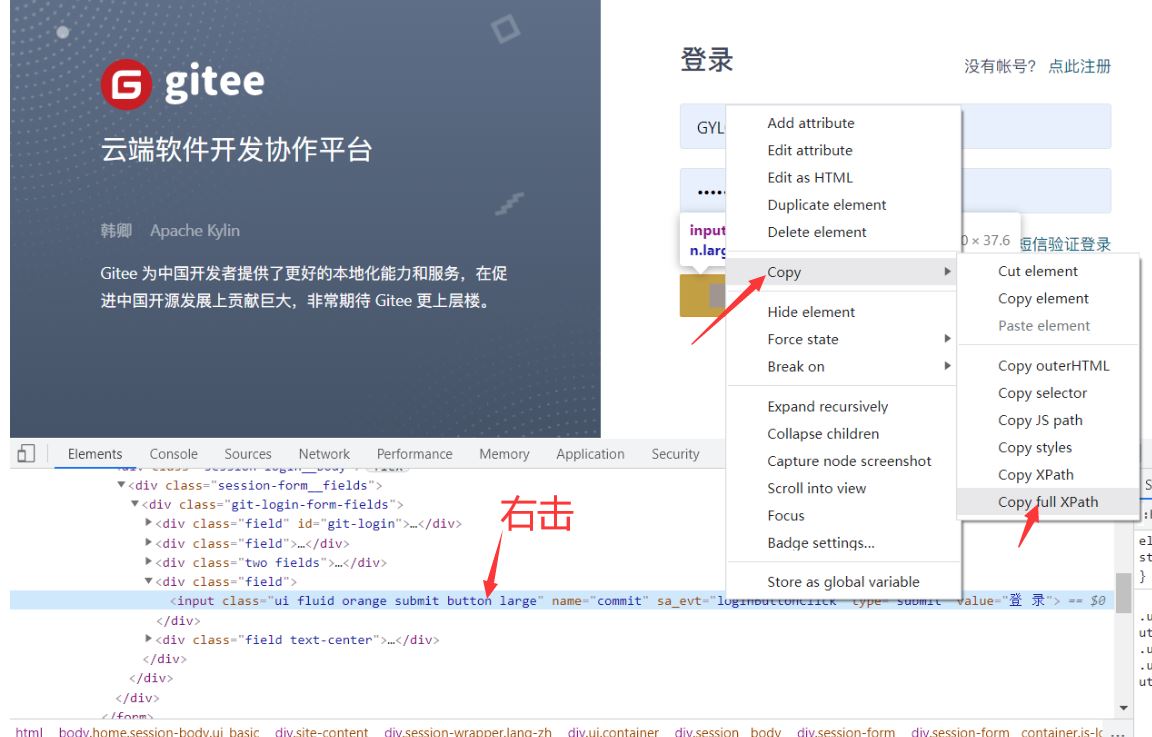
# 点击登录按钮--通过xpath确定点击位置
driver.find_element_by_xpath(
    '/html/body/div[2]/div[2]/div[1]/div/div[2]/div/form[1]/div[2]/div/div/div[4]/input').click()
time.sleep(2)
# 切换到gitee pages界面--改为you_gitee_id
driver.get('https://gitee.com/此处改为you_gitee_id/此处改为you_gitee_id/pages')
# 点击更新按钮--通过xpath确定点击位置
driver.find_element_by_xpath('/html/body/div[3]/div[2]/div/div[2]/div[1]/form/div[7]').click()
# 确认更新提示框--这个函数的作用是确认提示框
Alert(driver).accept()
# 等待5秒更新
time.sleep(5)
# 这个print其实没事什么用,如果真的要测试脚本是否运行成功,可以用try来抛出异常
print("成功")
# 脚本运行成功,退出浏览器
driver.quit()
# 写上更新日志
# 我这里是写在D盘,可以改为自己喜欢的目录
fp = open("D:\log.txt", "a+")
now_time = time.strftime("%Y-%m-%d %H:%M:%S", time.localtime())
fp.write("auto update time:{0}\n".format(now_time))
fp.close()
2.2 注意事项
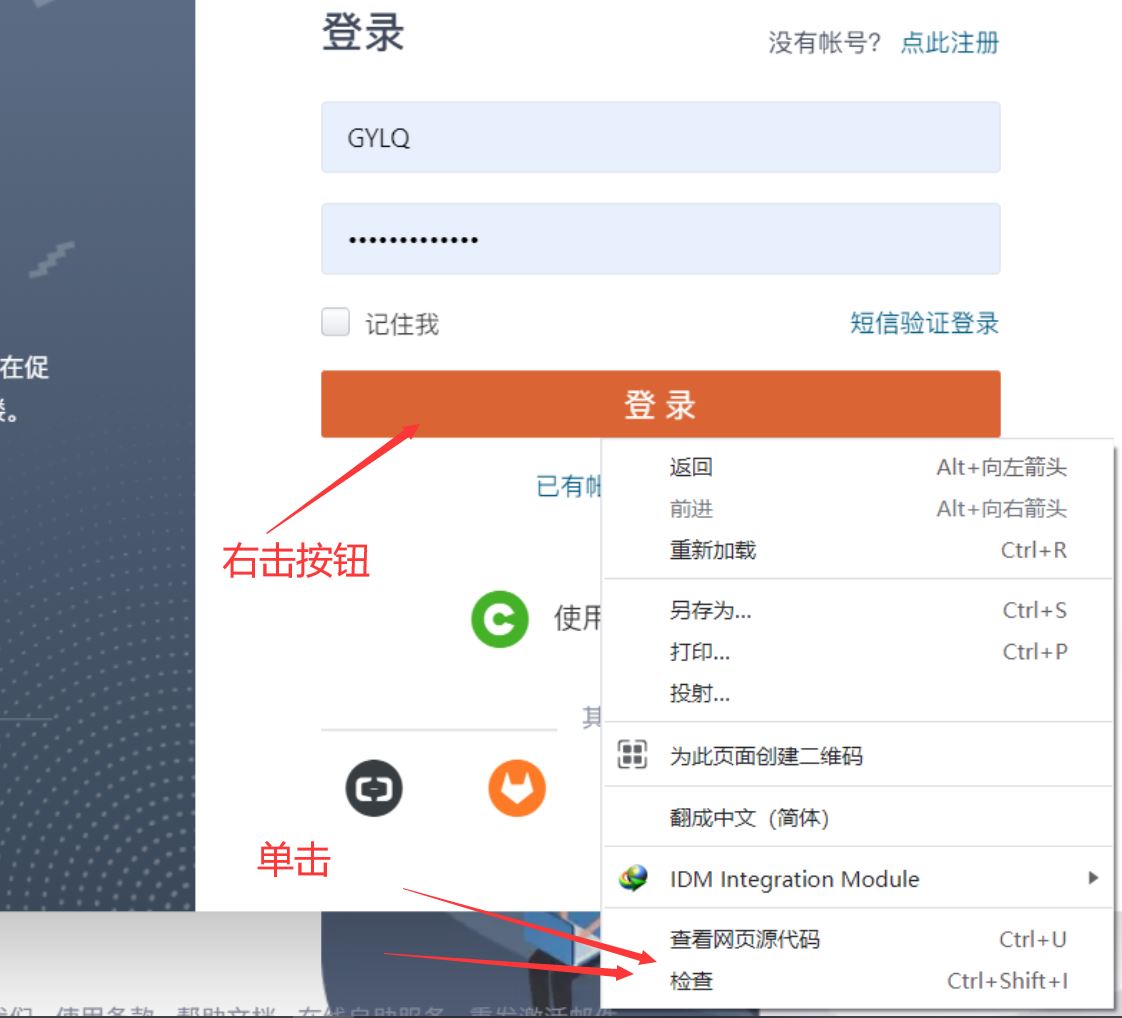
xpath可以通过在chrom的网页里面按F12来查看
演示过程


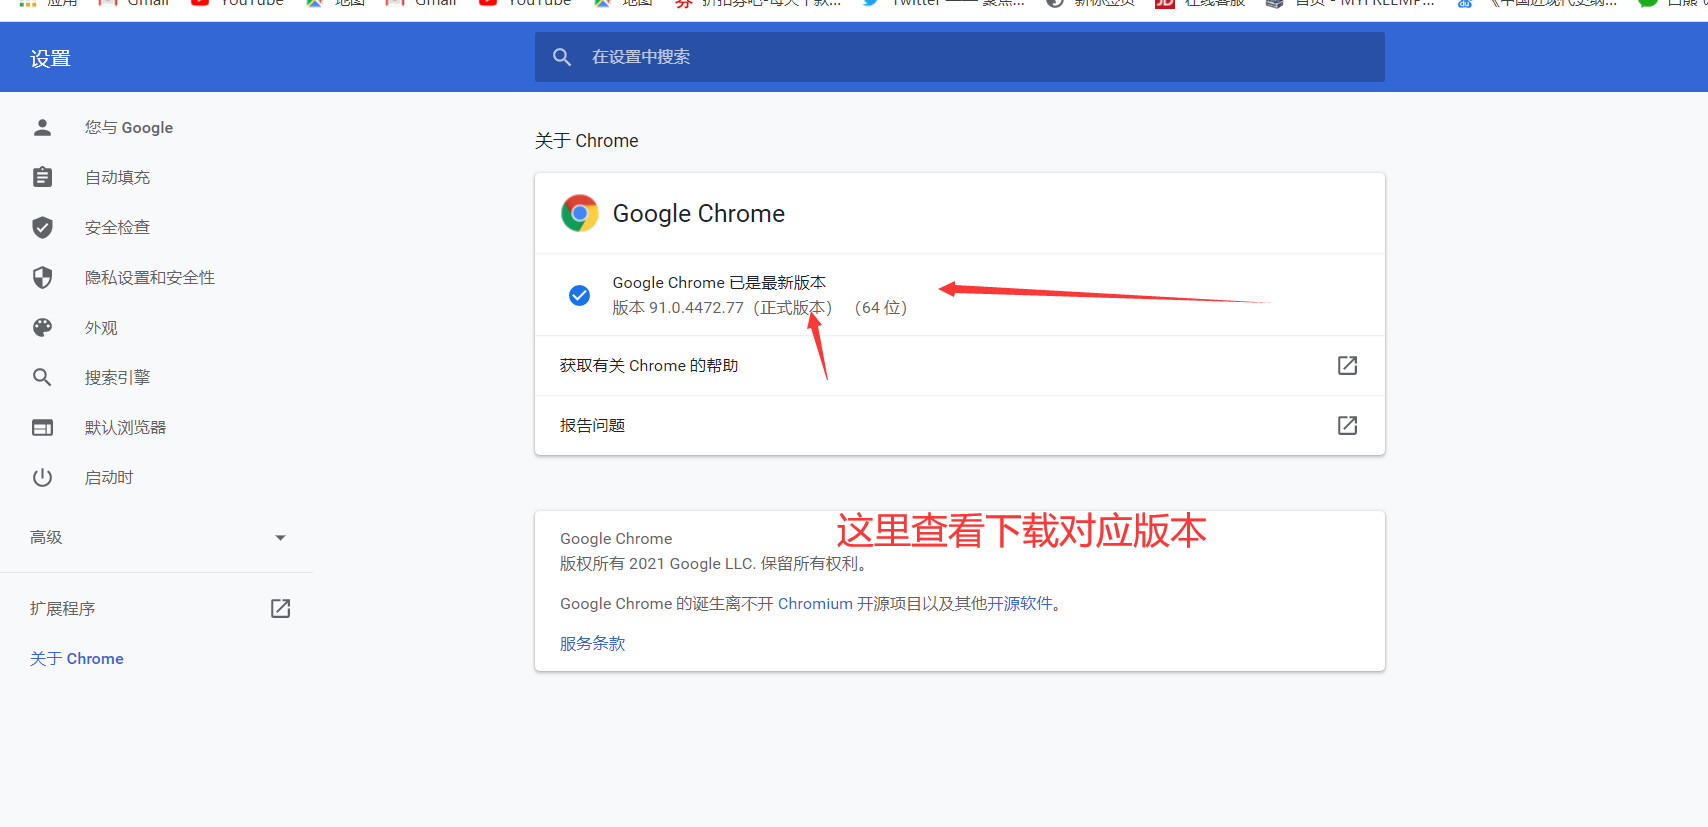
需要将chromeDrive可执行驱动丢到你python根目录(跟python.exe放在一起)
下载地址
http://chromedriver.storage.googleapis.com/index.html

以上就是使用Gitee自动化部署python脚本的详细过程的详细内容,更多关于Gitee自动部署python的资料请关注软件开发网其它相关文章!