linux(centos8.1)下使用qt5.12.7 no-gui测试protobuf3.11.4
上一篇写了在centos8.1下安装了protobuf3.11.4,这里记录下使用protobuf3做的些测试。
1.测试自带example比较苦恼的是,进入protobuf源码中examples中,
先编译提供的proto文件–addressbook.proto文件:
protoc --cpp_out=. addressbook.proto ,
编译后你发现会生成两个文件:
addresbook.pb.h, 和addresbook.pb.cc
再接着编译example吧,使用make,看着官方指导make cpp,呵呵,报错:
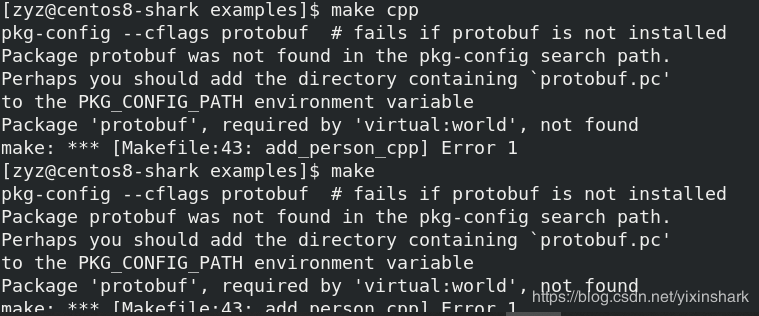
看着说的,也是呵呵,想想还是自己手动编译吧,毕竟咋是做嵌入式出身哈,没编辑器,没make,也可以手动哈:
g++ add_person.cc addressbook.pb.cc -o add_person -lprotobuf
编译通过,生成可执行代码。
看了下example中的代码,很简单,很容易看懂,but看懂不等于自己已经会了哈。
还说啥,打开Qt,仿照example开写吧
syntax = "proto3";
package studentInfo;
message Student {
  uint64 id = 1;
  string name = 2;
  string email = 3;
  enum PhoneType{
    MOBILE = 0;
    HOME = 1;
  }
  message PhoneNumber{
    string number = 1;
    PhoneType type = 2;
  }
  repeated PhoneNumber phone = 4;
}
编译:protoc --cpp_out=. student.proto后生成student.pb.h, 以及cc文件,将他们添加到工程中即可。
void testForStudent()
{
GOOGLE_PROTOBUF_VERIFY_VERSION;
studentInfo::Student student;
student.set_id(20200221);
student.set_name("zyz");
// student.set_email("yixinshark@gmail.com");
studentInfo::Student::PhoneNumber *phone_number = student.add_phone();
phone_number->set_type(studentInfo::Student::MOBILE);
phone_number->set_number("123");
studentInfo::Student::PhoneNumber *home_number = student.add_phone();
home_number->set_type(studentInfo::Student::HOME);
home_number->set_number("456");
std::string pbData;
if (student.SerializePartialToString(&pbData))
{
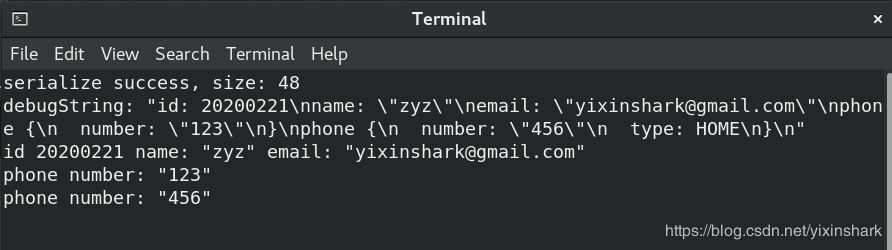
qDebug() << "serialize success, size:" << pbData.size();
}
qDebug() << "debugString:" << QString::fromStdString(student.DebugString());
// 反序列化
studentInfo::Student tom;
if (!tom.ParseFromString(pbData))
{
qDebug() << "parse pb Data failed!";
return;
}
qDebug() << "id" << tom.id() << "name:" << QString::fromStdString(tom.name())
<< "email:" << QString::fromStdString(tom.email());
for (int i = 0; i < tom.phone_size(); i++)
{
const studentInfo::Student::PhoneNumber &phoneNumber = tom.phone(i);
qDebug() << "phone number:" << QString::fromStdString(phoneNumber.number());
}
google::protobuf::ShutdownProtobufLibrary();
}
运行吧,如果运行中出错,很有可能是你的pro文件中没有添加protobuf库连接:

作者:yixinshark
相关文章
Ginger
2021-06-18
Adeline
2020-07-08
Radinka
2023-07-22
Gella
2023-07-22
Miette
2023-07-22
Zandra
2023-07-22
Kara
2023-07-22
Irma
2023-07-22
Pandora
2023-07-28
Tani
2023-07-28
Miette
2023-08-08
Kande
2023-08-08
Tricia
2023-08-08
Karli
2023-08-08
Ula
2023-08-08
Dulcea
2023-08-08
Malina
2023-08-08