C#基于Mongo的官方驱动手撸一个Super简易版MongoDB-ORM框架
如题,在GitHub上找了一圈想找一个MongoDB的的ORM框架,未偿所愿,就去翻了翻官网(https://docs.mongodb.com/drivers/csharp/)
看了看文档发现官方的驱动功能已经相当强大了并且更新速度很快

2.3之后得驱动版本已经支持 .Net 5,而且方法都已支持Task ,可以配合async , await.使用 ,同时也支持Lambda表达式及表达式树 官方是这么说的(https://mongodb.github.io/mongo-csharp-driver/2.12/what_is_new/)

官方得驱动如此强大了,还找什么ORM框架,我们自己基于官方驱动手撸一个简易版的,首先简单讲一下设计思路
要求1:首先要有一个对象实体基类,为什么要创建实体对象基类?是因为官方驱动支持的实体类与Collection得映射 必须要有id字段,对应数据库中得"_id",并且这个字段是ObjectIDl类型,像这样
 public class Person
    {
        [BsonId]
        [BsonElement("_id")]
        public ObjectId ID { get; set; }
    }
所以创建实体基类是为了免去每个实体类都要创建这个id的冗余代码.
要求2:实现实体类与Collection得自动映射 自动创建数据库连接.这一部分实现就稍微复杂一些,首先我们需要自定义一个Attribute,用于获取获取集合名称,然后创建一个管理器实现一些自动映射的初始化操作
要求3:实现Repository仓储类.提供简单得CRUD方法. 这一部分就比较简单了,通过封装直接调用官方的驱动提供的API,实现CURD操作
开始实现之前记得添加一下官方的驱动包直接在Nuget搜索MongoDB.Driver 安装就可以了 ,我这里使用的是2.12.3版本
第一步:创建对象实体基类
[DataContract]
    [Serializable]
    [BsonIgnoreExtraElements(Inherited = true)]  //当BSON文档被反序列化时,每个元素的名称用于在类映射中查找匹配的成员。通常,如果没有找到匹配的成员,将抛出异常。如果要在反序列化期间忽略其他元素 使用这个特性
    public abstract class MongoEntityBase : IMongoEntityBase<string>
    {
        protected MongoEntityBase()
        {
            DB_ID = ObjectId.GenerateNewId().ToString();  //对id进行初始化
        }
        [DataMember]     [BsonElement("_id")]
        [BsonRepresentation(BsonType.ObjectId)]  //因为 ObjectId 这个结构体是不能序列化的,所以使用  [BsonRepresentation(BsonType.ObjectId)] 标记为这个字符串ID在mongo中代表ObjectId
        public virtual string DB_ID { get; set; }
    }
    public interface IMongoEntityBase<TKey>
    {
        [BsonId]
        TKey DB_ID { get; set; }
    }
    public interface IMongoEntityBase : IMongoEntityBase<string>
    {
    }
第二步:实现实体类与Collection的自动映射;
我们需要先创建一个Attribute类,用于标记实体类来获取实体类对应的集合名称,如下:
[AttributeUsage(AttributeTargets.Class, Inherited = true)]
    public class CollectionNameAttribute : Attribute
    {
        public CollectionNameAttribute(string name)
        {
            if (string.IsNullOrEmpty(name)) throw new ArgumentException("Empty collectionname not allowed", "name");
            this.Name = name;
        }
        public string Name { get; private set; } //定义一个属性 用于获取Collection名称
    }
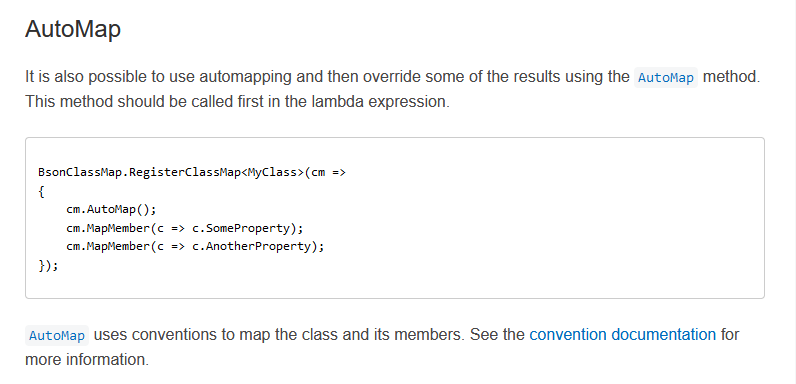
接下来实现一个管理器,用于自动映射,数据库连接的自动映射,官方驱动其实已经提供了实体类的自动映射,我们只需要接着稍微封装一下,官方自动映射demo如下:
有一部分准备工作要做,那就是需要在配置文件添加一个数据库连接的配置,用于连接数据库;

接下实现我们的管理器,这一部分是核心,实现了类与数据库Collection的自动映射,并自动创建出了mongo连接
internal static class GlobleManage<T>
    {
        private static string _tableName;
        private static string _dateBaseName;
        private static string _mongoServerSettings;
        private static IMongoCollection<T> _mongoCollection;
        public static IMongoCollection<T> MongoCollection
        {
            get => _mongoCollection;
        }
        public static string DateBaseName
        {
            get => _dateBaseName;
        }
        public static string MongoServerSettings
        {
            get => _mongoServerSettings;
        }
        public static string TableName
        {
            get => _tableName;
        }
        static GlobleManage()
        {
            Init();
        }
        private static void Init()
        {
            //初始化连接字符串
            string[] parm = ConfigurationManager.ConnectionStrings["MongoServerSettings"].ConnectionString.Split('/');
            _dateBaseName = parm.Last();
            _mongoServerSettings = ConfigurationManager.ConnectionStrings["MongoServerSettings"].ConnectionString.Replace(@"/" + _dateBaseName, ":27017");
            //根据实体类标注好的Attribute获取表名
            var entitytype = typeof(T);
            var attr = Attribute.GetCustomAttribute(entitytype, typeof(CollectionNameAttribute));
            //若Attribute不为空  获取标注的表名
            if (attr != null)
            {
                _tableName = ((CollectionNameAttribute)attr).Name;
            }
            else
            {
                //否则  如果类型是MongoEntityBase的派生类 获取类名作为表名
                if (typeof(MongoEntityBase).IsAssignableFrom(entitytype))
                {
                    // No attribute found, get the basetype
                    while (!entitytype.BaseType.Equals(typeof(MongoEntityBase)))
                    {
                        entitytype = entitytype.BaseType;
                    }
                }
                _tableName = entitytype.Name;
            }
            //添加实体类映射
            BsonClassMap.RegisterClassMap<T>(cm => cm.AutoMap());
            _mongoCollection = new MongoClient(_mongoServerSettings).GetDatabase(_dateBaseName).GetCollection<T>(_tableName);
        }
    }
第三步:实现Repository仓储类.提供简单的CRUD方法
首先,先创建仓储类的泛型接口
public interface IRepository<T> where T : IMongoEntityBase<string>
    {
        IMongoCollection<T> Collection { get; }
        bool Add(T entity);
        bool Delete(T delete, Expression<Func<T, bool>> conditions = null);
        bool Update(T update, Expression<Func<T, bool>> conditions = null);
        List<T> Find(Expression<Func<T, bool>> conditions = null);
泛型仓储类实现接口,通过管理器获取自动映射得到的 IMongoCollection
public class Repository<T> : IRepository<T> where T : IMongoEntityBase<string>
    {
        private IMongoCollection<T> _mongoCollection = GlobleManage<T>.MongoCollection;
        public IMongoCollection<T> Collection => _mongoCollection;
        public bool Add(T entity)
        {
            try
            {
                _mongoCollection.InsertOne(entity);
                return true;
            }
            catch (Exception)
            {
                throw;
            }
        }
        public bool Delete(T delete, Expression<Func<T, bool>> conditions = null)
        {
            try
            {
                string _id = string.Empty;
                if (conditions == null)
                {
                    foreach (var item in delete.GetType().GetProperties())
                    {
                        if (item.Name == "DB_ID" && item.GetValue(delete) != null)
                        {
                            _id = item.GetValue(delete).ToString();
                            var result = _mongoCollection.DeleteOne(new BsonDocument("_id", BsonValue.Create(new ObjectId(_id))));
                            return result.IsAcknowledged;
                        }
                    }
                }
                var res = _mongoCollection.DeleteOne(conditions);
                return res.IsAcknowledged;
            }
            catch (Exception)
            {
                throw;
            }
        }
        public bool Update(T update, Expression<Func<T, bool>> conditions = null)
        {
            try
            {
                ObjectId _id;
                var options = new ReplaceOptions() { IsUpsert = true };
                if (conditions == null)
                {
                    foreach (var item in update.GetType().GetProperties())
                    {
                        if (item.Name == "DB_ID" && item.GetValue(update) != null)
                        {
                            _id = new ObjectId(item.GetValue(update).ToString());
                            var result = _mongoCollection.ReplaceOne(new BsonDocument("_id", BsonValue.Create(_id)), update, options);
                            return result.IsAcknowledged;
                        }
                    }
                }
                var res = _mongoCollection.ReplaceOne(conditions, update, options);
                return res.IsAcknowledged;
            }
            catch (Exception)
            {
                throw;
            }
        }
        public List<T> Find(Expression<Func<T, bool>> conditions = null)
        {
            try
            {
                if (conditions == null)
                {
                    conditions = t => true;
                }
                return _mongoCollection.Find(conditions).ToList() ?? new List<T>();
            }
            catch (Exception)
            {
                throw;
            }
        }
    }
简易版的ORM框架就算是基本完成,接下来使用这个框架完成一些CRUD操作
首先,创建一个实体类,并且继承 MongoEntityBase
[Serializable]
    public class Person : MongoEntityBase
    {
        [BsonConstructor]
        public Person(string name, int age, string guid, EnumGender gender)
        {
            Name = name;
            Age = age;
            Guid = guid;
            Gender = gender;
        }
        public string Name { get; set; }
        public int Age { get; set; }
        public string Guid { get; set; }
        public EnumGender Gender { get; set; }
        public List<Person> Students { get => students; set => students = value; }
        public Pet Pet { get => pet; set => pet = value; }
        private Pet pet;
        public override string ToString()
        {
            return "DB_ID:" + this.DB_ID + "  " + "user:" + Name + "  " + "age:" + Age + "  " + "guid:" + Guid + "  " + "Gender:" + Gender.ToString() + "  " + "宠物叫" + Pet.Name + "," + Pet.Age + "岁了";
        }
        private List<Person> students;
    }
    public enum EnumGender
    {
        男,
        女
    }
    public class Pet
    {
        private string name;
        private int age;
        public string Name { get => name; set => name = value; }
        public int Age { get => age; set => age = value; }
    }
然后创建一个窗体 测试一下我们的CRUD功能,调用很简单 只需要一句 IRepository<Person> _IRepository = new Repository<Person>();
public partial class Form1 : Form
    {
        private IRepository<Person> _IRepository = new Repository<Person>();
        private Random random = new Random();
        public Form1()
        {
            InitializeComponent();
        }
        //ADD
        private void button1_Click(object sender, EventArgs e)
        {
            Person person = new Person("张三", 8, Guid.NewGuid().ToString(), EnumGender.男);
            person.Students = new List<Person>() { new Person("张小三1", 8, Guid.NewGuid().ToString(), EnumGender.男),
                new Person("张小三2", 8, Guid.NewGuid().ToString(), EnumGender.男)
                ,new Person("张小三3", 8, Guid.NewGuid().ToString(), EnumGender.男)
                ,new Person("张小三4", 8, Guid.NewGuid().ToString(), EnumGender.男)};
            person.Pet = new Pet() { Name = "旺财", Age = 3 };
            _IRepository.Add(person);
            richTextBox1.Text += "添加成功!\r\n";
        }
        //Find
        private void button2_Click(object sender, EventArgs e)
        {
            var id = textBox1.Text.Trim();
            var list = _IRepository.Find(t => t.DB_ID.Equals(id));
            richTextBox1.Text += "Find成功:" + "\r\n ";
            foreach (var item in list)
            {
                richTextBox1.Text += item.ToString() + "\r\n ";
            }
        }
        //Delete
        private void button3_Click(object sender, EventArgs e)
        {
            var id = textBox1.Text.Trim();
            //var res = _IRepository.Delete(t => t.DB_ID.Equals(id));
            var rese = _IRepository.Find(t => t.DB_ID.Equals(id)).FirstOrDefault();
            var res = _IRepository.Delete(rese);
            richTextBox1.Text += id + "删除:" + res;/*res.IsAcknowledged + res.DeletedCount;*/
        }
        //Update
        private void button4_Click(object sender, EventArgs e)
        {
            var guid = textBox1.Text.Trim();
            Person person = _IRepository.Find(t => t.DB_ID.Equals(guid)).FirstOrDefault();
            person.Name = "改过之后的名字" + random.Next(1, 10);
            var res = _IRepository.Update(person);
            richTextBox1.Text += guid + "更新:" + res;
        }
        //Clear
        private void button5_Click(object sender, EventArgs e)
        {
            textBox1.Clear();
            richTextBox1.Clear();
        }
        //FindAll
        private void button6_Click(object sender, EventArgs e)
        {
            var list = _IRepository.Find();
            richTextBox1.Text += "FindAll成功:" + "\r\n ";
            foreach (var item in list)
            {
                richTextBox1.Text += item.ToString() + "\r\n";
            }
        }
    }

简易版本的功能基本都实现,实际上,一个成熟的ORM框架还有好多工作要做
链接: https://pan.baidu.com/s/1t9xbfQXhb6iz5QJeC0WLOQ
提取码: y9d2
以上就是C#基于Mongo的官方驱动手撸一个Super简易版MongoDB-ORM框架的详细内容,更多关于C# MongoDB-ORM框架的资料请关注软件开发网其它相关文章!