CentOS7+nginx+rtmp+ffmpeg搭建流媒体服务器(总结前人经验亲测有效)
CentOS7+nginx+rtmp+ffmpeg搭建流媒体服务器(总结前人经验亲测有效)
作者:DesolatePoison
上次搭建了nginx文件服务器,这次遇到摄像头传时实录像到前台,需要搭建一个流媒体服务器
在搭建之前由于服务器上本来使用yum install nginx安装过一个nginx,这个nginx还跑着某些占用了某些端口,我们需要卸载这个nginx,不过为了不删数据跑路,我们暂时就不干掉这个nginx了
#查看nginx的进程
ps -ef | grep nginx
#干掉所有nginx进程
#如果提示killall没有则需要yum install psmisc安装
killall nginx
#首先下载一些可能用到的软件包 如果不够后续编译安装报错再继续下载
yum install -y net-tools wget unzip gcc gcc-c++ perl openssl pcre zlib git
#下载nginx-rtmp-module模块
git clone https://github.com/arut/nginx-rtmp-module.git
#下载nginx并解压
#nginx的官方网站为:http://nginx.org/en/download.html
wget http://nginx.org/download/nginx-1.8.1.tar.gz
tar -zxvf nginx-1.8.1.tar.gz
下载好之后解压如下

配置并编译nginx
进入到nginx-1.8.1安装目录, 使用nginx的默认配置,添加nginx的rtmp模块。 add-module为下载的nginx-rtmp-module文件路径。
cd nginx-1.8.1
./configure --prefix=/usr/local/nginx --add-module=../nginx-rtmp-module
make
sudo make install
由于本人已经编译安装没问题 就不再重新执行上面命令了 不过需要注意的是我放包的路径 你也可以根据自己的实际情况指定路径

如果编译安装不出任何错误,在/usr/local/nginx/sbin下运行nginx看看是否可以正常访问网页
可执行文件和配置文件在这里,不要还以为是/etc/nginx

安装ffmpeg
#安装epel包
yum install -y epel-release
#导入签名
rpm --import /etc/pki/rpm-gpg/RPM-GPG-KEY-EPEL-7
#导入签名
rpm --import http://li.nux.ro/download/nux/RPM-GPG-KEY-nux.ro
#升级软件包
rpm -Uvh http://li.nux.ro/download/nux/dextop/el7/x86_64/nux-dextop-release-0-1.el7.nux.noarch.rpm
#更新软件包
yum update -y
#安装ffmpeg
yum install -y ffmpeg
#检查版本
ffmpeg -version
现在修改配置文件搭建我们的流媒体nginx服务器
修改/usr/local/nginx/sbin/nginx.conf文件
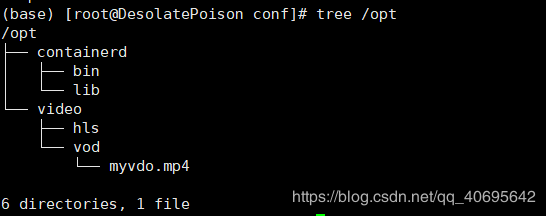
在这之前我们先在服务器上上传一个视频文件然后在opt下建立几个文件夹然后将上传的测试视频文件放在vod目录下
mkdir -pv /opt/video/{hls,vod}
使用tree查看目录结构 当然你也可以随便 不过要和配置文件中的对应

#在/usr/local/nginx/sbin/nginx.conf配置文件中加入已下内容
# vim /usr/local/nginx/sbin/nginx.conf
worker_processes  1;
events {
    worker_connections  1024;
}
rtmp {
    server {
        listen 1935;
    chunk_size 4096;
    application vod {
        play /opt/video/vod;
    }
    application live{ #第一处添加的直播字段
        live on;
    }
    #hls配置
        application hls {
            live on;
            hls on;
            hls_path /opt/video/hls;
        }
    }
}
http {
    include      mime.types;
    default_type  application/octet-stream;
    sendfile        on;
    keepalive_timeout  65;
    server {
        listen      80;
        server_name  localhost;
    location /stat {    #第二处添加的location字段。
            rtmp_stat all;
        rtmp_stat_stylesheet stat.xsl;
    }
    location /stat.xsl { #第二处添加的location字段。
       root /usr/local/nginx/nginx-rtmp-module;
   }
        location / {
            root  html;
            index  index.html index.htm;
        }
	#配置hls
        location /hls {
            types {
                application/vnd.apple.mpegurl m3u8;
                video/mp2t ts;
            }
            root /opt;
            add_header Cache-Control no-cache;
        }
        error_page  500 502 503 504  /50x.html;
        location = /50x.html {
            root  html;
        }
    }
}
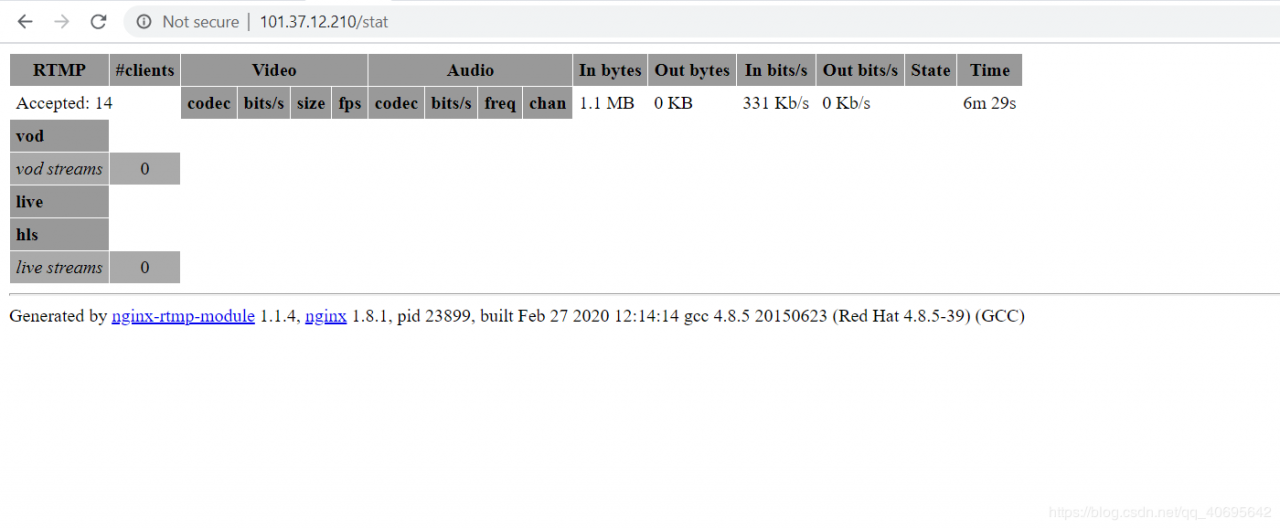
然后重新加载nginx

如果配置没问题不报错访问你的服务器会有如下界面(注意换成你自己的ip访问)

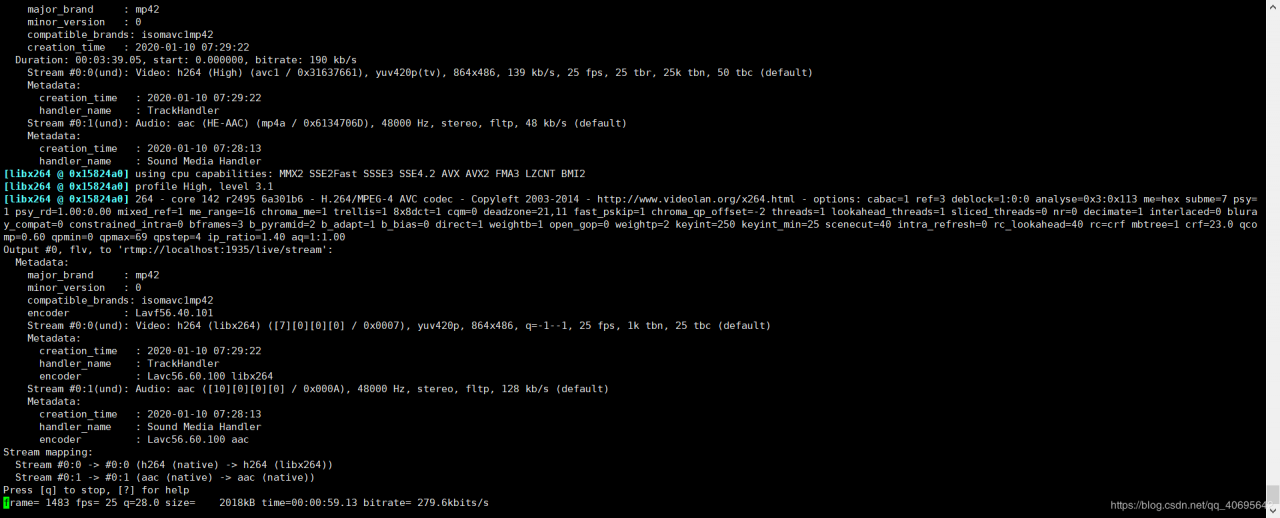
接下来使用ffmpeg推流测试
#/root/myvdo.mp4也有一个测试视频
#推流
ffmpeg -re -i /root/myvdo.mp4 -vcodec libx264 -acodec aac -strict -2 -f flv rtmp://localhost:1935/live/stream
如果配置成功就会出现如下页面


附加几种推流方法 我们所用的就是最后一种 也可以播放流转换的视频 这里不做演示了
UDP
# push stream local
ffmpeg -re -i h264.mp4 -vcodec copy -f h264 udp://127.0.0.1:1234
# play stream
ffplay  udp://127.0.0.1:1234
ffplay -f h264 udp://127.0.0.1:1234
RTP
# push stream local
ffmpeg -re -i h264.mp4 -vcodec copy -an -f rtp rtp://127.0.0.1:20000
RTMP
# push stream local
ffmpeg -re -i h264.mp4 -vcodec libx264 -acodec aac -strict -2 -f flv rtmp://localhost:1935/live/stream
# play stream
ffplay rtmp://192.168.0.157:1935/live/stream
作者:DesolatePoison
相关文章
Vanessa
2021-03-08
Octavia
2021-03-22
Kaitlyn
2020-10-14
Manda
2020-04-28
Bena
2023-07-22
Rhoda
2023-07-22
Kohana
2023-07-22
Olathe
2023-07-22
Nafisa
2023-07-22
Dorothy
2023-07-22
Sabah
2023-07-22
Halima
2023-07-22
Rosalia
2023-07-22
Miette
2023-08-08
Rhea
2023-08-08
Malinda
2023-08-08
Nora
2023-08-08
Olivia
2023-08-08