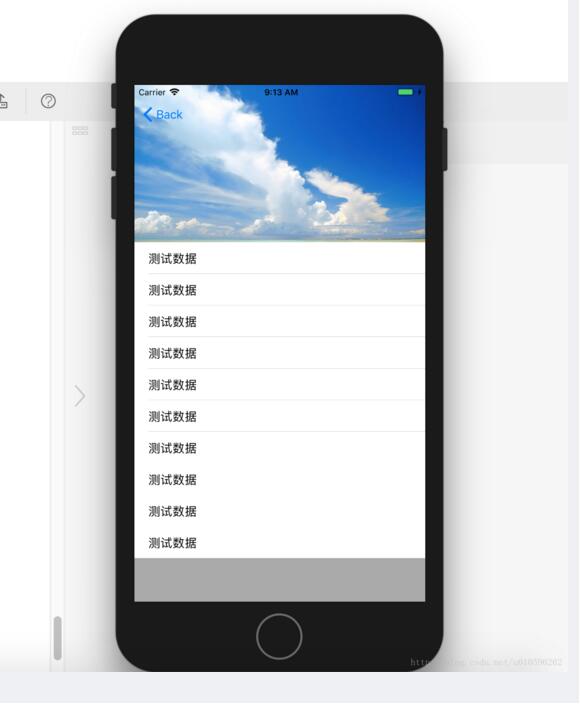
iOS实现头部拉伸效果
本文实例为大家分享了iOS实现头部拉伸效果展示的具体代码,供大家参考,具体内容如下
主要涉及到导航栏透明度、图片拉伸、列表头部等。
导航透明度的设置
添加系统导航栏的Category实现
声明部分:
@interface UINavigationBar (BackgroundColor)
- (void)lt_setBackgroundColor:(UIColor *)color;
@end
实现部分:
#import <objc/runtime.h>
@implementation UINavigationBar (BackgroundColor)
static char overlayKey;
- (UIView *)overlay
{
  return objc_getAssociatedObject(self, &overlayKey);
}
- (void)setOverlay:(UIView *)overlay
{
  objc_setAssociatedObject(self, &overlayKey, overlay, OBJC_ASSOCIATION_RETAIN_NONATOMIC);
}
- (void)lt_setBackgroundColor:(UIColor *)color
{
  if (!self.overlay) {
    [self setBackgroundImage:[UIImage new] forBarMetrics:UIBarMetricsDefault];
    // insert an overlay into the view hierarchy
    self.overlay = [[UIView alloc] initWithFrame:CGRectMake(0, -20, [UIScreen mainScreen].bounds.size.width, self.bounds.size.height + 20)];
    self.overlay.autoresizingMask = UIViewAutoresizingFlexibleWidth|UIViewAutoresizingFlexibleHeight;
    [self insertSubview:self.overlay atIndex:0];
  }
  self.overlay.backgroundColor = color;
}
@end
监听列表拖动及实现图片放大
主要是监听滚动的距离(scrollViewDidScroll:方法)
#import "StretchViewController.h"
#import "UINavigationBar+BackgroundColor.h"
// 背景图片的宽高比例
#define ratio 0.8
@interface StretchViewController () <UITableViewDelegate, UITableViewDataSource>
// 可放大的背景图片
@property (nonatomic, strong) UIImageView *bgView;
// 记录原始大小
@property (assign) CGRect originalFrame;
@property (nonatomic, strong) UITableView *tableView;
@end
@implementation StretchViewController
- (void)viewWillAppear:(BOOL)animated
{
  [super viewWillAppear:animated];
  //[self.navigationController setNavigationBarHidden:YES animated:animated];
  //self.navigationController.navigationBar.tintColor = [UIColor whiteColor];
  //self.navigationController.navigationBar.barTintColor = [UIColor clearColor];
  //self.navigationController.navigationBar.backgroundColor = [UIColor clearColor];
  // 设置导航栏底部分割线为透明
  [self.navigationController.navigationBar setShadowImage:[UIImage new]];
}
- (void)viewDidLoad {
  [super viewDidLoad];
  // 设置全透明
  [self.navigationController.navigationBar lt_setBackgroundColor:[[UIColor greenColor] colorWithAlphaComponent:0]];
  // Do any additional setup after loading the view.
  self.view.backgroundColor = [UIColor lightGrayColor];
  self.bgView = [[UIImageView alloc] initWithFrame:CGRectMake(0, 0, self.view.bounds.size.width, self.view.bounds.size.width*ratio)];
  self.bgView.image = [UIImage imageNamed:@"bg-mine"];
  self.originalFrame = self.bgView.frame;
  [self.view addSubview:self.bgView];
  self.tableView = [[UITableView alloc] initWithFrame:CGRectMake(0, 64, self.view.bounds.size.width, self.view.bounds.size.height-64) style:UITableViewStylePlain];
  self.tableView.backgroundColor = [UIColor clearColor];
  self.tableView.showsVerticalScrollIndicator = NO;
  self.tableView.delegate = self;
  self.tableView.dataSource = self;
  // 1. contentInset
  //table.contentInset = UIEdgeInsetsMake(160, 0, 0, 0);
  // 2. heatView
  UIView *headView = [[UIView alloc] initWithFrame:CGRectMake(0, 0, self.view.bounds.size.width, 160)];
  headView.backgroundColor = [UIColor clearColor];
  self.tableView.tableHeaderView = headView;
  [self.view addSubview:self.tableView];
}
- (nonnull UITableViewCell *)tableView:(nonnull UITableView *)tableView cellForRowAtIndexPath:(nonnull NSIndexPath *)indexPath {
  UITableViewCell *cell = [tableView dequeueReusableCellWithIdentifier:@"cellIdentifier"];
  if (cell == nil) {
    cell = [[UITableViewCell alloc] initWithStyle:UITableViewCellStyleValue1 reuseIdentifier:@"cellIdentifier"];
  }
  cell.textLabel.text = @"测试数据";
  return cell;
}
- (NSInteger)tableView:(nonnull UITableView *)tableView numberOfRowsInSection:(NSInteger)section {
  return 10;
}
- (void)scrollViewDidScroll:(UIScrollView *)scrollView
{
  CGFloat yOffset = scrollView.contentOffset.y; // 向上滑动,offset是增加的;向下滑动,是减少的
  if (yOffset < 160) { // 当滑动到导航栏底部时
    CGFloat colorAlpha = yOffset/160;
//    self.navigationController.navigationBar.backgroundColor = [[UIColor whiteColor] colorWithAlphaComponent:colorAlpha];
    [self.navigationController.navigationBar lt_setBackgroundColor:[[UIColor whiteColor] colorWithAlphaComponent:colorAlpha]];
  } else { // 超过导航栏底部了
    [self.navigationController.navigationBar lt_setBackgroundColor:[UIColor whiteColor]];
  }
  // 往上滑动效果、处理放大效果
  if (yOffset > 0) {
    self.bgView.frame = ({
      CGRect frame = self.bgView.frame;
      frame.origin.y = self.originalFrame.origin.y - yOffset;
      frame;
    });
  } else { // 往下移动,放大效果
    self.bgView.frame = ({
      CGRect frame = self.originalFrame;
      frame.size.height = self.originalFrame.size.height - yOffset;
      frame.size.width = frame.size.height/ratio;
      //
      frame.origin.x = self.originalFrame.origin.x - (frame.size.width - self.originalFrame.size.width)/2;
      frame;
    });
  }
}
@end
以上是对系统原生的导航栏进行透明度设置。
也可进行自定义视图设置为导航栏
效果如下:
相关文章
Gretel
2021-02-28
Pythia
2021-03-11
Sabah
2023-05-12
Tia
2023-05-12
Iris
2023-05-12
Serepta
2023-05-12
Isoke
2023-05-12
Xandy
2023-05-12
Isis
2023-05-12
Rae
2023-07-20
Bena
2023-07-20
Rhoda
2023-07-20
Rose
2023-07-20
Rasine
2023-07-20
Kohana
2023-07-20
Ilona
2023-07-20
Bianca
2023-07-20
Nafisa
2023-07-20
Vanna
2023-07-20