Swift 使用mapkit 实现在地图上两点(多点)画线,画多条·多种颜色的线
Swift 使用mapkit 实现在地图上两点(多点)画线,画多条·多种颜色的线
 在视图中,从视图库添加一个MKMapview到视图中。然后拉扯到你想要的大小,设定约束,可以使用约束让它涨满整个view
打开 assitant 窗口,按住ctrl+鼠标左键,拖拽MKMapview带代码区域: @IBOutlet var mapView: MKMapView!//名字可以随意,最好和我一样,之后都是使用mapView
在文件开头,import MapKit
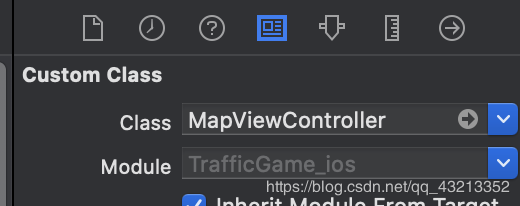
MapViewContrller需要实现MKMapViewDelegate协议,采用拓展的方式,这里一并贴上绘图的函数:
在视图中,从视图库添加一个MKMapview到视图中。然后拉扯到你想要的大小,设定约束,可以使用约束让它涨满整个view
打开 assitant 窗口,按住ctrl+鼠标左键,拖拽MKMapview带代码区域: @IBOutlet var mapView: MKMapView!//名字可以随意,最好和我一样,之后都是使用mapView
在文件开头,import MapKit
MapViewContrller需要实现MKMapViewDelegate协议,采用拓展的方式,这里一并贴上绘图的函数:
作者:CSUpengyuyan
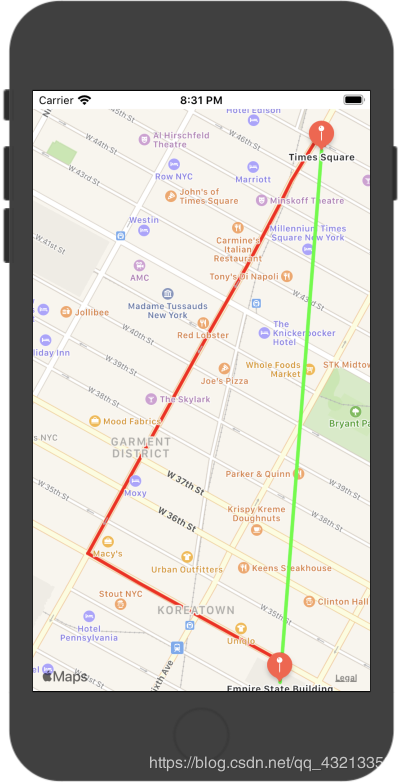
最终效果图:
在视图中,从视图库添加一个MKMapview到视图中。然后拉扯到你想要的大小,设定约束,可以使用约束让它涨满整个view
打开 assitant 窗口,按住ctrl+鼠标左键,拖拽MKMapview带代码区域: @IBOutlet var mapView: MKMapView!//名字可以随意,最好和我一样,之后都是使用mapView
在文件开头,import MapKit
MapViewContrller需要实现MKMapViewDelegate协议,采用拓展的方式,这里一并贴上绘图的函数:
 extension MapViewController:MKMapViewDelegate{
    // 渲染overlay的函数
    func mapView(_ mapView: MKMapView, rendererFor overlay: MKOverlay) -> MKOverlayRenderer {
        //画出两条线:
        let routeLineView = MKPolylineRenderer(overlay: overlay)
          routeLineView.lineWidth = 4.0
        if overlay is MKPolyline{
            if overlay.title == "one"{
                routeLineView.strokeColor = UIColor.red
            }else
                if overlay.title == "two" {
                routeLineView.strokeColor = UIColor.green
            }
        }
            return routeLineView
    }
// 准备数据,添加数据:
import UIKit
import MapKit
class MapViewController: UIViewController {
    @IBOutlet var mapView: MKMapView!
    override func viewDidLoad() {
        super.viewDidLoad()
        // 1.在ViewController实现MKMapViewDelegate协议的委托
        mapView.delegate = self
        //2.设置位置的纬度和经度
        let sourceLocation = CLLocationCoordinate2D(latitude: 40.759011, longitude: -73.984472)
        let destinationLocation = CLLocationCoordinate2D(latitude: 40.748441, longitude: -73.985564)
        // 3.创建包含位置坐标的地标对象
        let sourcePlacemark = MKPlacemark(coordinate: sourceLocation, addressDictionary: nil)
        let destinationPlacemark = MKPlacemark(coordinate: destinationLocation, addressDictionary: nil)
        // 4.MKMapitems用于路线的绘制。 此类封装有关地图上特定点的信息
        let sourceMapItem = MKMapItem(placemark: sourcePlacemark)
        let destinationMapItem = MKMapItem(placemark: destinationPlacemark)
        // 5. 添加注释,显示地标的名称
        let sourceAnnotation = MKPointAnnotation()
        sourceAnnotation.title = "Times Square"
        // 如果地标对象的坐标存在,就给MK点解释对象指点坐标
        if let location = sourcePlacemark.location {
            sourceAnnotation.coordinate = location.coordinate
        }
        let destinationAnnotation = MKPointAnnotation()
        destinationAnnotation.title = "Empire State Building"
        if let location = destinationPlacemark.location {
            destinationAnnotation.coordinate = location.coordinate
        }
        // 6.标记注释显示在地图上
     self.mapView.showAnnotations([sourceAnnotation,destinationAnnotation], animated: true )
        // 7. MKDirectionsRequest类用于计算路线。折线
        let directionRequest = MKDirections.Request()
        directionRequest.source = sourceMapItem
        directionRequest.destination = destinationMapItem
        directionRequest.transportType = .automobile
        // Calculate the direction
        let directions = MKDirections(request: directionRequest)
        // 8.将使用折线作为地图顶部的叠加视图绘制路线。区域设置为两个位置都可见
        directions.calculate {
            (response, error) -> Void in
            guard let response = response else {
                if let error = error {
                    print("Error: \(error)")
                }
                return
            }
            let route = response.routes[0]
            print("111")
            route.polyline.title = "one"
            self.mapView.addOverlay((route.polyline), level: MKOverlayLevel.aboveRoads)
            let rect = route.polyline.boundingMapRect
            self.mapView.setRegion(MKCoordinateRegion(rect), animated: true)
        }
        // 添加两个点直接相连的斜线
        let routeLine = MKPolyline(coordinates: [sourceLocation,destinationLocation], count: 2)
        routeLine.title = "two"
        self.mapView.addOverlay(routeLine)
        let rect1 = routeLine.boundingMapRect
        self.mapView.setRegion(MKCoordinateRegion(rect1), animated: true)
    }
自定义点的样式:
    // 自定义标记的样式:
    func mapView(_ mapView: MKMapView, viewFor annotation: MKAnnotation) -> MKAnnotationView? {
        if annotation is MKUserLocation {
            return nil
        }
        else {
            let annotationView = mapView.dequeueReusableAnnotationView(withIdentifier: "annotationView") ?? MKAnnotationView()
            annotationView.image = UIImage(systemName: "hare.fill")
//            annotationView.annotation.
            return annotationView
        }
    }
如果有什么不太明白的地方,可以留言一起探讨
作者:CSUpengyuyan