vue3封装计时器组件的方法
背景
在一些商城类网页中打开商品详情都会有一个计数器来选择购买的数量,这样的计时器不仅会在商品详情页面显示还会在购物车里面有,那就可以把计时器封装成组件,以便于更好的复用以及后期维护
落地代码
<template>
  <div class="xtx-numbox">
    <div class="label"><slot /></div>
    <div class="numbox">
      <a href="javascript:;" @click="handleSub(-1)">-</a>
      <input type="text" readonly :value="num" />
      <a href="javascript:;" @click="handleSub(1)">+</a>
    </div>
  </div>
</template>
<script>
// 第三方方法 useVModel 来实现双向绑定
import { useVModel } from '@vueuse/core'
export default {
  name: 'XtxNumbox',
  props: {
    modelValue: {
      type: Number,
      default: 1
    }
  },
  setup(props, { emit }) {
    // useVModel 方法接收三个参数,
    // 参数一:自定义属性 props 接收父组件传递过来的通过 v-model 双向绑定的数据
    // 参数二:props 里面需要传递的数据
    // 参数三:emit 绑定的数据需要通过 emit 事件通知父组件
    const num = useVModel(props, 'modelValue', emit)
    const handleSub = n => {
      if (n < 0) {
        num.value -= 1
        if (props.modelValue === 1) {
          num.value = 1
        }
      } else {
        num.value += 1
      }
    }
    return { handleSub, num }
  }
}
</script>
<style scoped lang="less">
.xtx-numbox {
  display: flex;
  align-items: center;
  .label {
    width: 60px;
    color: #999;
    padding-left: 10px;
  }
  .numbox {
    width: 120px;
    height: 30px;
    border: 1px solid #e4e4e4;
    display: flex;
    > a {
      width: 29px;
      line-height: 28px;
      text-align: center;
      background: #f8f8f8;
      font-size: 16px;
      color: #666;
      &:first-of-type {
        border-right: 1px solid #e4e4e4;
      }
      &:last-of-type {
        border-left: 1px solid #e4e4e4;
      }
    }
    > input {
      width: 60px;
      padding: 0 5px;
      text-align: center;
      color: #666;
    }
  }
}
</style>
使用
<XtxNumbox v-model="num">数量</XtxNumbox>
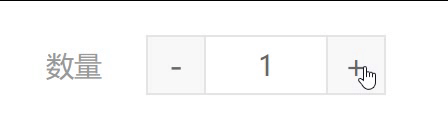
效果
相关文章
Serwa
2020-03-20
Claire
2021-05-21
Rhoda
2023-07-22
Hester
2023-07-22
Grace
2023-07-22
Vanna
2023-07-22
Peony
2023-07-22
Dorothy
2023-07-22
Dulcea
2023-07-22
Zandra
2023-07-22
Serafina
2023-07-24
Kathy
2023-08-08
Olivia
2023-08-08
Victoria
2023-08-08
Elina
2023-08-08
Jacinthe
2023-08-08
Viridis
2023-08-08
Hana
2023-08-08