Python tkinter 多线程 哲学家进餐问题
Python tkinter 多线程 哲学家进餐问题
作者:weixin_43594279
网上找了好久都没有自己满意的代码,于是自己学了一个,不过这只是个雏形,要想变成你满意的程序,需要靓男靓女们自己的努力啦!
废话不多说,直接上代码!
from tkinter import *
from PIL import Image,ImageTk
import threading
from time import sleep
import os, random
"""首先导入必要的模块,由于涉及到导入非gif的图片文件,就要用到PIL库"""
"""接下来开始写哲学家这个类"""
class Philosopher(threading.Thread): #哲学家类继承多线程
def __init__(self, index,forks,numForks,labels):
threading.Thread.__init__(self) #线程初始化,必不可少的一步
self.index = index #哲学家编号(0~n)
self.forks=forks #进餐用叉子编号(0~n)
self.numForks=numForks #叉子总数
#将叉子与哲学家编号关联
self.leftFork = forks[self.index]
self.rightFork = forks[(self.index + 1) % numForks]
"""导入图片,其中resize是更改图片尺寸,Image.open后的图片位置大家自己更改,这里只是样例"""
#哲学家思考时的图片
self.bm_thinking=ImageTk.PhotoImage(Image.open(r'E:\哲学家\img\thinking.png').resize((150,150),Image.ANTIALIAS))
#哲学家进餐时的图片
self.bm_eating=ImageTk.PhotoImage(Image.open(r'E:\哲学家\img\eating.png').resize((150,150),Image.ANTIALIAS))
#哲学家饥饿时等待的图片
self.bm_waiting=ImageTk.PhotoImage(Image.open(r'E:\哲学家\img\waiting.png').resize((150,150),Image.ANTIALIAS))
"""接下来定义哲学家的行为方法"""
#进餐时调用
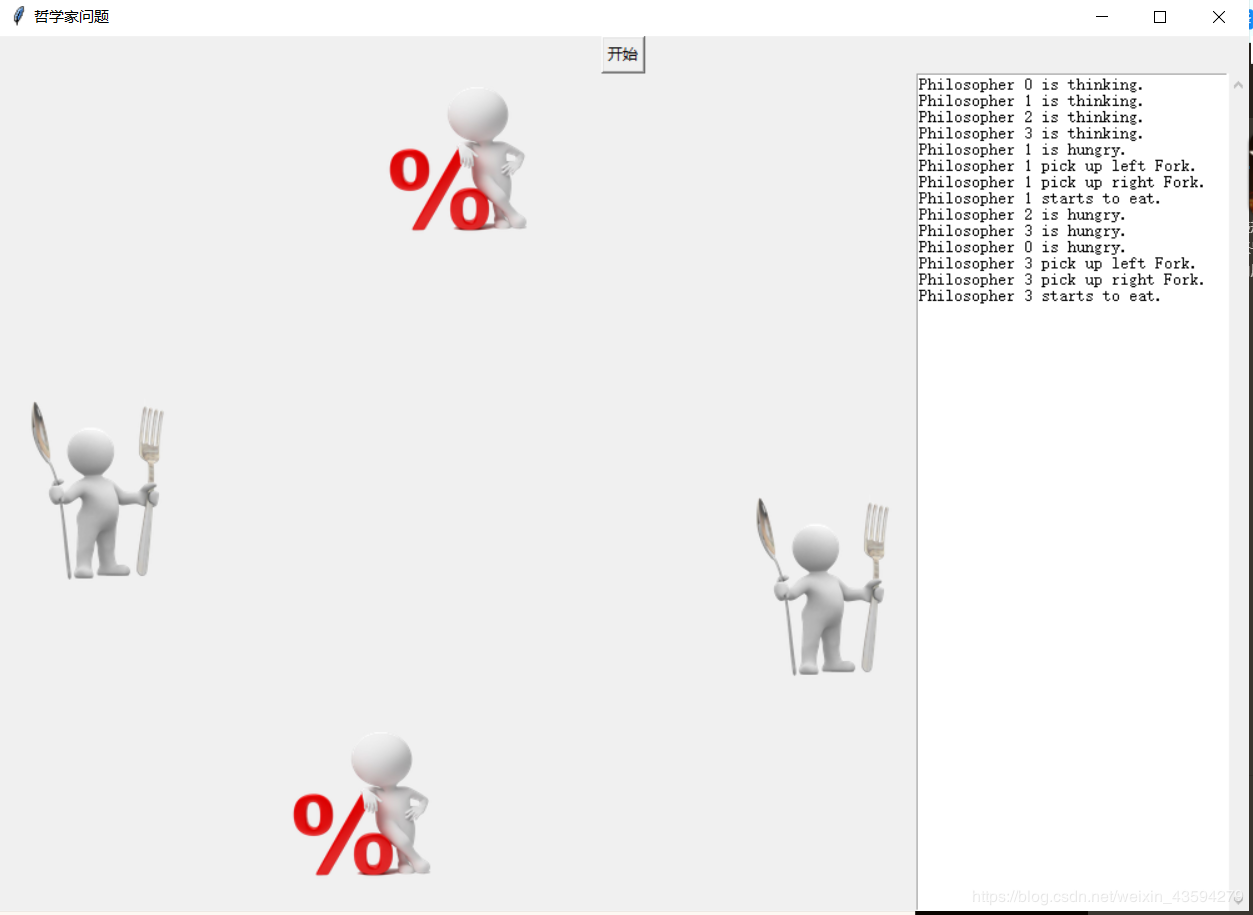
def dining(self):
#这里的text是在__name__=='__main__'之后定义的Tkinter中的Text组件
text.insert(END,"Philosopher %s starts to eat.\n"%(self.index))
#这里有个小坑,当上面这句写成text.insert(END,"Philosopher",self.index,"starts to eat.\n")
#时在text的输入框中就不会显示出self.index
labels[self.index].configure(image=self.bm_eating)
labels[self.index].image=self.bm_eating
#Label的疑问后再解释,这里就是把label和哲学家编号关联,减少代码量
sleep(random.randint(1,3))#随机睡眠1至3秒
text.insert(END,"Philosopher %s finishes eating.\n"%(self.index)
"""后面的方法都大同小异"""
#哲学家思考的方法
def thinking(self):
text.insert(END,"Philosopher %s is thinking.\n"%(self.index))
labels[self.index].configure(image=self.bm_thinking)
labels[self.index].image=self.bm_thinking
sleep(random.randint(1,3))
#哲学家饥饿等待的方法
def hungry(self):
text.insert(END,"Philosopher %s is hungry.\n"%(self.index))
labels[self.index].configure(image=self.bm_waiting)
labels[self.index].image=self.bm_waiting
sleep(1)
"""重写多线程的run方法"""
def run(self):
while True:
self.thinking()
self.hungry()
self.leftFork.pickup()
text.insert(END,"Philosopher %s pick up left Fork.\n"%(self.index))
self.rightFork.pickup()
text.insert(END,"Philosopher %s pick up right Fork.\n"%(self.index))
self.dining()
self.leftFork.putdown()
text.insert(END,"Philosopher %s put down left Fork.\n"%(self.index))
self.rightFork.putdown()
text.insert(END,"Philosopher %s put down right Fork.\n"%(self.index))
到这里哲学家类就写完了不过这是没有解决死锁问题的方案,要解决死锁可以自行查阅资料。关于哲学家问题有个不错的网址推荐:
https://www.colabug.com/2018/0712/3522710/
后面是叉子类:
class Fork():
    def __init__(self, index):
        self.index = index #叉子编号
        self._lock = threading.Lock() #加锁,保证互斥访问
    def pickup(self):#拿起叉子
    	self._lock.acquire()#相当于信号量semWait()
    def putdown(self):#放下叉子
    	self._lock.release()#相当于semSignal()
是不是也没有想象中那么难,嘻嘻
由于使用到的是Tkinter,所以需要有个入口函数,方便按下“开始”键时执行程序。
def main():
    text.delete(0.0,END)   #清空text组件中的所有内容
    # 设置为2更容易重现死锁
    numPhilosophers = numForks = 4
    # 创建叉子与哲学家实例
    forks = [Fork(idx) for idx in range(numForks)]
    philosophers = [Philosopher(idx,forks,numForks,labels) for idx in range(numPhilosophers)]
    # 开启所有的哲学家线程
    for philosopher in philosophers:
        philosopher.start()
现在只剩下最后一个关了,创建一个Tkinter的界面
if __name__ == '__main__':
root = Tk() #实例化一个顶级窗口
root.title('哲学家问题') #设置界面标题
root.geometry('1000x700') #设置界面尺寸
start=Button(root,text='开始',command=main) #生成一个按钮,command参数为对应执行的函数名
#由于只是胚胎版的代码,没有深究tkinter布局,这里简单使用pack()
#这也是为什么哲学家是四个不是五个的原因,因为五个布局比较麻烦
#感兴趣的朋友可以自己检索“Tkinter 布局”等查找
start.pack(side='top',anchor='center') #按钮置于顶部中间位置
scroll = Scrollbar() #滚动条
text=Text(root,relief="sunken",width=35)
scroll.pack(side=RIGHT,fill=Y)
text.pack(side=RIGHT,fill=Y)
#将滚动条和文本框关联
scroll.config(command=text.yview)
text.config(yscrollcommand=scroll.set)
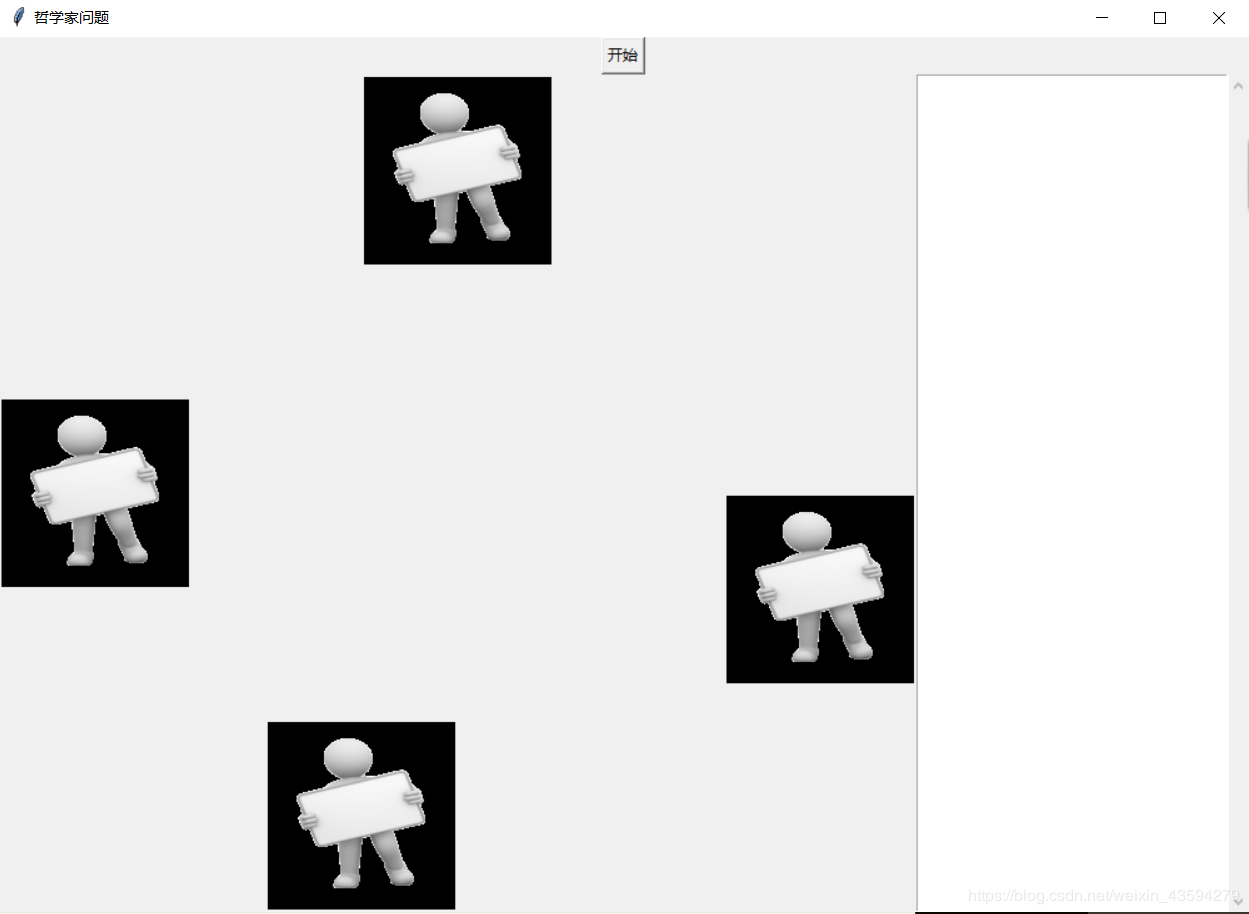
"""导入初始化的图片"""
img_init = Image.open(r'E:\哲学家\img\init.png')
img_init=img_init.resize((150,150),Image.BILINEAR)
bm_init=ImageTk.PhotoImage(img_init)
#构建一个labels列表用于对应哲学家编号的索引
labels=[]
"""对四个label进行布局"""
label0=Label(root,image=bm_init)
label0.image = bm_init
label0.pack(side='top')
labels.append(label0)
label1=Label(root,image=bm_init)
label1.image = bm_init
label1.pack(side='right')
labels.append(label1)
label2=Label(root,image=bm_init)
label2.image = bm_init
label2.pack(side='bottom')
labels.append(label2)
label3=Label(root,image=bm_init)
label3.image = bm_init
label3.pack(side='left')
labels.append(label3)
#最后一步,开启我们的界面循环
root.mainloop()
至此,我们的代码就写完了!看看效果吧!
图片有需要或者对代码有什么疑问欢迎提问,在下QQ:1334724312,问题答案为:不知道
喜欢的点个关注吧,亲
作者:weixin_43594279