vue使用动态组件实现TAB切换效果完整实例
目录
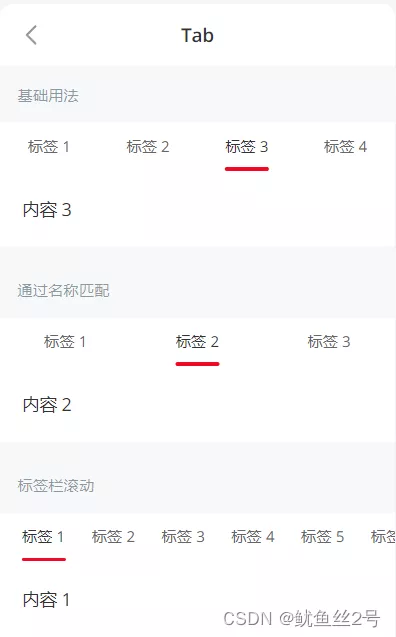
一、方法1:使用Vant组件库的tab组件
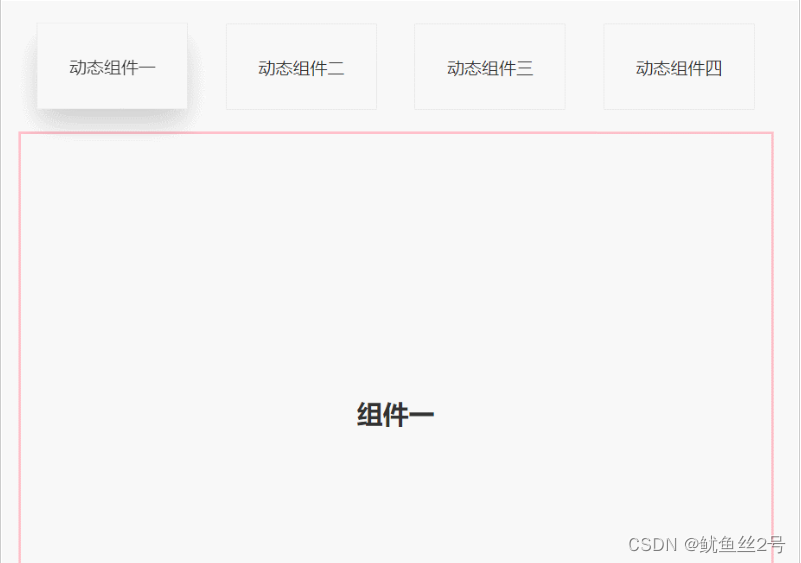
二、 方法2:手动创建tab切换效果
三、完整代码
总结
一、方法1:使用Vant组件库的tab组件Vant 2 - Mobile UI Components built on Vue
1.在components文件夹下创建切换的.vue页面、引入使用
import one from "./components/one";
import two from "./components/two";
import three from "./components/three";
import four from "./components/four";
components: {
    one,
    two,
    three,
    four,
},
2.布局:上面放tab点击的标签,下面放组件呈现对应内容
// 然后使用v-for循环出来呈现
<template>
   <div id="app">
      <div class="top">
      <!-- 放置tab点击标签 -->
         <div class="crad"
         :class="{ highLight: whichIndex == index }"
         v-for="(item, index) in cardArr"
         :key="index"
         @click="whichIndex = index">
            {{ item.componentName }}
        </div>
      </div>
      <div class="bottom">
        <!-- 放置动态组件... -->
       <!-- keep-alive缓存组件,这样的话,组件就不会被销毁,DOM就不会被重新渲染,
       浏览器也就不会回流和重绘,就可以优化性能。不使用的话页面加载就会慢一点 -->
       <keep-alive>
         <component :is="componentId"></component>
       </keep-alive>
      </div>
   </div>
</template>
3.写好上面的tab点击标签,定义数据修改样式
// 首先我们在data中定义数组cardArr存放点击tab的数据
data() {
   return {
      whichIndex: 0,
      cardArr: [
        {
          componentName: "动态组件一",
          componentId: "one",
        },{
          componentName: "动态组件二",
          componentId: "two",
        },{
          componentName: "动态组件三",
          componentId: "three",
        },{
          componentName: "动态组件四",
          componentId: "four",
        },
      ],
    };
},
// 又因为需要有高亮状态样式:默认索引0高亮
.highLight {
  box-shadow: 0 15px 30px rgba(0, 0, 0, 0.2);
  transform: translate3d(0, -1px, 0);
}
三、完整代码
<template>
  <div id="app">
    <div class="top">
      <div
        class="crad"
        :class="{ highLight: whichIndex == index }"
        v-for="(item, index) in cardArr"
        :key="index"
        @click="
          whichIndex = index;
          componentId = item.componentId;
        "
      >
        {{ item.componentName }}
      </div>
    </div>
    <div class="bottom">
      <keep-alive>
        <component :is="componentId"></component>
      </keep-alive>
    </div>
  </div>
</template>
<script>
import one from "./components/one";
import two from "./components/two";
import three from "./components/three";
import four from "./components/four";
export default {
  components: {
    one,
    two,
    three,
    four,
  },
  data() {
    return {
      whichIndex: 0,
      componentId: "one",
      cardArr: [
        {
          componentName: "动态组件一",
          componentId: "one",
        },
        {
          componentName: "动态组件二",
          componentId: "two",
        },
        {
          componentName: "动态组件三",
          componentId: "three",
        },
        {
          componentName: "动态组件四",
          componentId: "four",
        },
      ],
    };
  },
};
</script>
<style lang="less" scoped>
#app {
  width: 100%;
  height: 100vh;
  box-sizing: border-box;
  padding: 50px;
  .top {
    width: 100%;
    height: 80px;
    display: flex;
    justify-content: space-around;
    .crad {
      width: 20%;
      height: 80px;
      line-height: 80px;
      text-align: center;
      background-color: #fff;
      border: 1px solid #e9e9e9;
    }
    .highLight {
      box-shadow: 0 15px 30px rgba(0, 0, 0, 0.2);
      transform: translate3d(0, -1px, 0);
    }
  }
  .bottom {
    margin-top: 20px;
    width: 100%;
    height: calc(100% - 100px);
    border: 3px solid pink;
    display: flex;
    justify-content: center;
    align-items: center;
  }
}
</style>
总结
到此这篇关于vue使用动态组件实现TAB切换效果的文章就介绍到这了,更多相关vue动态组件实现TAB切换内容请搜索软件开发网以前的文章或继续浏览下面的相关文章希望大家以后多多支持软件开发网!
相关文章
Jenna
2020-10-09
Rosalia
2020-02-03
Claire
2021-05-21
Abbie
2023-07-20
Yvonne
2023-07-20
Rasine
2023-07-20
Tina
2023-07-20
Kande
2023-07-20
Flower
2023-07-20
Heather
2023-07-20
Tertia
2023-07-20
Fredrica
2023-07-20
Katherine
2023-07-20
Genet
2023-07-20
Orianna
2023-07-20
Gella
2023-07-20
Ora
2023-07-20
Fern
2023-07-20
Irene
2023-07-20