VIBE:配置环境以及论文思想与创新点分析,Ubuntu18+cuda10.1+torch-1.4.0+torchvision0.5.0
*论文:
https://arxiv.org/abs/1912.05656
GitHub:
https://github.com/mkocabas/VIBE
AMASS数据集:
https://amass.is.tue.mpg.de/*
**
**
前面的nvidia,cuda cudnn和ananconda安装百度就好
这里环境名字一致比较好
conda create -n vibe-env python=3.7

pip install numpy==1.17.5
torch和torchvision以及后面需要到Google云盘下载的文件链接:
pip install torch-1.4.0-cp37-cp37m-manylinux1_x86_64.whl
pip uninstall torchvision-0.5.0-cp37-cp37m-linux_x86_64.whl
第三步下载源码配置
git clone https://github.com/mkocabas/VIBE
cd VIBE
运行pip 或者 conda脚本
bash install_conda.sh
pip install -r requirements.txt#上面有问题可以用这个
若现在运行代码会出现
 所以先装好了
sudo apt install ffmpeg
第四步准备数据
可打开这个prepare_data.sh文件看看
 这里得翻墙下载或者从该链接下载https://pan.baidu.com/s/1PUVrFSw1wJ52DWuc4xEO4Q
得到一个vibe_data.zip
在VIBE文件夹下建一个data文件夹,并把vibe_data.zip解压到该文件夹下得到一个vibe_data文件夹
mkdir data
cd data
unzip vibe_data.zip
配置好yolov3的文件路径
mv data/vibe_data/yolov3.weights $HOME/.torch/models/#$HOME是你自己的路径
mv yolov3.cfg /home/tkh/.torch/config/yolov3.cfg#这个作者没说不过得加这个文件也在百度云盘
最后
运行demo.py 可更改输入文件和输出文件夹python demo.py --vid_file sample_video.mp4 --output_folder output/ --display
GPU渲染如果溢出,可修改参数
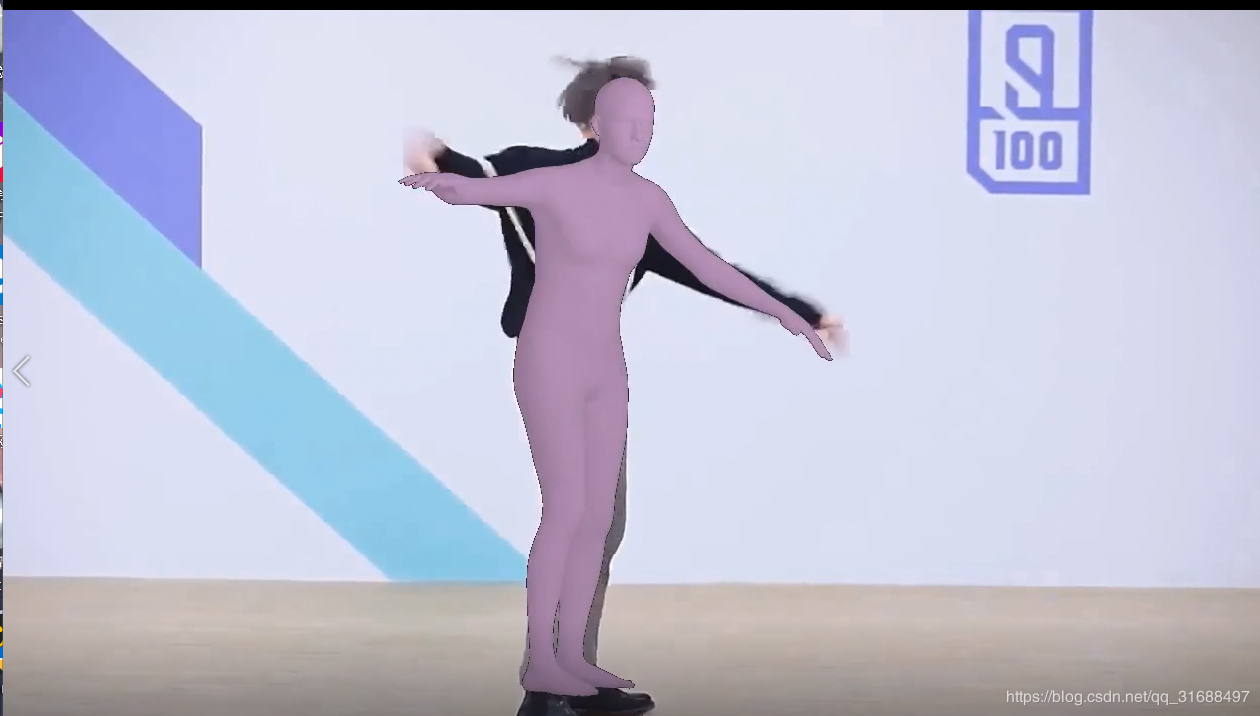
这是运行成功得视频

还有很多参数可以设置 可以看看README.md和git’
This implementation:
- is the demo code for VIBE implemented purely in PyTorch,
- can work on arbitrary videos with multi person,
- supports both CPU and GPU inference (though GPU is way faster),
- is fast, up-to 30 FPS on a RTX2080Ti (see [this table](doc/demo.md#runtime-performance)),
- achieves SOTA results on 3DPW and MPI-INF-3DHP datasets,
- includes Temporal SMPLify implementation.
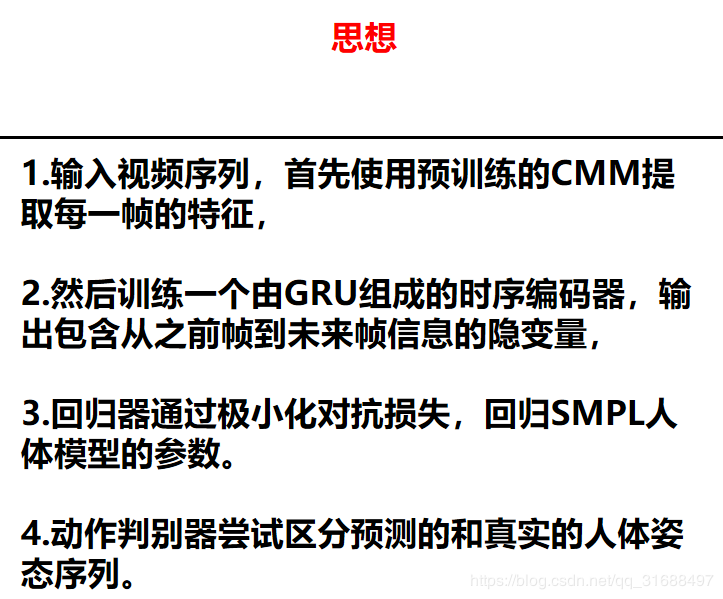
论文思想


作者:八倍体小黑麦
相关文章
Caltha
2021-03-01
Vanora
2020-10-01
Maleah
2020-01-07
Miki
2020-02-01
Fronde
2021-01-18
Fawn
2023-05-12
Julie
2023-05-12
Jacinda
2023-05-13
Penelope
2023-05-13
Tia
2023-07-17
Ursula
2023-07-20
Rhea
2023-07-20
Hazel
2023-07-20
Habiba
2023-07-20
Kamiisa
2023-07-20
Bianca
2023-07-20