纯css3实现宠物小鸡实例代码
最近看了很多关于css3的知识和文章,觉得css3用起来很方便,使用css3的话,在页面布局上可以省去很多不必要的代码。所以最近用css3仿写了我每天都照顾的宠物小鸡的模样,第一次写,有些细节处理的不够好。
先看最终效果图:
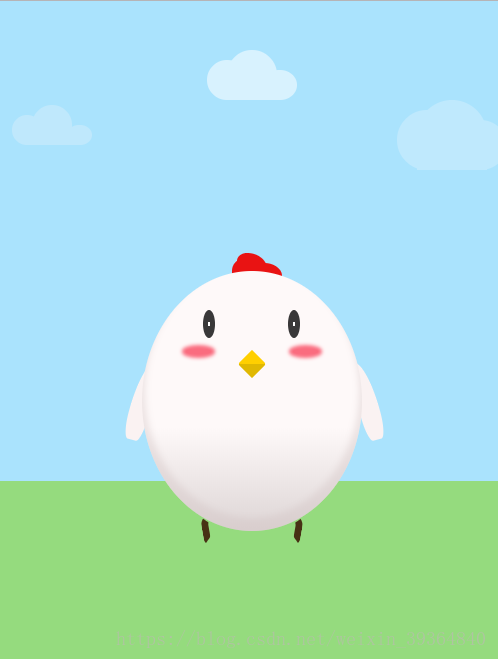
接下来是我书写的步骤:
首先是html,分别写出云朵,小鸡的身体,鸡冠,眼睛,嘴巴,腮红,翅膀,鸡爪
<body>
    <div class="content">
        <!-- 天上的云 -->
        <div class="cloud">
            <div class="content"></div>
        </div>
        <!--鸡冠-->
        <div class="crest"></div>
        <!--翅膀-->
        <div class="hand"></div>
        <!-- 宠物小鸡body -->
        <div class="egg">
            <!--眼睛-->
            <div class="eye"></div>
            <!--腮红-->
            <div class="blush"></div>
            <!--嘴-->
            <div class="mouth"></div>
            <!--脚-->
            <div class="feet"></div>
        </div>
    </div>
</body>
接下来是css设置样式:
先设置整体的背景色,使用的是线性渐变linear-gradient,设置蓝天色和草地色,并设置让元素居中。
.content {
        width: 100%;
        height: 800px;
        background: linear-gradient(rgb(170, 227, 253) 60%, rgb(149, 219, 126) 80px);
        display: flex;
        justify-content: center;
        align-items: center;
        }
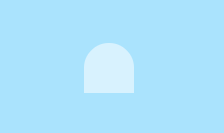
天上的云:先给一定的宽高和背景色,使用border-radius设置边框圆角效果,只设置左上和右上。效果如下:
border-radius: 100% 100% 0 0;
在使用::before和::after伪元素画出一朵完整的云:
.content::before,
 .content::after {
                content: '';
                position: absolute;
                bottom: 0;
            }
  .content::before {
                width: 40px;
                height: 40px;
                background: currentColor;
                left: -20px;
                border-radius: 100% 100% 0 100%;
            }
   .content::after {
                width: 35px;
                height: 30px;
                background: currentColor;
                right: -20px;
                border-radius: 100% 100% 100% 0;
            }
然后使用阴影在画出两朵云

.content,
.content::before,
.content::after {
                box-shadow:
                -200px 50px 0 -5px rgb(191, 232, 252),
                 200px 60px 0 10px rgb(191, 233, 253);
            }

云朵实现了。
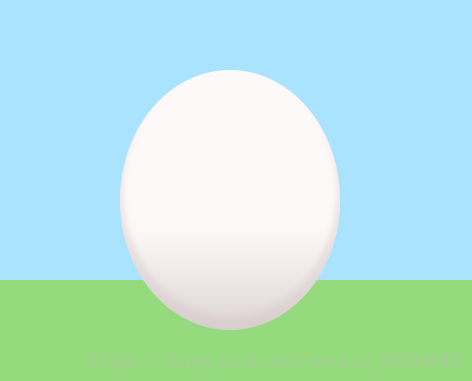
接下来是宠物小鸡,先把身体写出来,同样用border-radius设置边框圆角效果,画出鸡蛋的模样,设置背景色,并使用box-shadow设置向内的阴影。
.egg {
            width: 220px;
            height: 260px;
            border-radius: 100%;
            background: linear-gradient(rgb(254, 249, 249) 60%,rgb(221, 213, 213));
            position: absolute;
            display: flex;
            flex-direction: column;
            align-items: center;
            box-shadow: 0 -10px 10px 3px rgba(211, 194, 194,0.4) inset;
}
鸡冠和云朵的写法差不多
.crest {
            position: relative;
            top: -17%;
            width: 30px;
            height: 25px;
            background: rgb(233, 19, 19);
            border-radius: 50% 100% 20% 20%;
        }
  .crest::before,
  .crest::after {
            content: '';
            position: absolute;
            bottom: 0;
            width: 20px;
            background: rgb(233, 19, 19);
        }
  .crest::before {
            left: -5px;
            height: 20px;
            border-radius: 100% 50% 0 20%;
        }
  .crest::after {
            right: -15px;
            height: 15px;
            background: rgb(233, 19, 19);
            border-radius: 20% 200% 20% 30%;
        }
眼睛,翅膀,腮红,分别用伪元素左右定位设置大小即可实现。嘴部使用transform旋转45°并使用线性渐变设置鸡嘴的阴影效果。
全部css代码如下(我安装了sass插件,所以是scss的写法):
body {
    margin: 0;
    width: 100%;
    height: 100%;
    >.content {
        width: 100%;
        height: 800px;
        background: linear-gradient(rgb(170, 227, 253) 60%, rgb(149, 219, 126) 80px);
        display: flex;
        justify-content: center;
        align-items: center;
        >.cloud {
            position: absolute;
            top: 5%;
            color: rgb(216, 242, 254);
            >.content {
                width: 50px;
                height: 50px;
                background: currentColor;
                border-radius: 100% 100% 0 0;
            }
            >.content::before,
            >.content::after {
                content: '';
                position: absolute;
                bottom: 0;
            }
            >.content::before {
                width: 40px;
                height: 40px;
                background: currentColor;
                left: -20px;
                border-radius: 100% 100% 0 100%;
            }
            >.content::after {
                width: 35px;
                height: 30px;
                background: currentColor;
                right: -20px;
                border-radius: 100% 100% 100% 0;
            }
            >.content,
            .content::before,
            .content::after {
                box-shadow: -200px 50px 0 -5px rgb(191, 232, 252),
                             200px 60px 0 10px rgb(191, 233, 253);
            }
        }
        >.egg {
            width: 220px;
            height: 260px;
            border-radius: 100%;
            background: linear-gradient(rgb(254, 249, 249) 60%,rgb(221, 213, 213));
            position: absolute;
            display: flex;
            flex-direction: column;
            align-items: center;
            box-shadow: 0 -10px 10px 3px rgba(211, 194, 194,0.4) inset;
            >.eye::before,
            .eye::after {
                content: '';
                position: absolute;
                top: 15%;
                width: 12px;
                height: 28px;
                border-radius: 100%;
                background: radial-gradient(white 1px, rgb(57, 56, 57) 5%);
            }
            > .eye::before{
                left: 28%;
            }
            >.eye::after {
                right: 28%;
            }
            >.blush::before,
            .blush::after {
                content: '';
                position: absolute;
                top: 30%;
                width: 25px;
                height: 5px;
                transform: rotate(0deg);
                background: rgb(250, 108, 127);
                border-radius: 100%;
                box-shadow: 0 0 5px 4px rgb(250, 108, 127);
            }
            >.blush::before {
                left: 20%;
            }
            >.blush::after {
                right: 20%;
            }
            >.mouth {
                position: absolute;
                top: 32%;
                width: 20px;
                height: 20px;
                background:
                    linear-gradient(135deg, rgb(255, 207, 0) 50%,
                    rgb(224, 184, 2) 50%);
                transform: rotate(45deg);
                border-radius: 5% 15%;
            }
            > .feet::before,
            .feet::after{
                content: '';
                position: absolute;
                bottom: -12px;
                width: 10px;
                height: 15px;
                border: 7px solid rgb(71, 49, 20);
            }
            > .feet::before{
                left: 60px;
                border-radius: 80% 100% 100% 50%;
                transform: rotate(-10deg);
                border-color: transparent  transparent transparent rgb(71, 49, 20);
            }
            > .feet::after{
                right: 60px;
                border-radius: 100% 80% 50% 0%;
                transform: rotate(10deg);
                border-color: transparent rgb(71, 49, 20) transparent transparent ;
            }
        }
        >.crest {
            position: relative;
            top: -17%;
            width: 30px;
            height: 25px;
            background: rgb(233, 19, 19);
            border-radius: 50% 100% 20% 20%;
        }
        >.crest::before,
        .crest::after {
            content: '';
            position: absolute;
            bottom: 0;
            width: 20px;
            background: rgb(233, 19, 19);
        }
        >.crest::before {
            left: -5px;
            height: 20px;
            border-radius: 100% 50% 0 20%;
        }
        >.crest::after {
            right: -15px;
            height: 15px;
            background: rgb(233, 19, 19);
            border-radius: 20% 200% 20% 30%;
        }
        > .hand{
            position: relative;
            top: -5%;
        }
        > .hand::before,
        .hand::after{
            content: '';
            position: absolute;
        }
        > .hand::before{
            left:-135px;
            width: 20px;
            height: 80px;
            transform: rotate(15deg);
            background: rgb(250, 242, 242);
            border-radius: 100% 0 50% 50%;
        }
        > .hand::after{
            right: -110px;
            width: 20px;
            height: 80px;
            transform: rotate(-15deg);
            background: rgb(250,242,242);
            border-radius: 50% 100% 50% 50%;
        }
    }
}
总结
以上所述是小编给大家介绍的纯css3实现宠物小鸡实例代码,希望对大家有所帮助,如果大家有任何疑问请给我留言,小编会及时回复大家的。在此也非常感谢大家对软件开发网网站的支持!
相关文章
Laurie
2020-11-30
Dabria
2020-01-05
Olinda
2023-02-26
Bunny
2023-02-26
Kefira
2023-02-26
Jacinthe
2023-02-26
Viridis
2023-02-26
Tertia
2023-02-26
Elina
2023-03-29
Querida
2023-04-14
Serafina
2023-04-19
Rhea
2023-04-19
Malinda
2023-04-19
Kathy
2023-04-19
Nora
2023-04-19
Pandora
2023-04-19
Tani
2023-04-19
Tanisha
2023-04-19
Thalia
2023-05-17