Android Studio和阿里云数据库实现一个远程聊天程序
没有阿里云数据库的可以买个最便宜的,我是新用户9.9元买了一个
1.买到后点击左上角的工作台
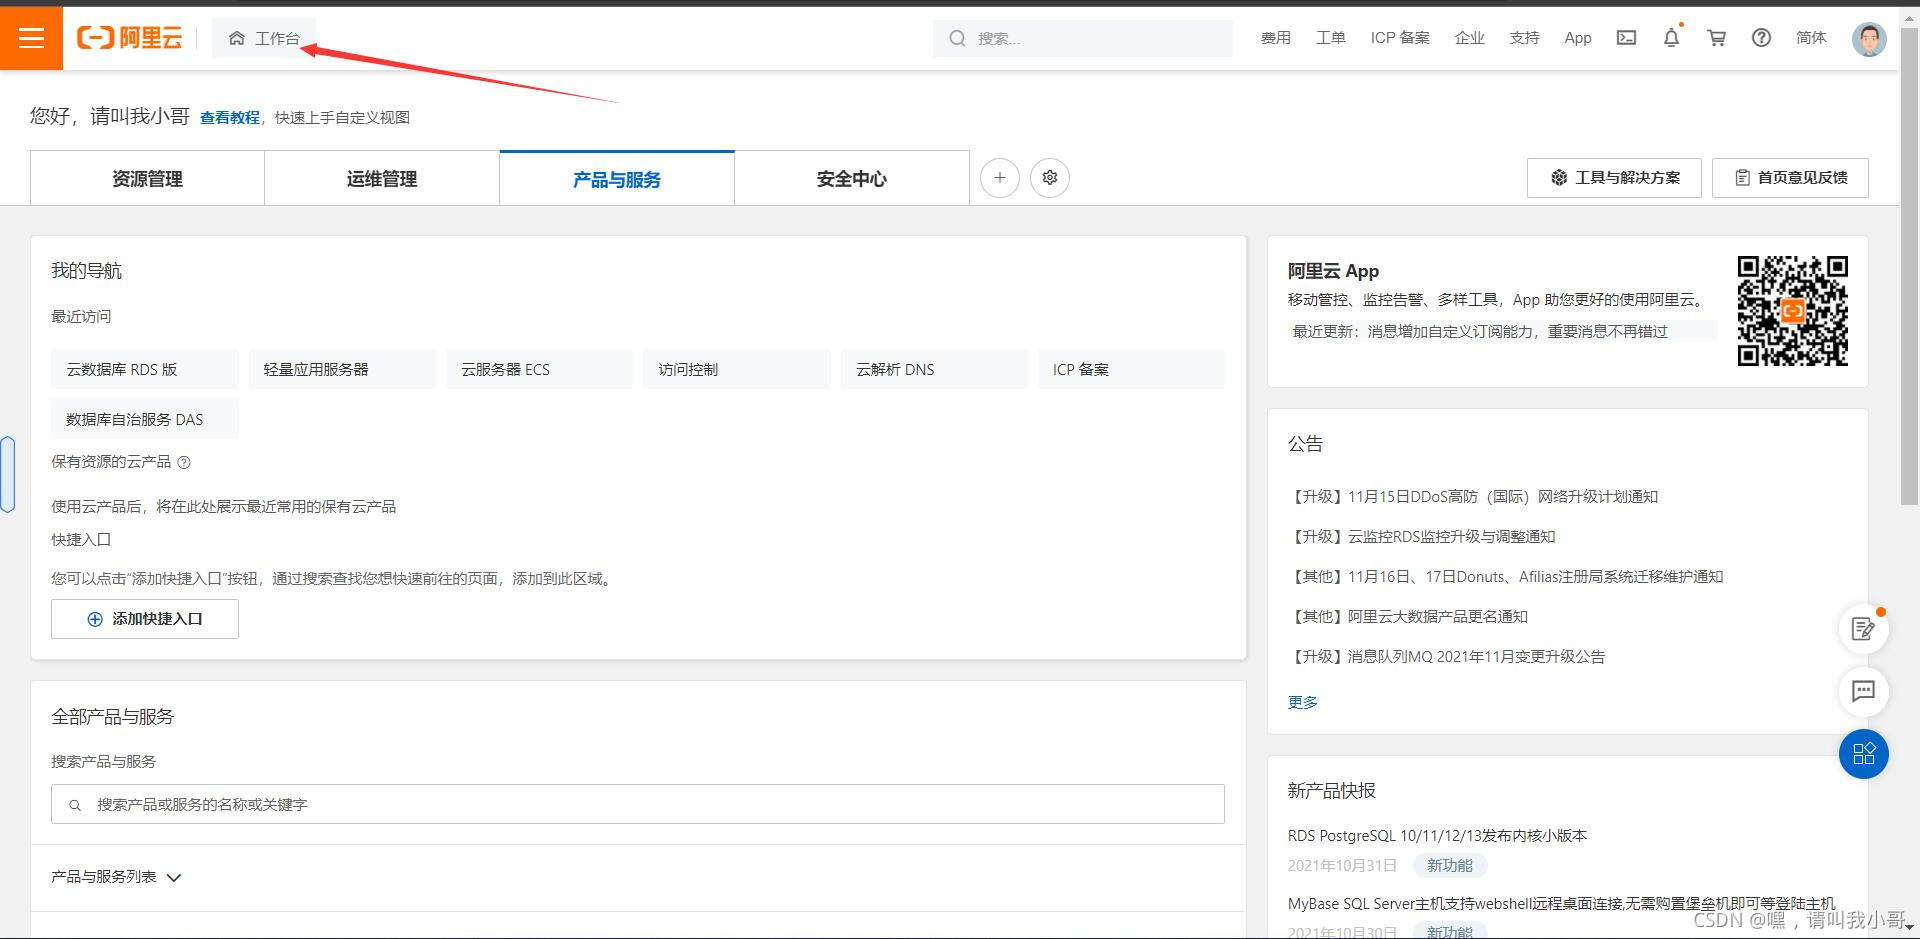
2.
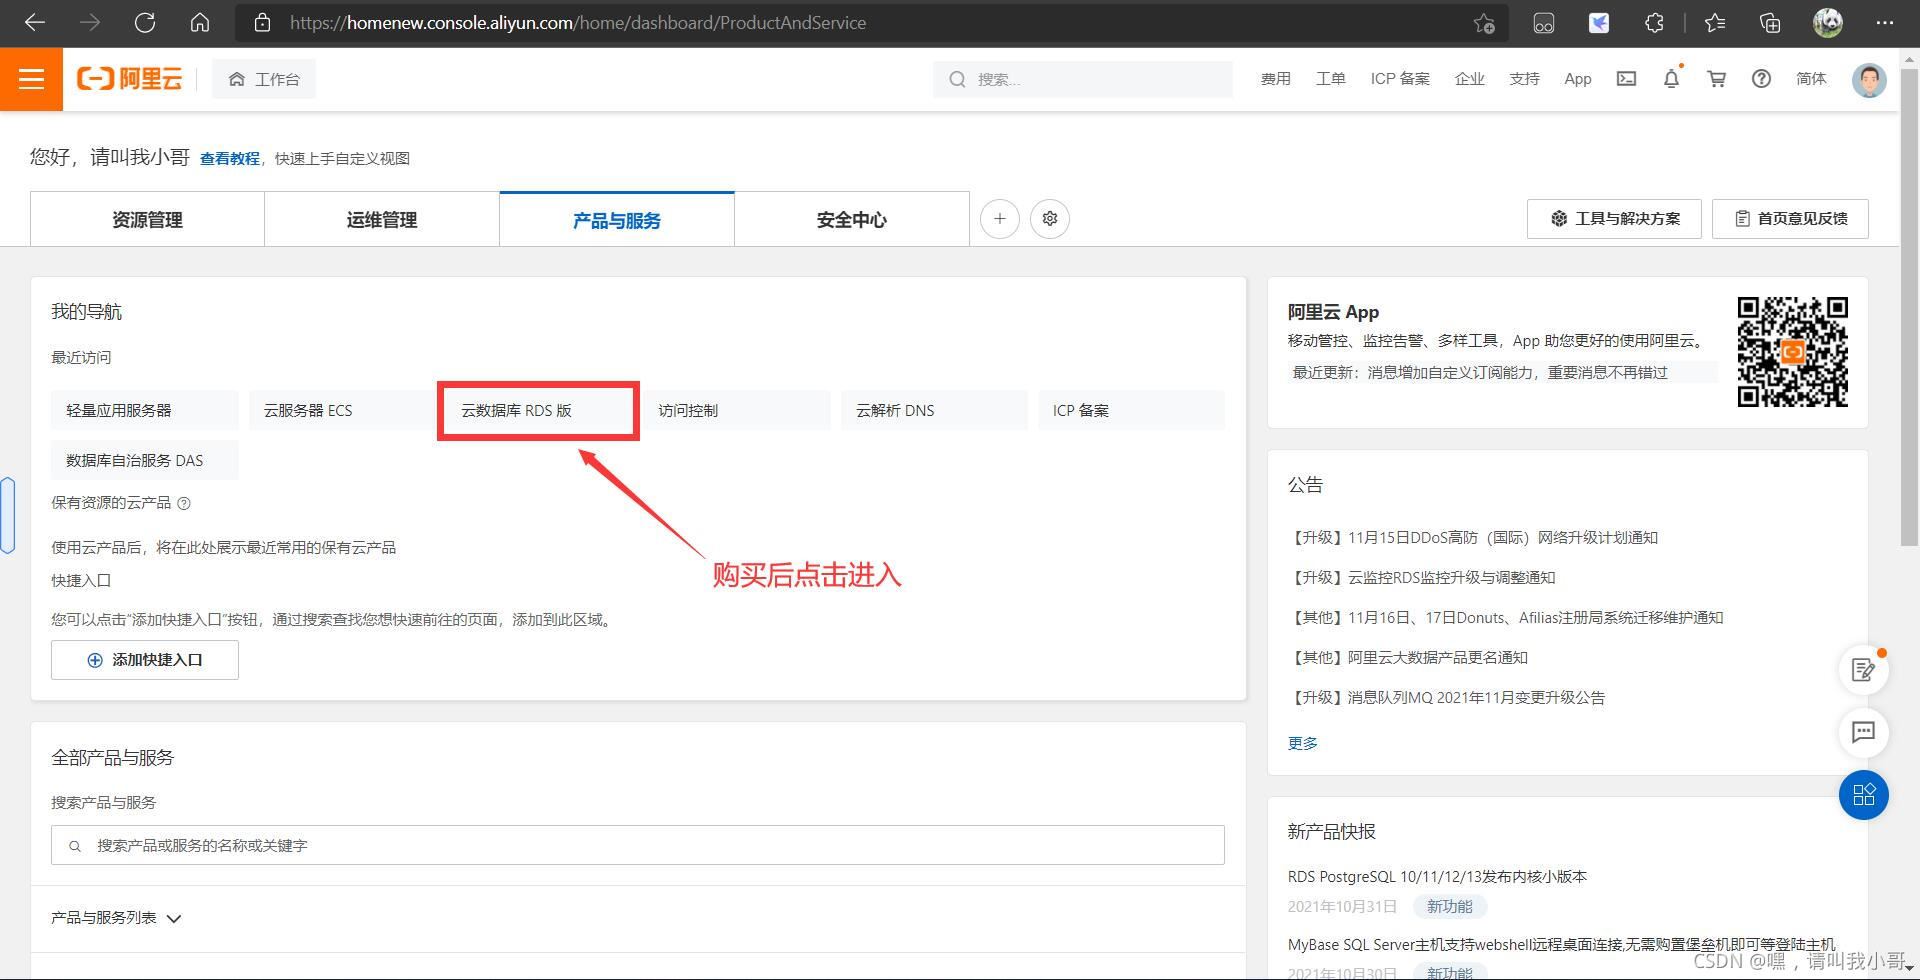
3.
4.
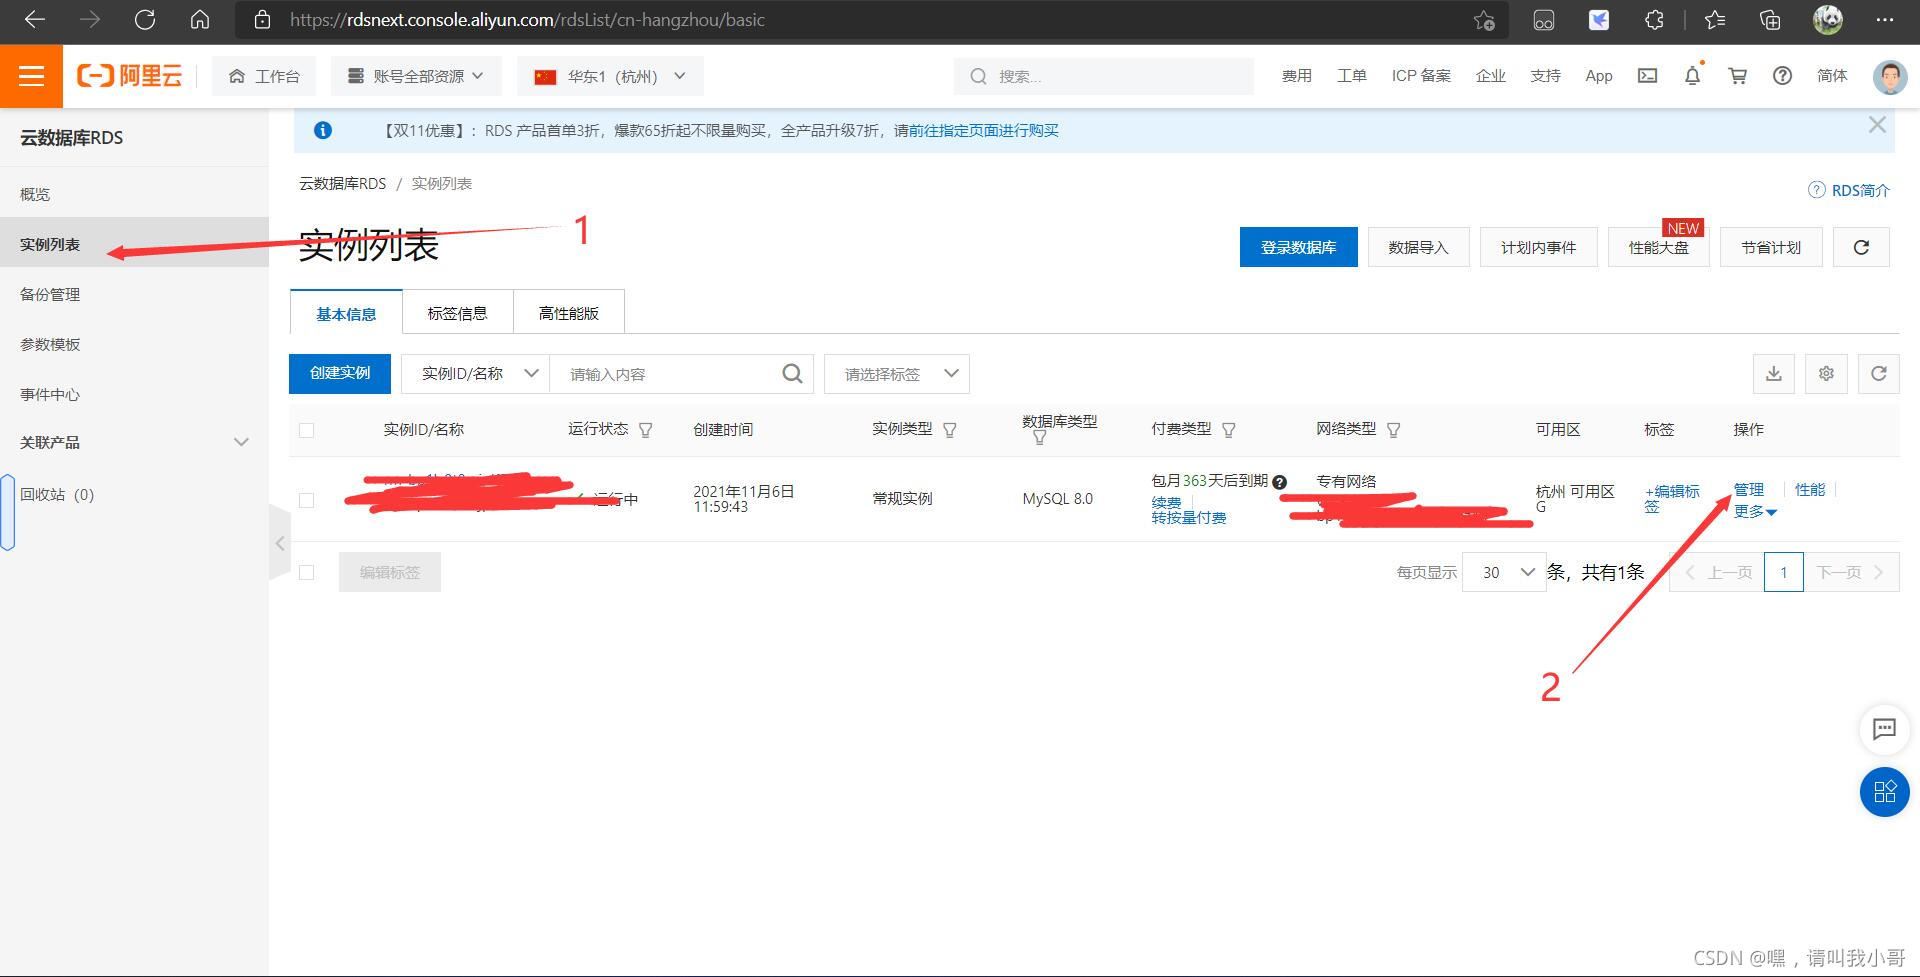
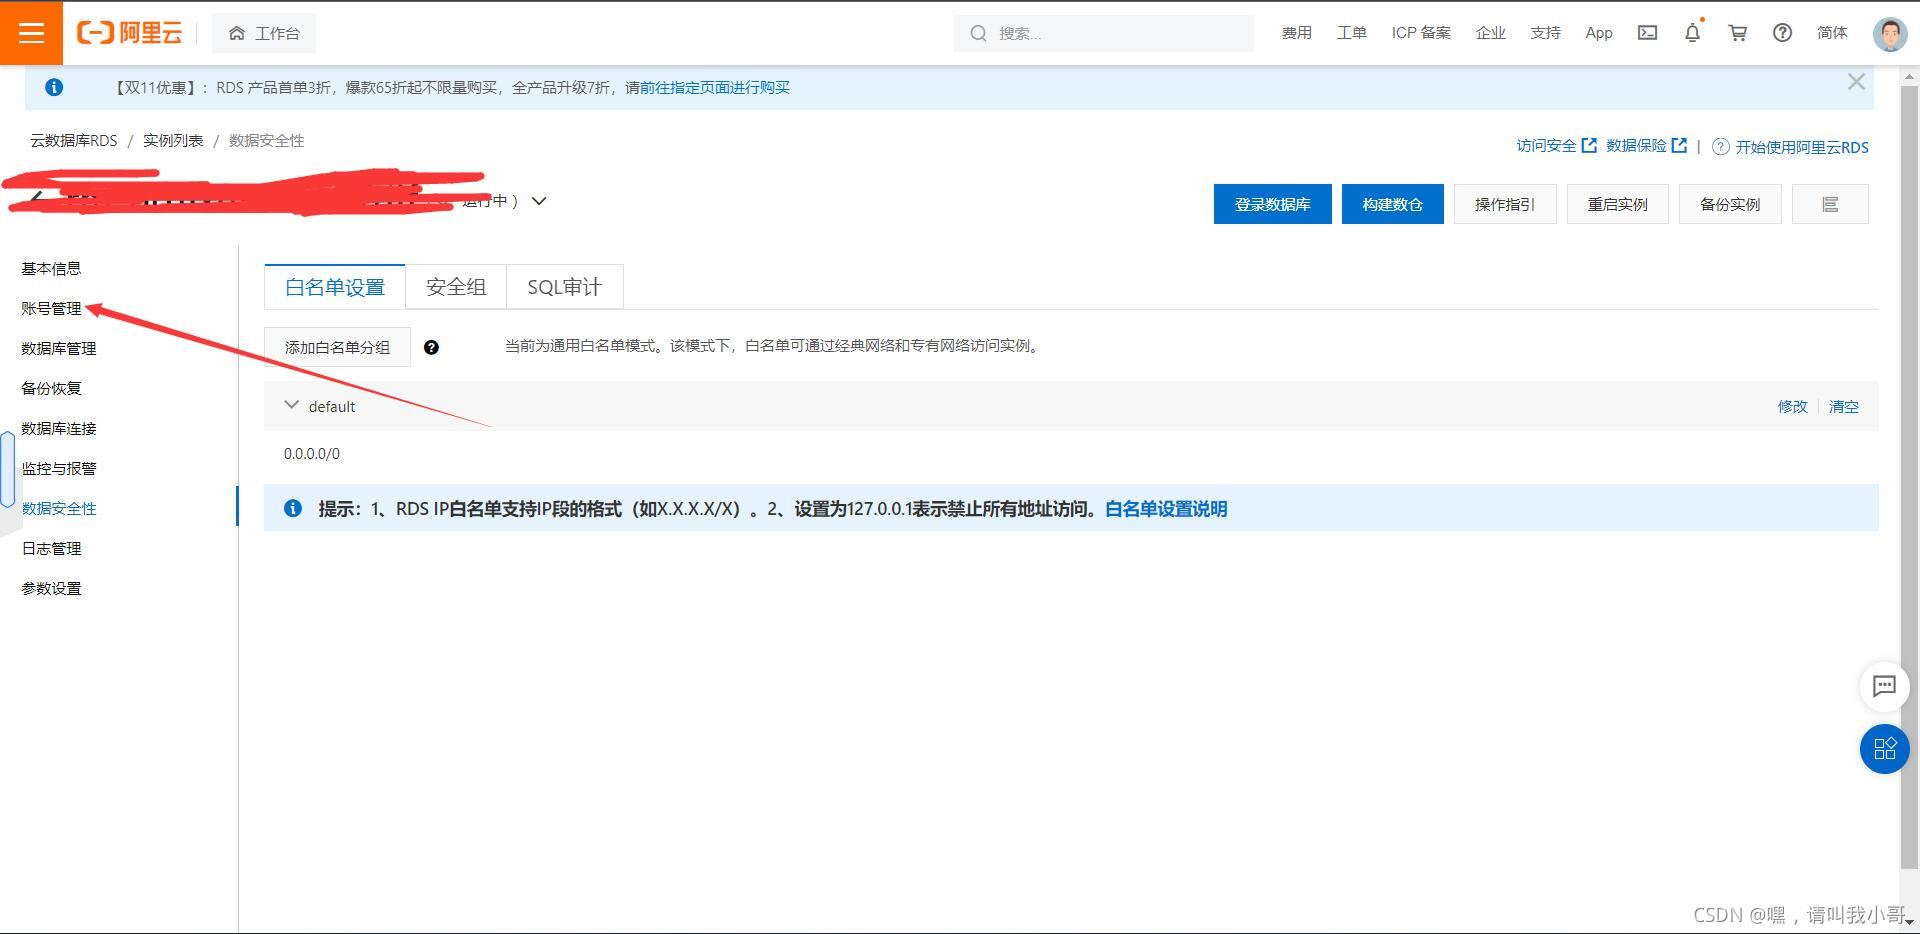
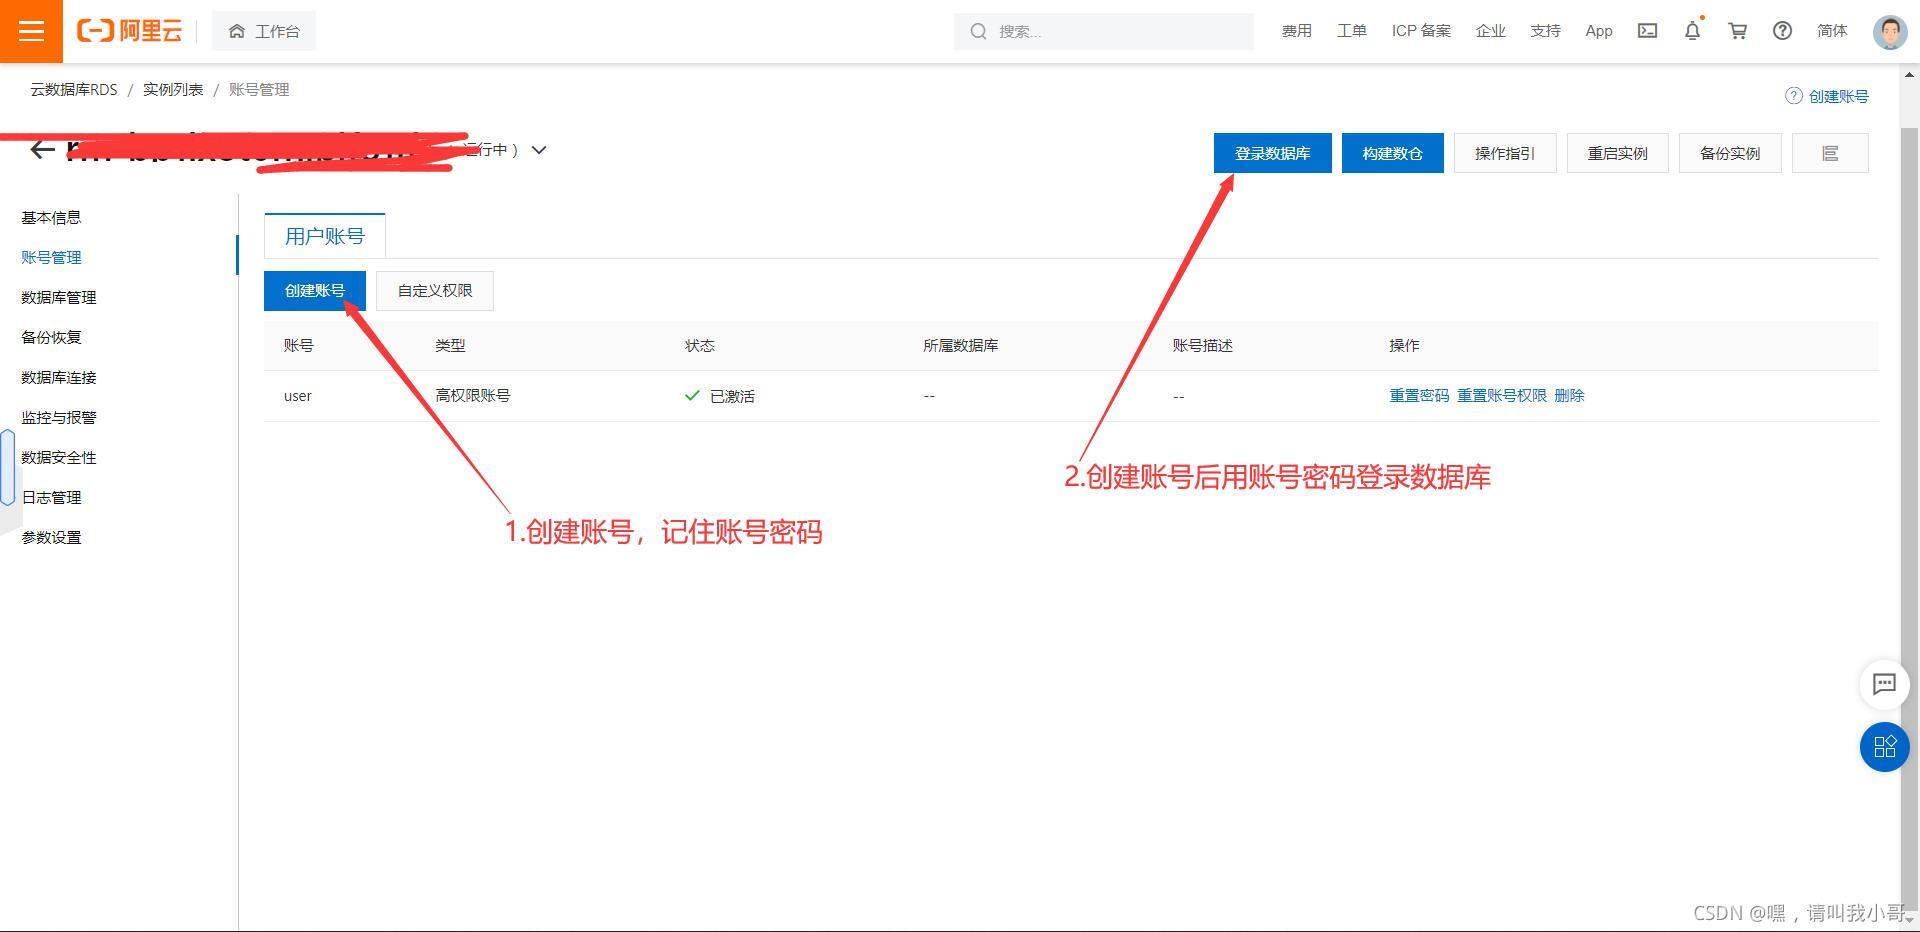
5.
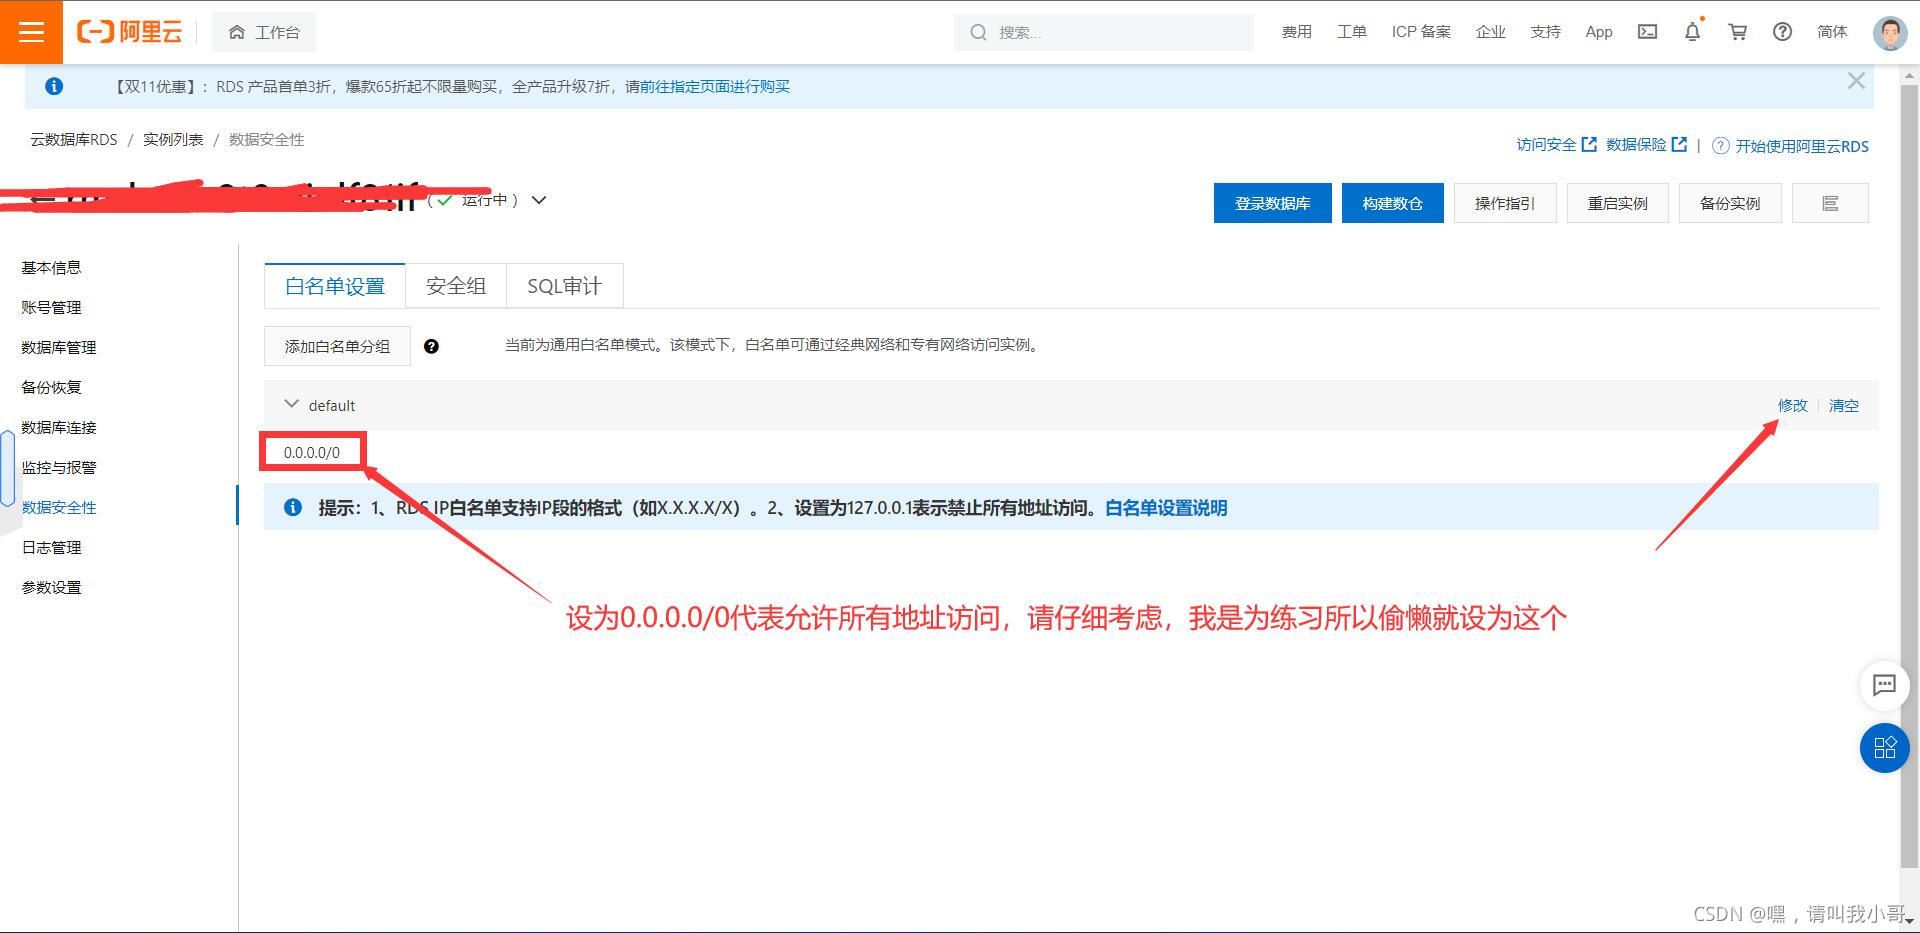
6.
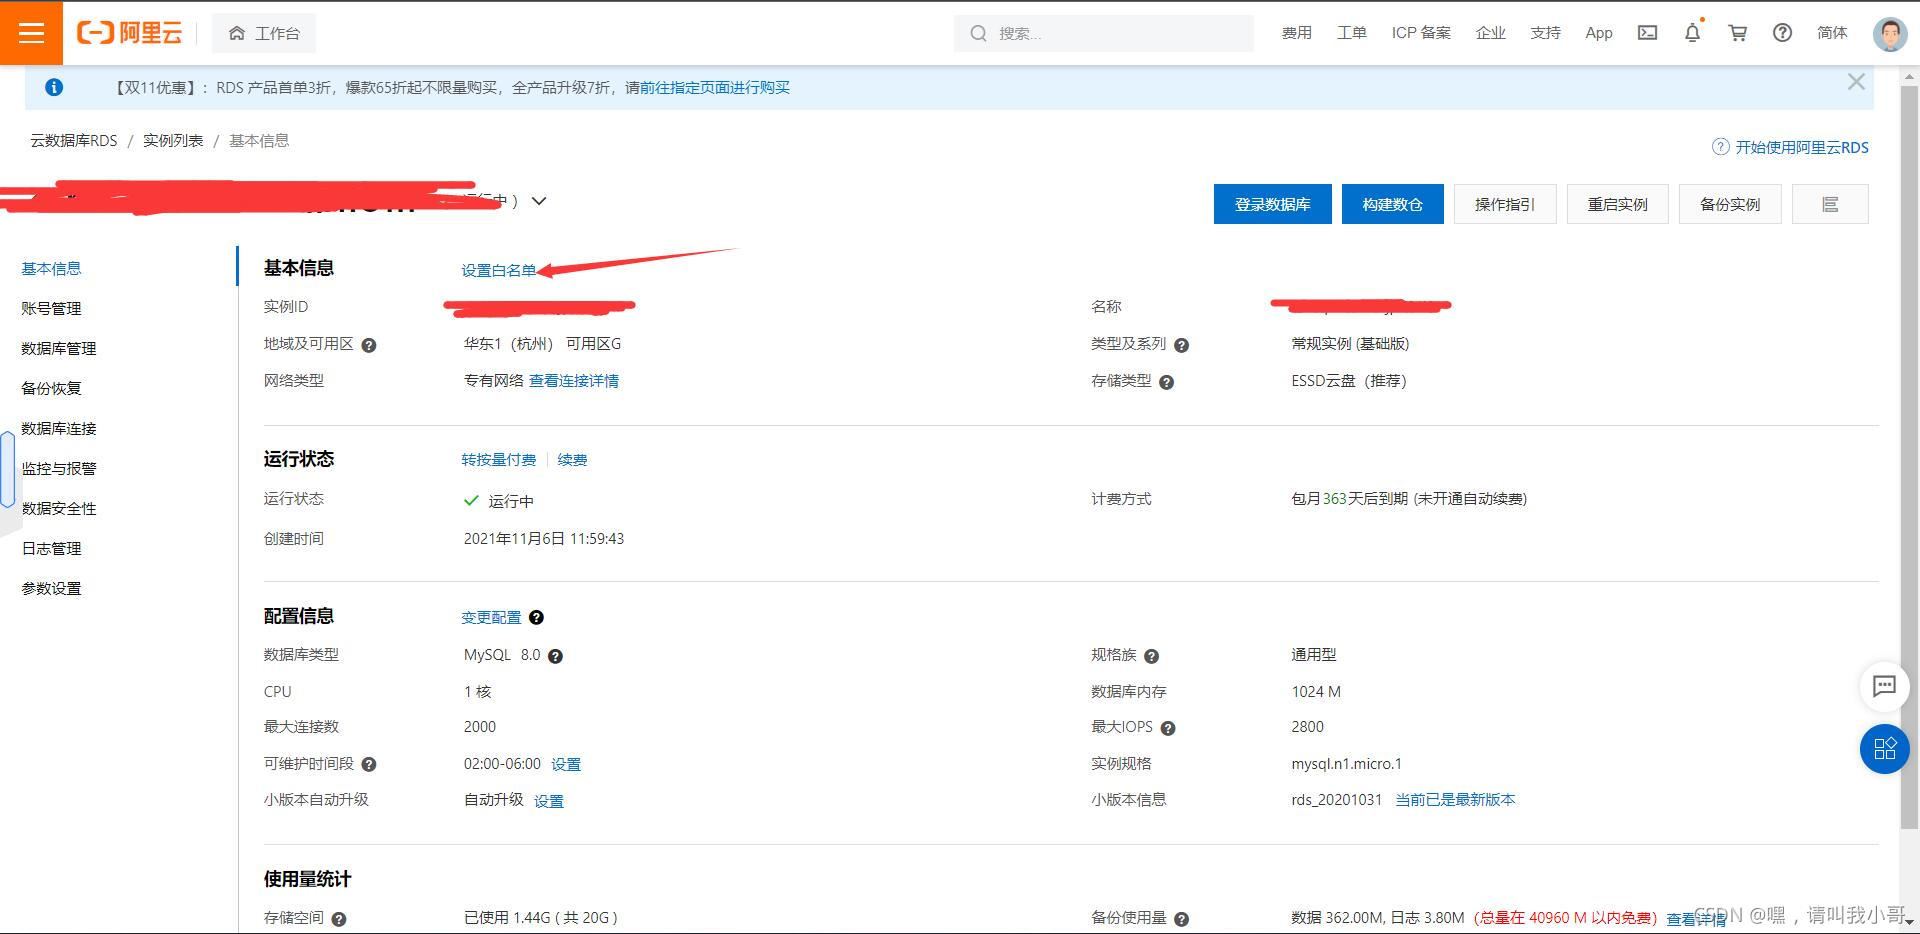
7.
8.
9.

10.
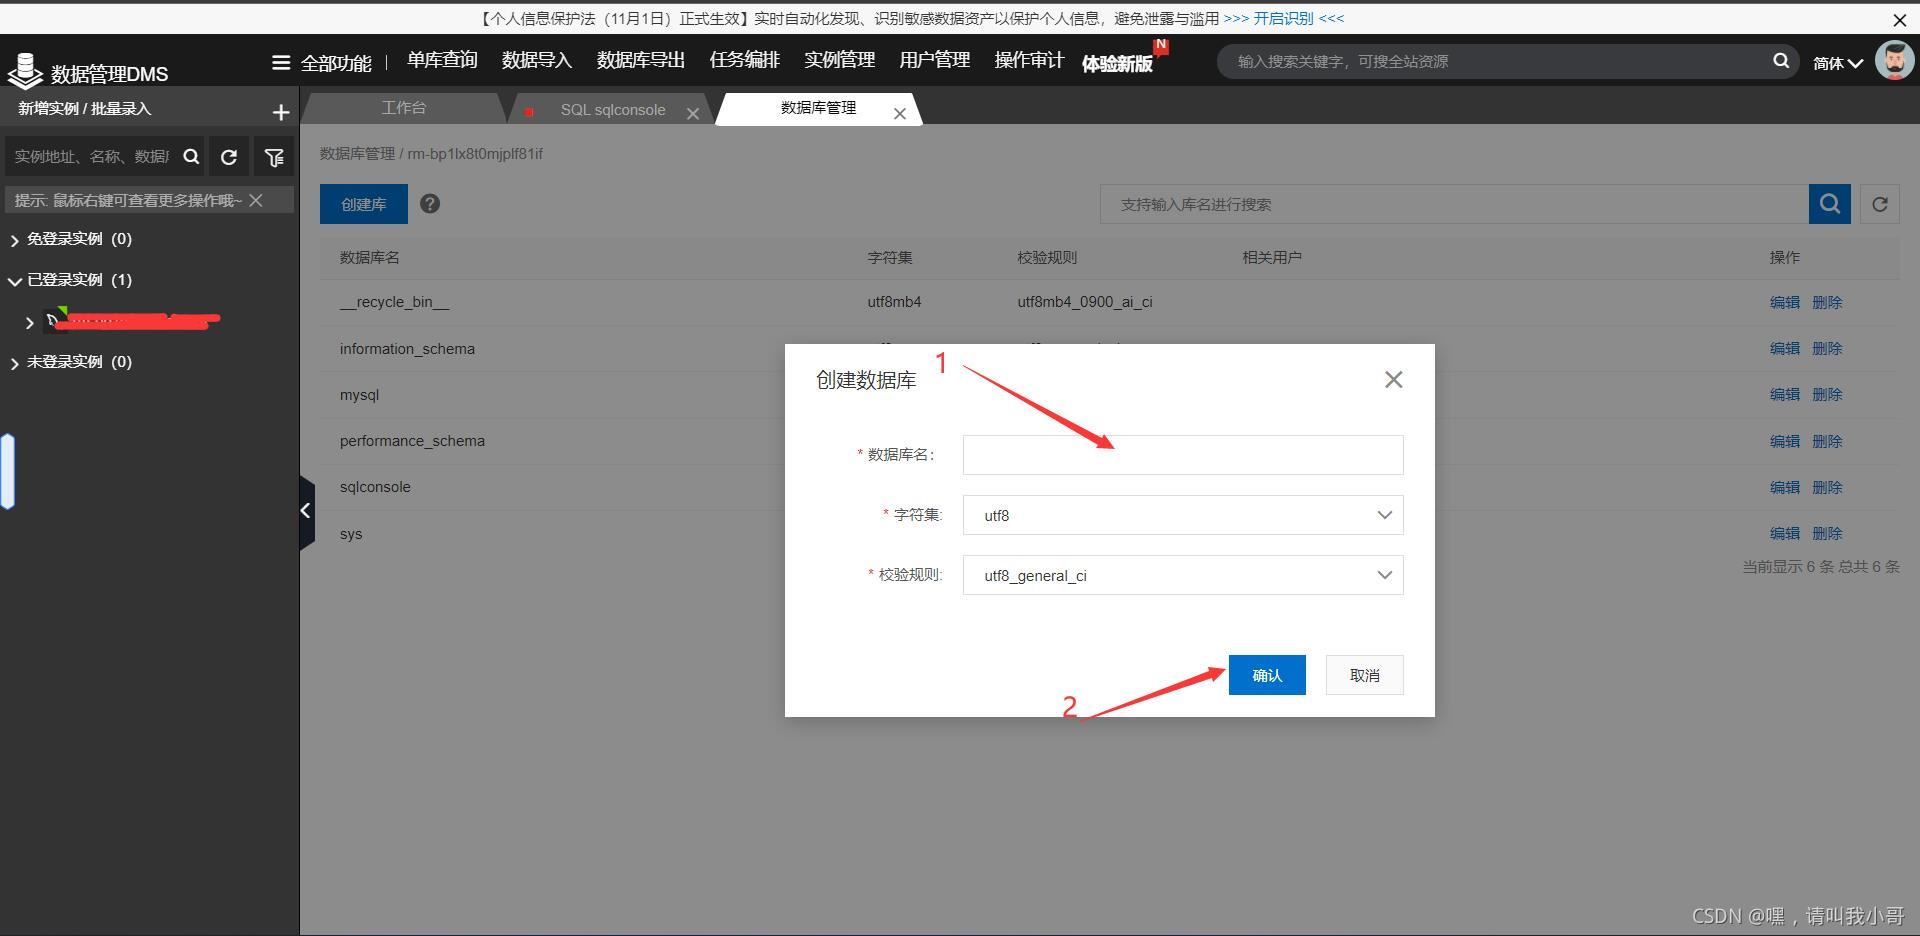
11.
12.

13.
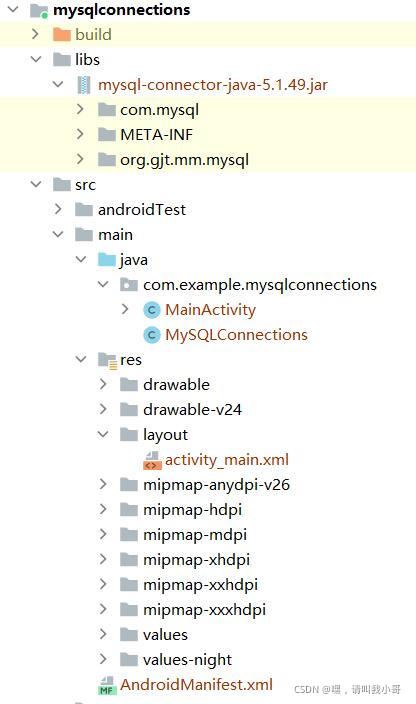
开始写Android Studio项目代码了,先来看看我的项目结构
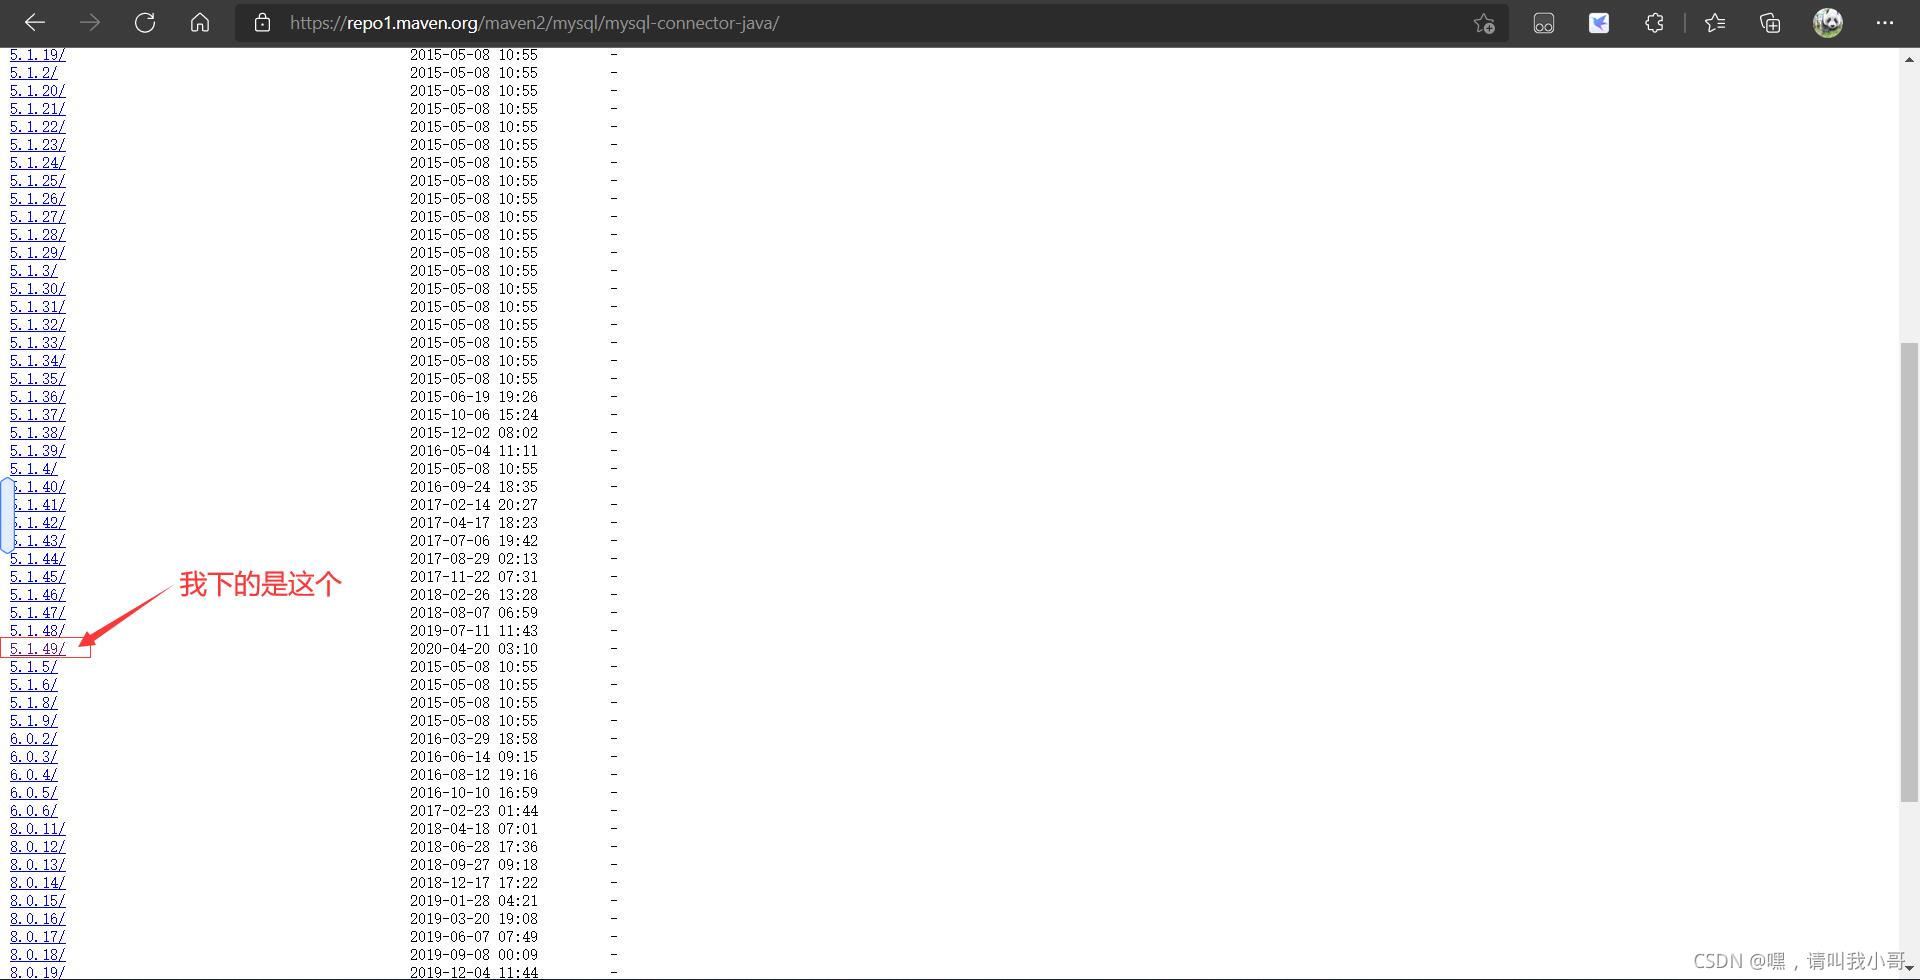
依赖包下载地址 Central Repository: mysql/mysql-connector-java (maven.org)
我第一次下了个版本比较新的发现会报错,由于我能力有限,所以就老实下载一个低版本的
添加依赖包应该都会了吧,不要忘了添加后还要添加到模块
MainActivity代码如下
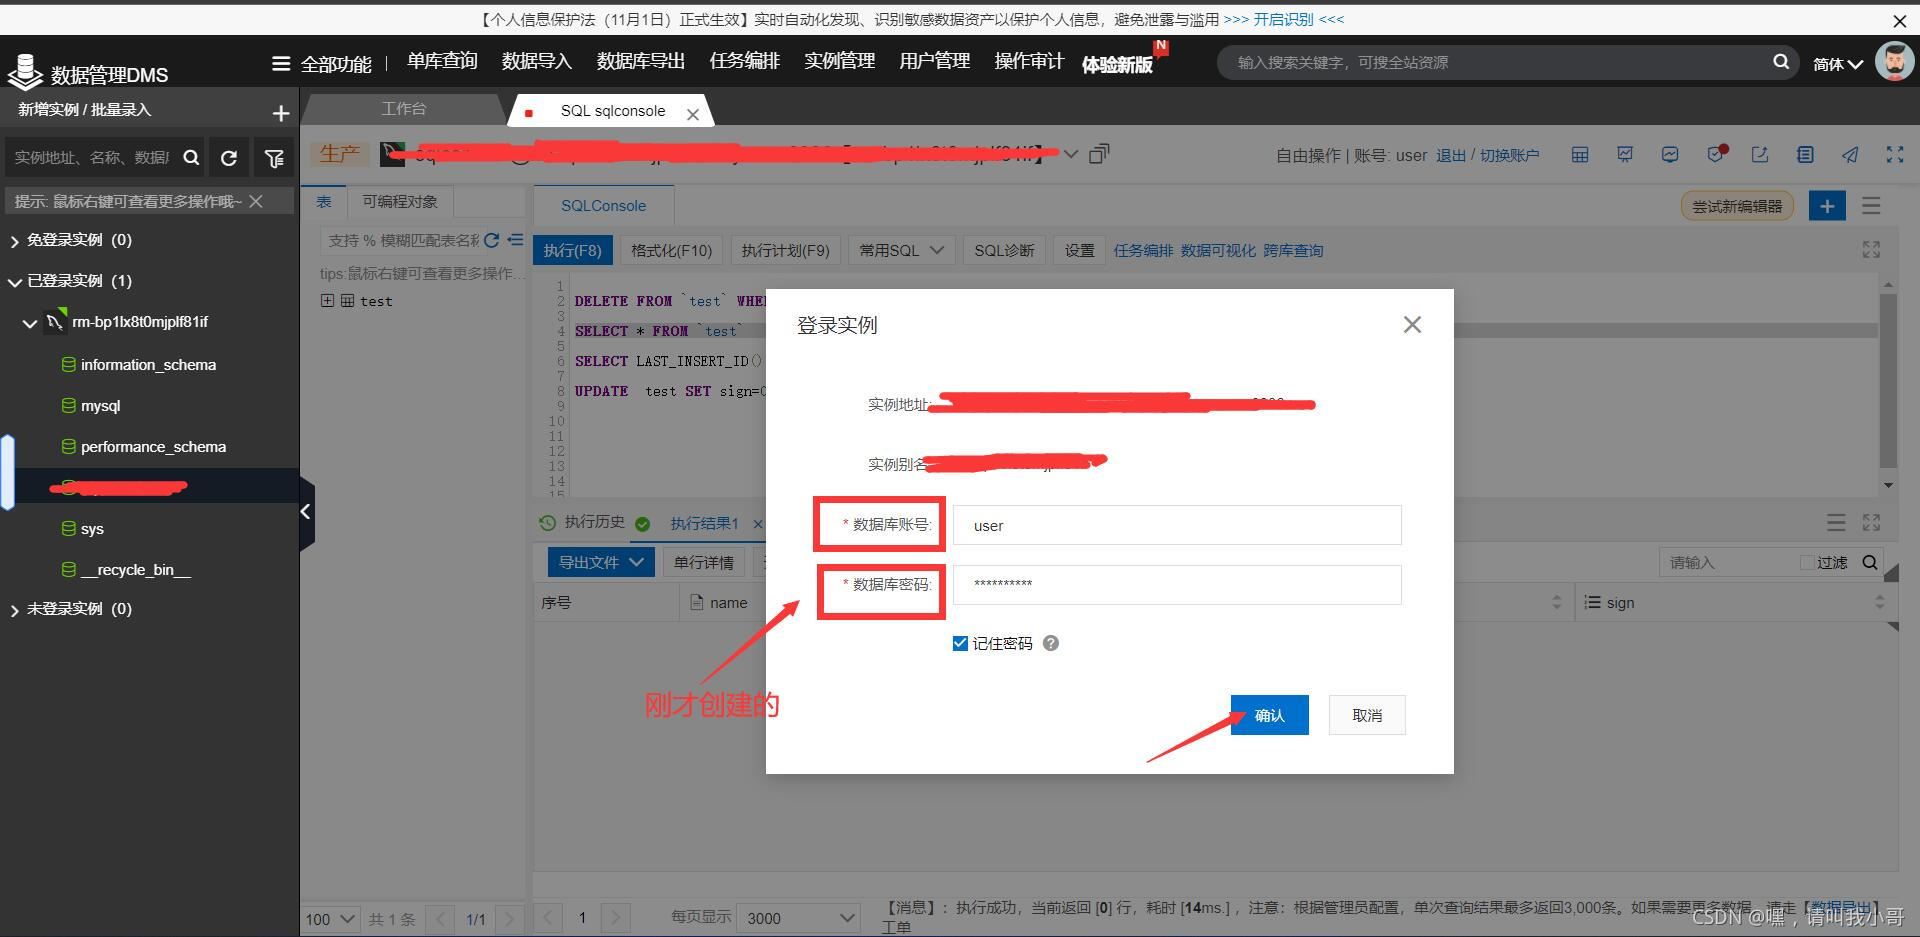
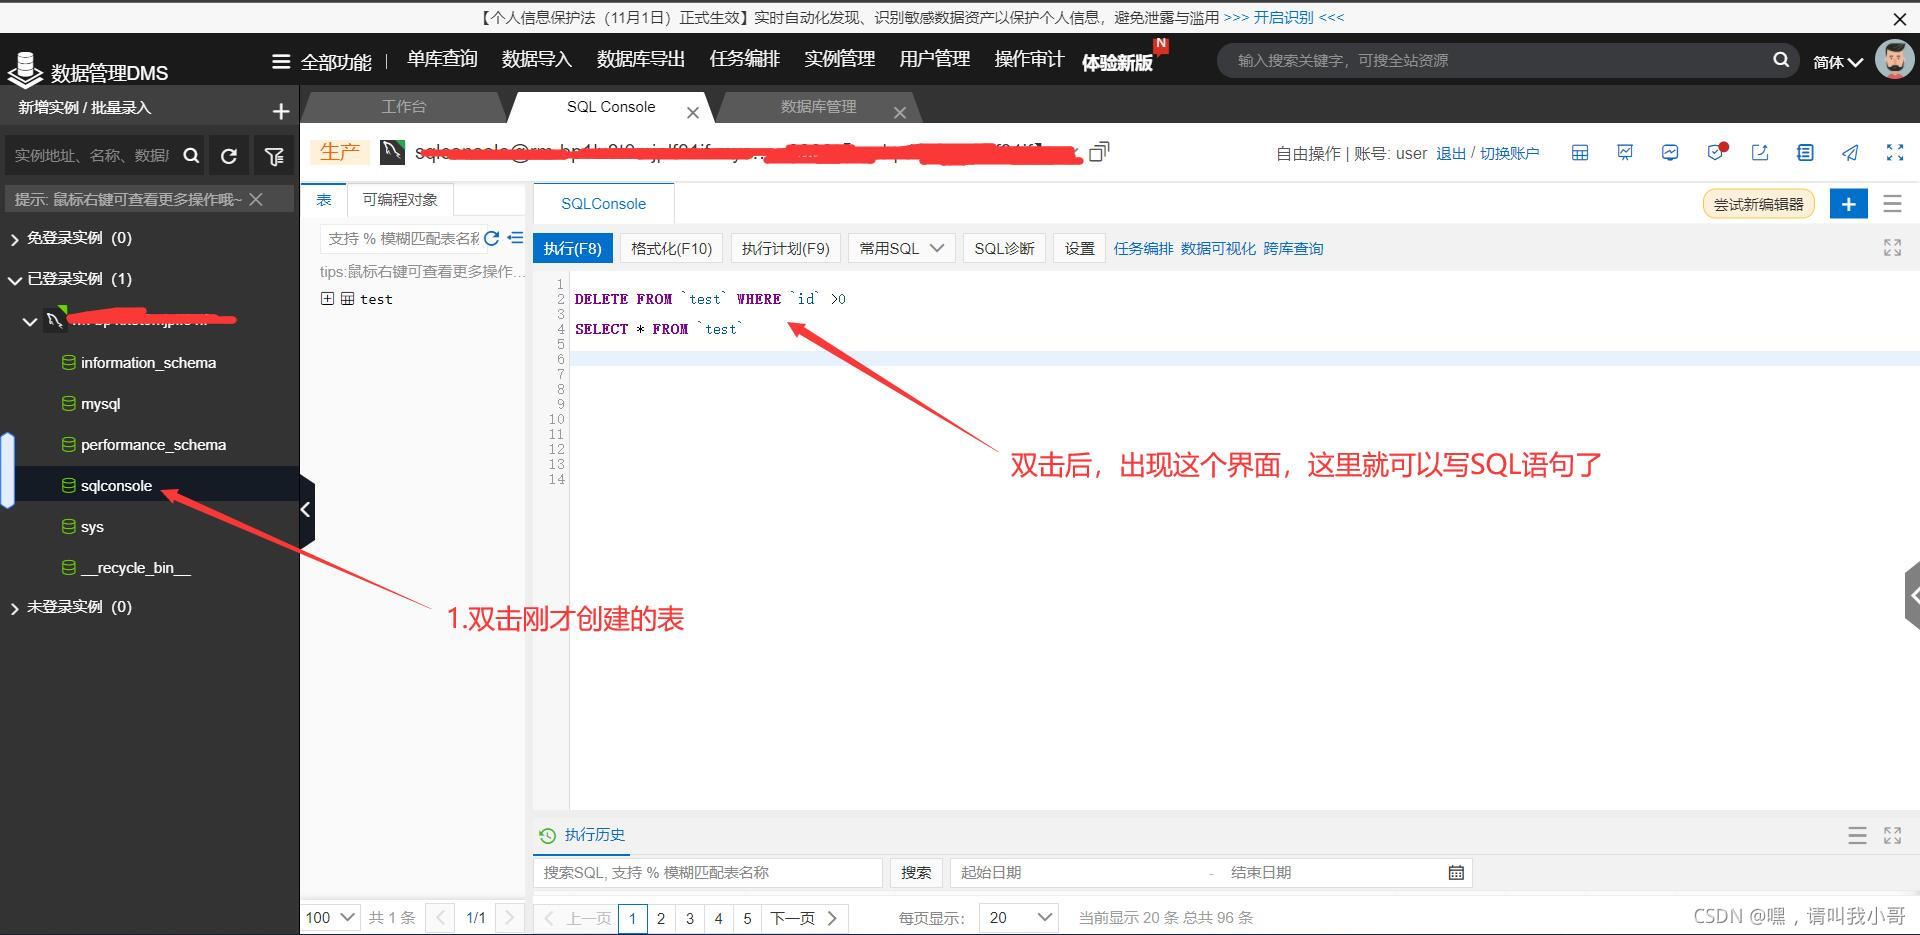
注意代码里涉及SQL语句,这里要根据你之前新建的数据库和新建的表来写,我新建的表是test
import android.os.Bundle;
import android.os.Looper;
import android.view.View;
import android.widget.Button;
import android.widget.EditText;
import android.widget.TextView;
import android.widget.Toast;
import androidx.appcompat.app.AppCompatActivity;
import java.sql.Connection;
import java.sql.PreparedStatement;
import java.sql.ResultSet;
import java.sql.SQLException;
public class MainActivity extends AppCompatActivity {
    private TextView t1;  //用于显示获取的信息
    private Button sendmsg;  //发送消息按钮
    private EditText et_msg;//用户输入信息框
    private String user="user"; //默认用户昵称
    private boolean T=false;//发送标志位
    //数据库连接类对象
    private static Connection con = null;
    private static PreparedStatement stmt = null;
    private Button revise;
    private EditText et_revise;
    @Override
    protected void onCreate(Bundle savedInstanceState) {
        super.onCreate(savedInstanceState);
        setContentView(R.layout.activity_main);
        //初始化
        t1 = findViewById(R.id.t1);
        et_msg = findViewById(R.id.msg);
        et_revise = findViewById(R.id.reviseText);
        sendmsg = findViewById(R.id.button);
        revise = findViewById(R.id.revise);
        revise.setOnClickListener(new View.OnClickListener() {
            @Override
            public void onClick(View view) {
                user = et_revise.getText().toString();
                Toast.makeText(MainActivity.this,"修改成功",Toast.LENGTH_SHORT).show();
            }
        });
        sendmsg.setOnClickListener(new View.OnClickListener() {
            @Override
            public void onClick(View v) { T=true; }
        });
        //TODO 启动发送线程,用按钮控制发送标志位T,来进行发送信息【注意:连接数据库必须在线程内,不然会报错】
        Threads_sendmsg threads_sendmsg = new Threads_sendmsg();
        threads_sendmsg.start();
        //TODO 启动获取数据线程,读取数据库里的信息【注意:连接数据库必须在线程内,不然会报错】
        Threads_readSQL threads_readSQL = new Threads_readSQL();
        threads_readSQL.start();
    }
    class Threads_sendmsg extends Thread {
        @Override
        public void run() {
            while (true){
                while (T){
                    try {
                        con = MySQLConnections.getConnection();
                    } catch (Exception e) {
                        e.printStackTrace();
                    }
                    try {
                             //注意你数据库中是否有 test 这个表,我新建的表是 test
                            //还有我的属性,是否和我一样呢,不一样就按你自己的来吧
                        String msg =et_msg.getText().toString().trim(); //用户发送的信息
                        if (msg.isEmpty()){
                            Looper.prepare();
                            Toast.makeText(MainActivity.this, "消息为空", Toast.LENGTH_SHORT).show();
                            Looper.loop();
                            T=false;
                            break;
                        }
                        if (msg.length()>199){
                            Looper.prepare();
                            Toast.makeText(MainActivity.this, "消息长度超过限制", Toast.LENGTH_SHORT).show();
                            Looper.loop();
                            T=false;
                            break;
                        }
                        if (con!=null) {
                            runOnUiThread(new Runnable() {
                                @Override
                                public void run() {
                                    Toast.makeText(MainActivity.this, "发送成功", Toast.LENGTH_SHORT).show();
                                }
                            });
                            String sql = "insert into test(name,msg,sign)  values(?,?,?)";
                            stmt = con.prepareStatement(sql);
                            // 关闭事务自动提交 ,这一行必须加上
                            con.setAutoCommit(false);
                            stmt.setString(1,user);
                            stmt.setString(2,msg);
                            stmt.setInt(3,1);
                            stmt.addBatch();
                            stmt.executeBatch();
                            con.commit();
                        }
                    }catch (SQLException e){
                        System.out.println(e);
                        runOnUiThread(new Runnable() {
                            @Override
                            public void run() {
                                Toast.makeText(MainActivity.this,"请输入正确的语句",Toast.LENGTH_SHORT).show();
                            }
                        });
                    }
                    T=false;
                }
            }
        }
    }
    class Threads_readSQL extends Thread {
        ResultSet rs;
        @Override
        public void run() {
            while (true) {
                try {
                    con = MySQLConnections.getConnection();
                } catch (Exception e) {
                    e.printStackTrace();
                }
                try {
                            //注意你数据库中是否有 test 这个表,我新建的表是 test
                            //还有我的属性,是否和我一样呢,不一样就按你自己的来吧
                    String sql = "select name,msg,sign from test";
                    if (con != null) {
                        stmt = con.prepareStatement(sql);
                        // 关闭事务自动提交
                        con.setAutoCommit(false);
                        rs = stmt.executeQuery();//创建数据对象
                        //清空上次发送的信息
                        t1.setText(null);
                        while (rs.next() ) {
                            t1.append(rs.getString(1) + "\n" + rs.getString(2) + "\n\n");
                        }
                        con.commit();
                        rs.close();
                        stmt.close();
                    }
                    //2秒更新一次
                    sleep(2000);
                } catch (Exception e) {
                    System.out.println(e);
                    runOnUiThread(new Runnable() {
                        @Override
                        public void run() {
                            //Toast.makeText(MainActivity.this,"请输入正确的语句",Toast.LENGTH_SHORT).show();
                        }
                    });
                }
            }
        }
    }
}
MainActivity布局文件activity_main.xml
<?xml version="1.0" encoding="utf-8"?>
<LinearLayout xmlns:android="http://schemas.android.com/apk/res/android"
    xmlns:app="http://schemas.android.com/apk/res-auto"
    xmlns:tools="http://schemas.android.com/tools"
    android:layout_width="match_parent"
    android:layout_height="match_parent"
    tools:context=".MainActivity"
    android:orientation="vertical">
    // An highlighted block
    <TextView
        android:id="@+id/t1"
        android:layout_width="match_parent"
        android:layout_height="0dp"
        android:layout_weight="10"
        android:text="Hello World!"
        android:layout_marginLeft="8dp"
         />
    <LinearLayout
        android:layout_width="match_parent"
        android:layout_height="0dp"
        android:layout_weight="1"
        android:orientation="vertical">
        <LinearLayout
            android:layout_width="match_parent"
            android:layout_height="match_parent"
            android:layout_weight="1"
            android:orientation="horizontal">
            <EditText
                android:id="@+id/reviseText"
                android:layout_width="wrap_content"
                android:layout_height="wrap_content"
                android:layout_weight="1"
                android:ems="10"
                android:hint="请输入你的昵称"
                android:inputType="textPersonName" />
            <Button
                android:id="@+id/revise"
                android:layout_width="wrap_content"
                android:layout_height="wrap_content"
                android:layout_weight="1"
                android:text="修改" />
        </LinearLayout>
        <LinearLayout
            android:layout_width="match_parent"
            android:layout_height="match_parent"
            android:layout_weight="1"
            android:orientation="horizontal">
            <EditText
                android:id="@+id/msg"
                android:layout_width="wrap_content"
                android:layout_height="match_parent"
                android:layout_weight="1"
                android:ems="10"
                android:hint="请输入内容"
                android:inputType="textPersonName" />
            <Button
                android:id="@+id/button"
                android:layout_width="wrap_content"
                android:layout_height="match_parent"
                android:layout_weight="1"
                android:text="发送" />
        </LinearLayout>
    </LinearLayout>
</LinearLayout>
MYSQLConnections代码如下
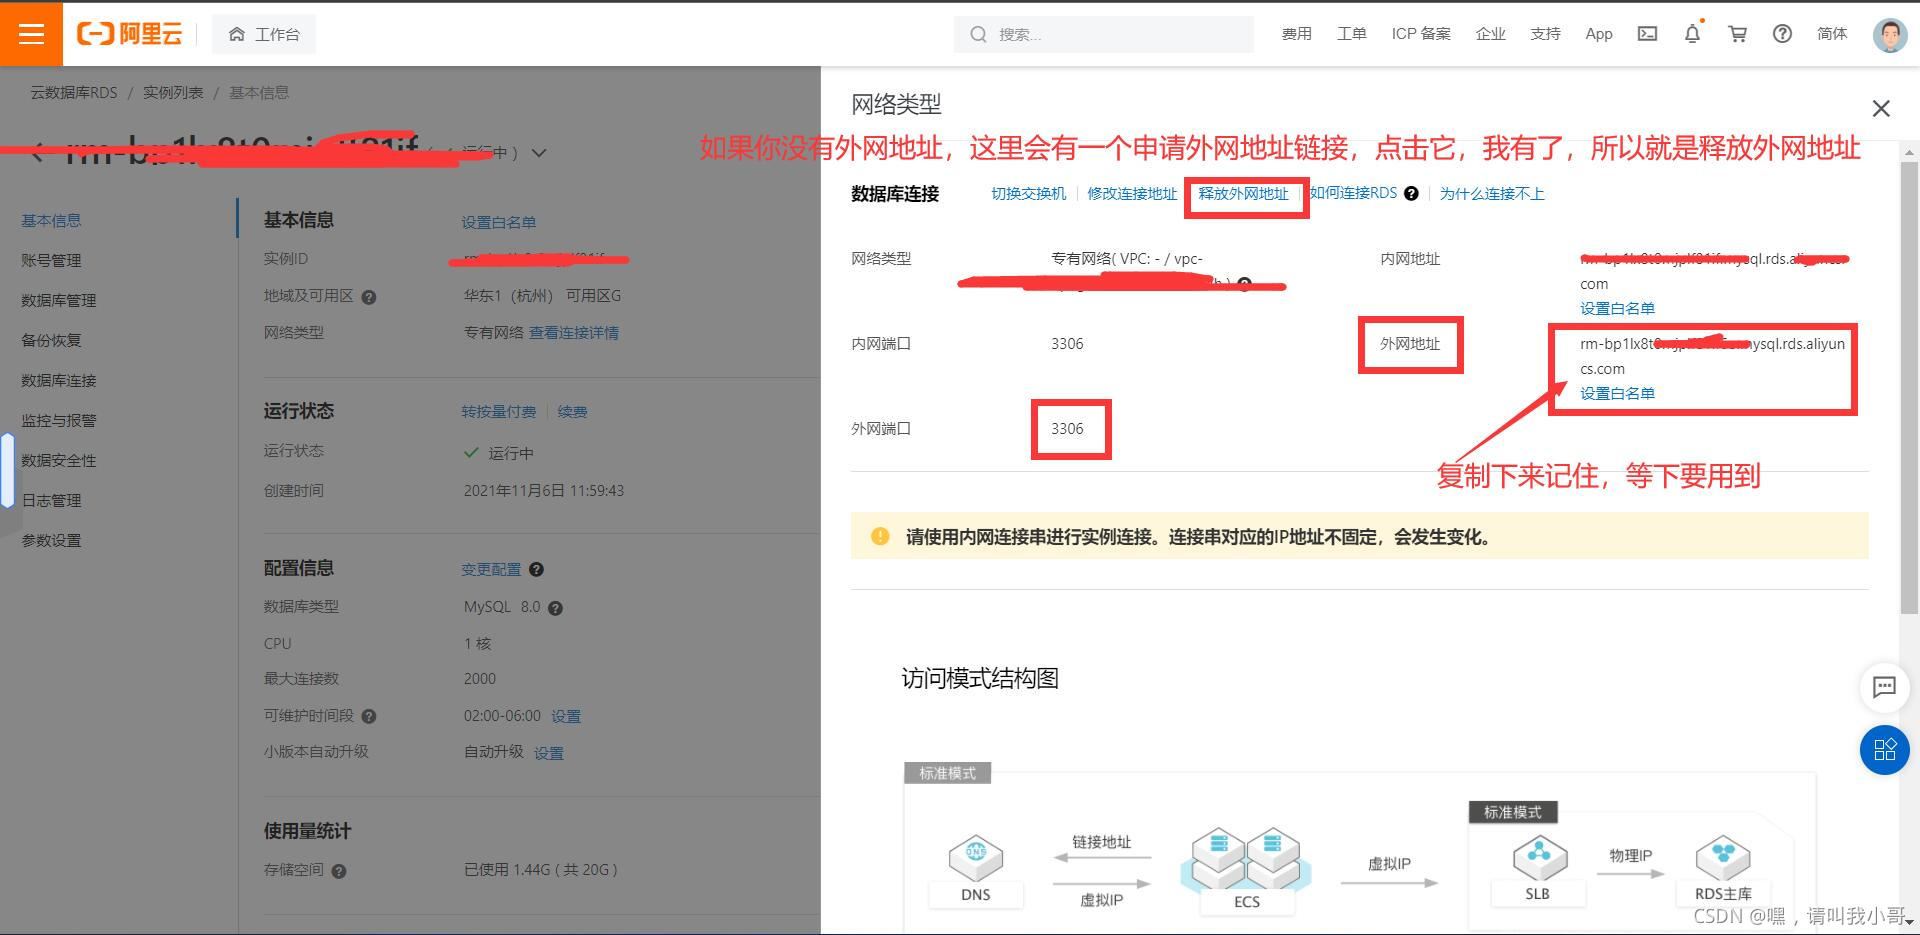
注意我写的注释,用户名,密码,外网地址,外网端口号,数据库名称,这些都要填写你自己的
import java.sql.Connection;
import java.sql.DriverManager;
public class MySQLConnections {
    private String driver = "";
    private String dbURL = "";
    private String user = "";
    private String password = "";
    private static MySQLConnections connection = null;
    private MySQLConnections() throws Exception {
        driver = "com.mysql.jdbc.Driver"; //这里根据你下载的依赖包版本会有不同的写法,下载低版本的就是这样写
        //rm-bp1lxt0mjpf6o.mysql.rds.aliyuncs.com:3306 这个是外网地址,3306是外网端口号,这些都需要填写你自己的
        //sqlconsole 这个是你登录你的数据库后新建的数据库(应该不绕口吧)
        dbURL = "jdbc:mysql://rm-bp1lxt0m.mysql.rds.aliyuncs.com:3306/sqlconsole";
        user = "user";  //你新建库时的用户名
        password = "123456"; //你新建库时的密码,这里我就不写我的真密码了
        System.out.println("dbURL:" + dbURL);
    }
    public static Connection getConnection() {
        Connection conn = null;
        if (connection == null) {
            try {
                connection = new MySQLConnections();
            } catch (Exception e) {
                e.printStackTrace();
                return null;
            }
        }
        try {
            Class.forName(connection.driver);
            conn = DriverManager.getConnection(connection.dbURL,
                    connection.user, connection.password);
        } catch (Exception e) {
            e.printStackTrace();
        }
        return conn;
    }
}
AndroidManifest.xml
注意这里要添加网络请求权限
<?xml version="1.0" encoding="utf-8"?>
<manifest xmlns:android="http://schemas.android.com/apk/res/android"
    package="com.example.mysqlconnections">
    <uses-permission android:name="android.permission.INTERNET" />
    <uses-permission android:name="android.permission.ACCESS_NETWORK_STATE" />
    <uses-permission android:name="android.permission.ACCESS_WIFI_STATE" />
    <application
        android:usesCleartextTraffic="true"
        android:allowBackup="true"
        android:icon="@mipmap/ic_launcher"
        android:label="@string/app_name"
        android:roundIcon="@mipmap/ic_launcher_round"
        android:supportsRtl="true"
        android:theme="@style/Theme.MyApplication1">
        <activity
            android:name=".MainActivity"
            android:exported="true">
            <intent-filter>
                <action android:name="android.intent.action.MAIN" />
                <category android:name="android.intent.category.LAUNCHER" />
            </intent-filter>
        </activity>
    </application>
</manifest>
最后看我运行结果
参考博客Android Studio 连接阿里云数据库【制作基于数据库的多人远程聊天APP】
到此这篇关于Android Studio和阿里云数据库实现一个远程聊天程序的文章就介绍到这了,更多相关Android Studio阿里云远程聊天内容请搜索软件开发网以前的文章或继续浏览下面的相关文章希望大家以后多多支持软件开发网!