Android仿微信雷达扫描效果的实现方法
本文主要给大家介绍的是关于Android实现微信雷达扫描效果的相关内容,分享出来供大家参考学习,下面来看看详细的介绍:
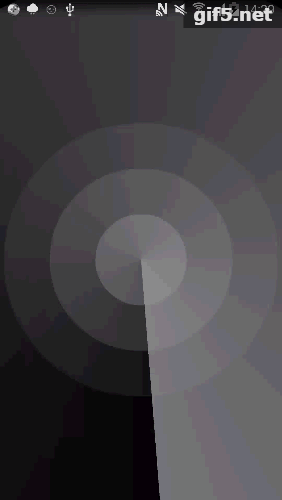
废话不多说 先上图(用AS录制的 转换工具不是很好 所以看得效果不是很好)
效果图
示例代码
Activity 代码
public class ShapeDrawableActivity extends AppCompatActivity {
 private ImageView ivLightbeam;
 private ObjectAnimator radarScanAnim; // 扫描动画
 private int width;
 private int height;
 @Override
 protected void onCreate(Bundle savedInstanceState) {
  super.onCreate(savedInstanceState);
  setContentView(R.layout.activity_shape_drawable);
  ivLightbeam = (ImageView) findViewById(R.id.ivLightbeam);
 }
 @Override
 protected void onResume() {
  super.onResume();
  startScan();
 }
 @Override
 public void onWindowFocusChanged(boolean hasFocus) {
  super.onWindowFocusChanged(hasFocus);
  if (height == 0 || width == 0) {   //获取屏幕长、宽
   width = ScreenUtils.getScreenWidth(this);
   height = ScreenUtils.getScreenHeight(this);   //根据屏幕长、宽计算扫描圆的直径
   int diameter = (int) Math.sqrt(Math.pow(height, 2) + Math.pow(width, 2));   //修改光束的大小,使光束可以扫描到整个屏幕
   FrameLayout.LayoutParams layoutParams = new FrameLayout.LayoutParams(diameter, diameter);
   ivLightbeam.setLayoutParams(layoutParams);   //将扫描光束的中心移至屏幕内容中心
   int offsetX = (width - diameter) / 2;
   int offsetY = (height - diameter) / 2 + ScreenUtils.getStatusHeight(this) / 2;
   ivLightbeam.setX(offsetX);
   ivLightbeam.setY(offsetY);
  }
 }
 @Override
 protected void onPause() {
  super.onPause();
  stopScan();
 } // 开始扫描
 private void startScan() {
  radarScanAnim = ObjectAnimator.ofFloat(ivLightbeam, "rotation", 0f, 360f);
  radarScanAnim.setDuration(2000); //2秒扫描一圈
  radarScanAnim.setInterpolator(new LinearInterpolator());
  radarScanAnim.setRepeatCount(ObjectAnimator.INFINITE);//循环扫描
  ivLightbeam.setVisibility(View.VISIBLE);
  radarScanAnim.start();
 } // 停止扫描
 private void stopScan() {
  ivLightbeam.setVisibility(View.GONE);
  radarScanAnim.end();
 }
}
Activity 布局文件
<FrameLayout xmlns:android="http://schemas.android.com/apk/res/android"
 xmlns:tools="http://schemas.android.com/tools"
 android:layout_width="match_parent"
 android:layout_height="match_parent"
 android:background="#FA000000"
 android:clipToPadding="false"
 android:fitsSystemWindows="true">
 <ImageView
  android:id="@+id/ivWave"
  android:layout_width="match_parent"
  android:layout_height="match_parent"
  android:layout_margin="5dp"
  android:src="@drawable/wave" />
 <ImageView
  android:id="@+id/ivLightbeam"
  android:layout_width="match_parent"
  android:layout_height="match_parent"
  android:src="@drawable/light_beam" />
</FrameLayout>
绘制扫描光束
<shape
 xmlns:android="http://schemas.android.com/apk/res/android"
 android:shape="oval">
 <size
  android:width="500dp"
  android:height="500dp" />
 <gradient
  android:endColor="#AAAAAAAA"
  android:startColor="#00000000"
  android:type="sweep"
  />
</shape>
绘制雷达波纹
<layer-list xmlns:android="http://schemas.android.com/apk/res/android">
 <item>
  <!--最外层圆圈-->
  <shape android:shape="oval">
   <solid android:color="#10FFFFFF" />
   <size
    android:width="600dp"
    android:height="600dp" />
   <stroke
    android:color="#10B8B8B8"
    android:dashWidth="1dp" />
  </shape>
 </item>
 <item
  android:bottom="100dp"
  android:left="100dp"
  android:right="100dp"
  android:top="100dp">
  <!--最中间层圆圈-->
  <shape android:shape="oval">
   <solid android:color="#1CFFFFFF" />
   <stroke
    android:color="#1CB8B8B8"
    android:dashWidth="1dp" />
  </shape>
 </item>
 <item
  android:bottom="200dp"
  android:left="200dp"
  android:right="200dp"
  android:top="200dp">
  <!--最中心圆圈-->
  <shape android:shape="oval">
   <solid android:color="#2CFFFFFF" />
   <stroke
    android:color="#2CB8B8B8"
    android:dashWidth="1dp" />
  </shape>
 </item>
</layer-list>
总结
以上就是这篇文章的全部内容了,希望本文的内容对大家的学习或者工作能带来一定的帮助,如果有疑问大家可以留言交流,谢谢大家对软件开发网的支持。
您可能感兴趣的文章:Android Shader应用开发之雷达扫描效果Android仿微信、QQ附近好友雷达扫描效果Android雷达扫描动态界面制作Android自定义ViewGroup实现绚丽的仿支付宝咻一咻雷达脉冲效果Android仿支付宝上芝麻信用分雷达图Android动画之雷达扫描效果Android仿微信雷达辐射搜索好友(逻辑清晰实现简单)Android编程简单实现雷达扫描效果基于Android自定义控件实现雷达效果
相关文章
Vala
2020-03-25
Veronica
2020-02-08
Serwa
2020-03-20
Hester
2023-07-22
Grace
2023-07-22
Vanna
2023-07-22
Peony
2023-07-22
Dorothy
2023-07-22
Dulcea
2023-07-22
Zandra
2023-07-22
Serafina
2023-07-24
Kathy
2023-08-08
Olivia
2023-08-08
Elina
2023-08-08
Jacinthe
2023-08-08
Viridis
2023-08-08
Hana
2023-08-08
Cybill
2023-08-08